Dinner · Part 2 of 3: Instructions
Creamy Slow Cooker Chicken Pot Pie Pasta Step-by-step instructions
- Prep
- Cook
- Total
- Serves
- 4
Before you start
Before you begin, gather all your ingredients and ensure your slow cooker is clean and ready for use. Have your measuring cups prepared, and if you are using frozen vegetables, there is no need to thaw them beforehand; they can go directly into the pot.
Make sure your chicken breasts are trimmed of any excess fat, as this will help keep the final sauce clean and smooth once the cooking process is complete.
Ingredients at a glance (5)
- 1 lb boneless skinless chicken breasts
- 2 cups frozen mixed vegetables
- 1 tbsp poultry seasoning
- 2 cups creamy potato soup
- 8 oz dried pasta
Instructions
Layering the ingredients
- Prepare the slow cooker basePlace the raw chicken breasts at the bottom of the slow cooker. Ensure the chicken is evenly distributed to allow for uniform cooking throughout the process.Look for Chicken is flat at the bottomTip Pat the chicken dry with a paper towel before placing it in the cooker to remove excess surface moisture.
- Add vegetables and seasoningScatter the frozen mixed vegetables over the chicken. Evenly sprinkle the poultry seasoning over the vegetables to ensure the flavors permeate the entire dish.Look for Vegetables are spread evenlyTip Use a mix of carrots, peas, and corn for the classic pot pie flavor profile.
At this stage, the ingredients should be neatly layered in the slow cooker. The chicken should be at the base, topped with the frozen vegetables and seasonings. This arrangement ensures that the chicken cooks thoroughly in the liquid while the vegetables steam gently on top, maintaining their color and structure before the cooking cycle begins.
Adding the creamy base
- Pour the soup mixturePour the creamy potato soup mixture over the vegetables and chicken. Ensure the soup covers the ingredients to create a moist environment for the chicken to cook thoroughly.Look for Soup covers the top layerTip Scrape the measuring cup well to ensure all the creamy soup is added to the slow cooker.
Once the soup is poured over the ingredients, the slow cooker will look full and well-coated. The soup should settle around the chicken and vegetables. Verify that the liquid covers the majority of the solids, as this moisture is essential for creating the creamy sauce that defines this dish. Ensure there is no air gap between the lid and the base.
Finishing and serving
- Cook and finishCover and cook on low for 4 hours. Once the chicken reaches 165°F (74°C), stir in the cooked pasta. Let the dish rest for at least 5 minutes before serving to allow the sauce to thicken.Look for Chicken is tender and sauce is thickSafe temperature 165°F (74°C) internal temperature (poultry)Tip Shred the chicken with two forks directly in the slow cooker before serving for a traditional pot pie texture.
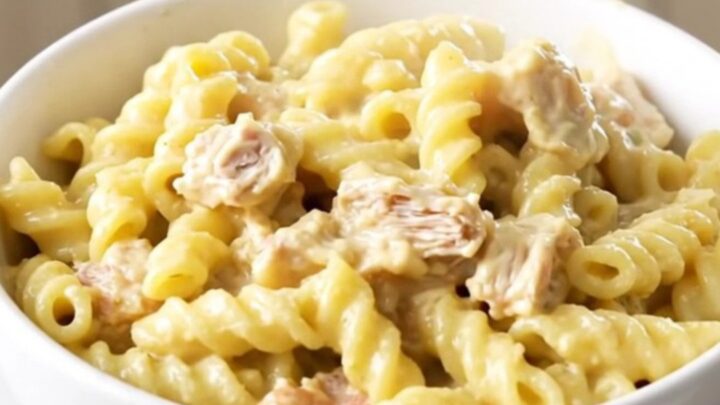
When the cooking is complete, the chicken should be cooked through and the pasta should be tender. The entire mixture should look uniform and smell savory and aromatic.
Before serving, give the mixture a thorough stir to combine the shredded chicken and the creamy sauce, ensuring every portion of pasta is evenly coated with the rich, thickened gravy.
Common mistakes
A common mistake is adding the pasta too early, which can cause it to become mushy and overcooked. Always add the pasta toward the end of the cooking process so it retains the right texture.
Another issue to avoid is opening the lid too frequently, as this causes the slow cooker to lose heat and extends the required cooking time significantly, which may result in unevenly cooked chicken or vegetables.
How to tell it’s done
The dish is perfectly done when the chicken is tender enough to shred easily with a fork and has reached an internal temperature of at least 165°F (74°C).
The sauce should be thick, creamy, and clinging to the pasta. If the sauce seems too thin after the cooking time, leave the lid off for the final 15 minutes of cooking to allow some of the moisture to evaporate.
- Poultry: 165°F (74°C) in the thickest part
Up next · Part 3 of 3
2 variations · storage & make-ahead · 3 answers · printable card
Tips, FAQ & printable recipe (Part 3)← Back to the ingredients (Part 1)