Dinner · Part 2 of 3: Instructions
Creamy Slow Cooker Chicken Florentine Step-by-step instructions
- Prep
- Cook
- Total
- Serves
- 4
Before you start
Before beginning, ensure all ingredients are at room temperature to promote even cooking. Thoroughly wash the fresh baby spinach to remove any grit or debris, and pat it dry with paper towels. Measure the parmesan cream sauce precisely and have your slow cooker ready on a clean, stable counter surface.
Having everything prepped in advance allows for a smooth assembly process, ensuring the chicken and spinach are layered correctly for the best possible results during the long, slow braising period.
Ingredients at a glance (3)
- 4 pieces boneless skinless chicken breasts
- 5 oz fresh baby spinach
- 2 cups parmesan cream sauce
Instructions
Layering the ingredients
- Prepare the slow cooker basePlace the fresh baby spinach at the bottom of the slow cooker stoneware. Arrange the chicken breasts in a single layer directly on top of the spinach bed, ensuring they are evenly distributed to allow for uniform cooking throughout the process.Look for The spinach should form a flat base for the chicken.Tip Ensure the chicken breasts are of similar thickness for even cooking.
The spinach should be spread evenly to create a bed for the chicken. The chicken breasts should be placed in a single, even layer to ensure they cook through at the same rate.
This phase is essential for building the foundation of the dish, ensuring that the moisture from the spinach and the heat from the cooker work together properly.
Slow cooking the chicken
- Add the sauce and cookPour the parmesan cream sauce over the chicken and spinach. Cover the slow cooker with its lid and cook on the low setting for approximately 4 hours, or until the chicken is tender and fully cooked through.Look for The sauce should be bubbling gently around the edges.Safe temperature 165°F (74°C) internal temperature (poultry)Tip Avoid lifting the lid too often to maintain the internal temperature.
The sauce should be bubbling gently and the chicken should be fully immersed in the cream mixture. The aroma in the kitchen should be savory and rich, indicating that the flavors are blending correctly. Check that the lid is tightly sealed to maintain the necessary humidity and temperature for the cooking process to be successful.
Resting and final presentation
- Rest and serveOnce the chicken reaches an internal temperature of 165°F (74°C), turn off the heat. Allow the chicken to rest in the sauce for 5 minutes before serving to ensure the juices redistribute properly throughout the meat, keeping it moist and tender.Look for The sauce should be thick and clinging to the chicken.Safe temperature 165°F (74°C) internal temperature (poultry)Tip Use a digital thermometer to check the thickest part of the breast.
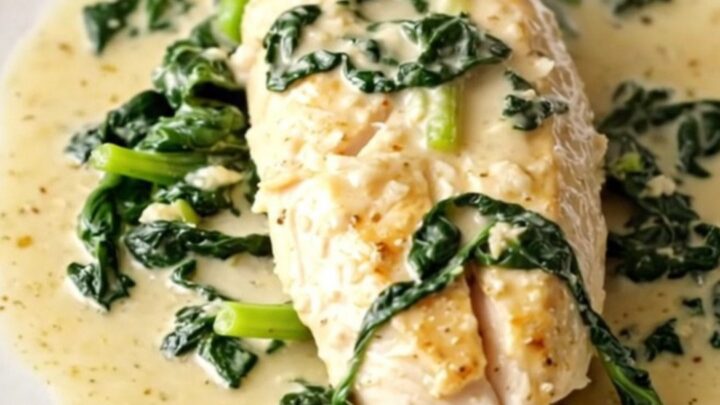
The chicken should be tender and the sauce should have a glossy, thick consistency. Resting the meat is crucial; the chicken should be firm yet yielding to the touch. The final dish should look cohesive, with the spinach beautifully incorporated into the creamy sauce, ready for immediate service on a warm plate.
Common mistakes
A common mistake is overcrowding the slow cooker, which can prevent the chicken from cooking evenly and lead to excess liquid accumulation. Ensure the chicken breasts are arranged in a single layer.
Another error is overcooking the chicken, which can result in a rubbery texture; always use a thermometer to check for doneness rather than relying solely on the clock, as cooking times can vary depending on the specific appliance used.
How to tell it’s done
The chicken is perfectly done when it reaches an internal temperature of 165°F (74°C) at its thickest point. The meat should be opaque throughout and pull apart easily with a fork.
The sauce will appear thick and creamy, clinging to the surface of the chicken, with the spinach wilted into the mixture. Always verify the temperature with a meat thermometer to ensure food safety before serving the dish to guests or family members.
- Poultry: 165°F (74°C) in the thickest part
Up next · Part 3 of 3
2 variations · storage & make-ahead · 3 answers · printable card
Tips, FAQ & printable recipe (Part 3)← Back to the ingredients (Part 1)