Appetizers · Part 2 of 3: Instructions
Creamy Slow Cooker Buffalo Chicken Dip Step-by-step instructions
- Prep
- Cook
- Total
- Serves
- 8
Before you start
Before starting, ensure the slow cooker bowl is clean and dry. Remove the chicken from the refrigerator about 20 minutes before beginning to take the chill off. Have all ingredients measured and ready to go.
If the cream cheese is very cold, set it on the counter for 15 minutes to make it easier to cut into uniform cubes, which helps it melt evenly into the sauce as the chicken cooks.
Ingredients at a glance (4)
- 2 lbs boneless skinless chicken breasts
- 16 oz cream cheese, cubed
- 1 packet ranch seasoning mix
- 1/2 cup cayenne pepper hot sauce
Instructions
Layering the ingredients
- Assemble the slow cookerPlace the raw chicken breasts into the bottom of the slow cooker. Distribute the cubed cream cheese evenly over the top of the chicken to ensure even melting during the cooking process.Look for Ingredients are layered in the slow cooker bowl.Tip Ensure the cream cheese is cut into uniform cubes to help it melt smoothly.
At this stage, the slow cooker should be neatly packed with the chicken at the base and the cream cheese cubes distributed evenly across the surface. Ensure the power cord is clear of the countertop edge.
Everything is now ready for the seasoning and the long, gentle cooking process that will transform these raw components into a cohesive, flavorful dip.
Slow cooking the chicken
- Season and cookSprinkle the entire packet of ranch seasoning over the cream cheese and chicken. Pour the hot sauce over the mixture. Cover the slow cooker and cook on high for 3 hours or until the chicken reaches an internal temperature of 165°F (74°C).Look for The chicken is tender and easily flakes with a fork.Safe temperature 165°F (74°C) internal temperature (poultry)Tip Avoid lifting the lid too often to maintain a consistent temperature inside the cooker.
During the cooking phase, the slow cooker will slowly release moisture from the chicken while the cream cheese melts into the hot sauce. The aroma of spices will begin to fill the kitchen. Check that the lid is tightly sealed to maintain the necessary heat. The chicken is finished when it reaches 165°F (74°C) and is fully opaque and tender.
Shredding and finishing
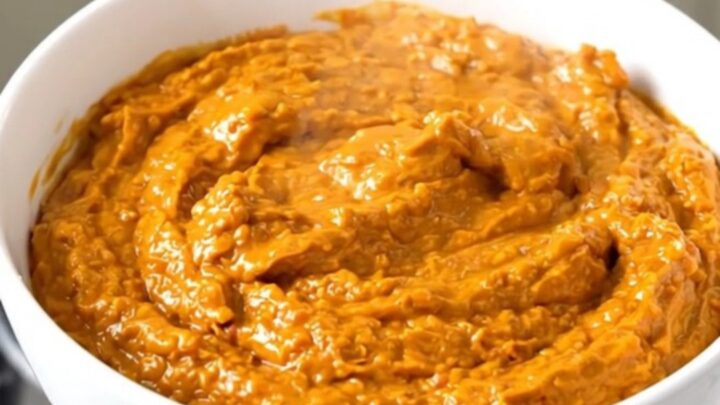
- Shred and serveOnce the chicken is fully cooked, use two forks to shred the chicken directly in the slow cooker. Stir the mixture vigorously until the cream cheese, hot sauce, and shredded chicken are fully combined into a smooth, creamy dip. Serve warm.Look for The dip is thick, glossy, and uniform in texture.Tip Stir well to incorporate all the seasoning and sauce into the chicken strands.
Once the cooking cycle ends, the mixture should look glossy and the chicken should be easily pullable. After shredding and stirring, the dip should have a uniform, thick consistency with no large lumps of cream cheese remaining. The final dip should be warm, fragrant, and ready to be transferred to a serving bowl or kept warm in the slow cooker.
Common mistakes
A common mistake is using chicken that is too lean or overcooking it, which can result in a stringy texture. Always use fresh chicken breasts for the best results. Another error is not stirring the dip enough after shredding; thorough mixing is essential to create that signature creamy consistency.
Finally, ensure the slow cooker is not overcrowded, as this can lead to uneven cooking and cold spots that may prevent the cheese from melting properly into the sauce.
How to tell it’s done
The dish is done when the chicken is fully cooked and reaches an internal temperature of 165°F (74°C). The meat should be tender enough to shred effortlessly with two forks.
The sauce should be smooth, glossy, and fully incorporated with the shredded chicken. If the dip is still chunky or the chicken feels firm, continue cooking for an additional 20 minutes, then re-check the temperature and texture.
- Poultry: 165°F (74°C) in the thickest part
Up next · Part 3 of 3
2 variations · storage & make-ahead · 3 answers · printable card
Tips, FAQ & printable recipe (Part 3)← Back to the ingredients (Part 1)