Dinner · Part 2 of 3: Instructions
Creamy Shrimp Fettuccine Alfredo: A Quick Restaurant-Style Meal Step-by-step instructions
- Prep
- Cook
- Total
- Serves
- 4
Before you start
Before starting, ensure all ingredients are measured and ready. Peel and devein the shrimp, then pat them dry with paper towels to ensure a good sear. Mince the garlic finely so it distributes evenly through the sauce.
Grate the parmesan cheese using the finest setting on your grater to encourage fast melting. Have your pasta pot ready with water and plenty of salt. Clear your workspace to allow for fluid movement between the stove and the prep area.
Ingredients at a glance (7)
- 1 lb shrimp, peeled and deveined
- 12 oz fettuccine pasta
- 4 tbsp butter
- 3 cloves garlic, minced
- 1 1/2 cups alfredo sauce, store-bought or made ahead
- 1 cup parmesan cheese, freshly grated
- black pepper to taste
Instructions
Searing the Shrimp
- Prepare Pasta and ShrimpBoil a large pot of salted water and cook the fettuccine according to package instructions until al dente. While the pasta cooks, melt two tablespoons of butter in a large skillet over medium-high heat. Add the shrimp and sear until opaque and cooked through, reaching an internal temperature of 145°F (63°C). Remove the shrimp from the skillet and set aside.Look for shrimp turn pink and opaqueSafe temperature 145°F (63°C) internal temperature (shellfish)Tip Do not overcook the shrimp or they will become rubbery.
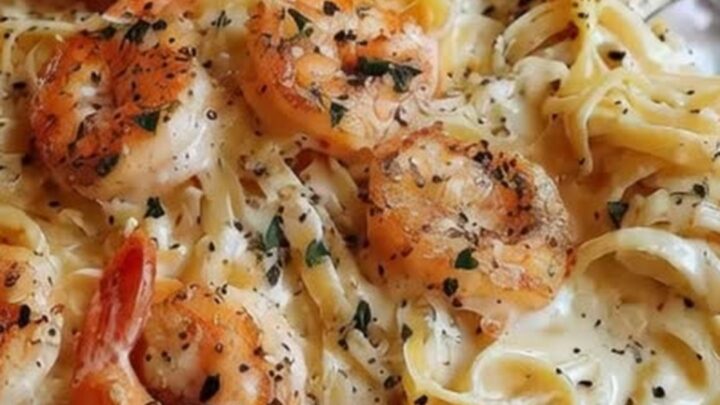
The shrimp should be vibrant pink and golden-brown on the edges. They should feel firm to the touch.
Ensure they are removed from the pan immediately after reaching 145°F (63°C) to prevent them from becoming chewy. The pan should have some browned bits left in the bottom, which will add flavor to the sauce.
Developing the Sauce
- Create the Alfredo SauceIn the same skillet, melt the remaining butter. Add the minced garlic and sauté until fragrant, about one minute. Pour in the alfredo sauce and bring to a gentle simmer. Reduce the heat and stir in the freshly grated parmesan cheese until the sauce is smooth and thickened.Look for sauce coats the back of a spoonTip Use freshly grated parmesan for the best melting properties.
The sauce should be gently bubbling and the parmesan should be completely melted. The sauce should appear pale, smooth, and thick. If it seems too thin, continue to simmer for another minute, but be careful not to let it reduce too much, as it will thicken further once the pasta is added.
Tossing the Pasta
- Combine and ServeAdd the cooked pasta and the seared shrimp back into the skillet with the sauce. Toss everything together until the pasta is well coated. Season generously with freshly cracked black pepper and serve immediately in warm bowls.Look for pasta is evenly coated with creamy sauceTip Add a splash of pasta water if the sauce becomes too thick.
The final dish should be glossy and fragrant, with the shrimp evenly distributed throughout the pasta. Every strand of fettuccine should be thoroughly coated in the creamy sauce.
The aroma of garlic and melted cheese should be prominent. If the dish seems dry, stir in a tablespoon of pasta water to loosen the sauce.
Common mistakes
Avoid using too much heat when making the sauce, as high heat can cause the sauce to boil over or the cheese to clump. Never add pre-grated cheese, as the additives will ruin the texture.
Do not crowd the skillet when searing the shrimp, as this will cause them to steam rather than sear. Finally, avoid rinsing your pasta, as the starch on the surface is essential for helping the sauce stick to the noodles.
How to tell it’s done
The shrimp are done when they are opaque, firm, and reach an internal temperature of 145°F (63°C). The sauce is ready when it is thick enough to coat the back of a spoon and has a smooth, glossy appearance. The pasta should be al dente, meaning it is tender but still offers a slight resistance when bitten.
- Shellfish: 145°F (63°C) in the thickest part
Up next · Part 3 of 3
2 variations · storage & make-ahead · 3 answers · printable card
Tips, FAQ & printable recipe (Part 3)← Back to the ingredients (Part 1)