Dinner · Part 2 of 3: Instructions
Creamy Queso Chicken Enchiladas with Bubbling Cheese Step-by-step instructions
- Prep
- Cook
- Total
- Serves
- 4
Before you start
Before you begin assembling your enchiladas, make sure your cooked shredded chicken is warmed slightly so it rolls easily and heats through evenly.
Warm your queso dip gently on the stovetop or in the microwave until it is smooth and pourable. Measure out your shredded Monterey Jack cheese, dice your fresh tomatoes, and chop the herbs so everything is ready for quick assembly.
Ingredients at a glance (6)
- 3 cups cooked shredded chicken (store-bought or made ahead)
- 8 flour tortillas
- 2 cups warm queso dip (store-bought or made ahead)
- 1 cup shredded Monterey Jack cheese
- 1/2 cup diced tomatoes
- 1/4 cup chopped fresh herbs
Instructions
Assembly Phase
- Assemble the EnchiladasFill each of the flour tortillas evenly with the cooked shredded chicken, rolling them tightly. Place them seam-side down in a 9x13-inch baking dish to keep them secure.Look for The tortillas should fit snugly in a single layer.Tip Warm the tortillas slightly beforehand to make them easier to roll.
At the end of this first phase, all eight tortillas should be tightly rolled around the shredded chicken and arranged snugly in a single layer inside your baking dish.
The tortillas must be placed seam-side down to prevent them from unrolling or opening up when the warm queso and cheese are added.
Saucing and Topping Phase
- Add the Sauces and ToppingsLadle the warm queso dip evenly over the rolled tortillas in the baking dish, ensuring they are completely covered to prevent drying out.Look for The tortillas should be fully blanketed in sauce.Tip Ensure the queso is warm so it spreads easily and evenly.
- Top with Shredded CheeseDistribute the shredded Monterey Jack cheese evenly over the top of the queso-covered tortillas, creating a uniform layer for melting.Look for The cheese should cover the entire surface.Tip Freshly shredded cheese melts much better than pre-packaged varieties.
By the end of this phase, the rolled tortillas should be completely blanketed in a smooth, velvety layer of warm queso dip, with a generous, even coating of shredded Monterey Jack cheese on top. No dry tortilla edges should be exposed, ensuring a perfectly moist bake.
Broiling and Garnishing Phase
- Broil Until BubblingPlace the baking dish under the broiler for 3 to 5 minutes until the cheese is melted, bubbling, and beautifully browned in spots. Watch closely to prevent burning.Look for Look for a bubbling surface with golden-brown patches.Tip Keep the oven door slightly cracked to monitor the browning process.
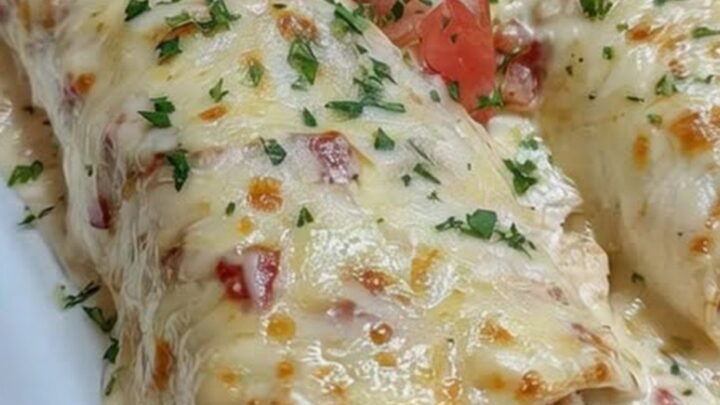
- Garnish and ServeRemove the dish safely from the oven, then scatter the diced tomatoes and chopped fresh herbs over the top before serving hot.Look for The fresh garnishes should contrast beautifully with the melted cheese.Tip Serve immediately while the cheese pull is at its absolute peak.
At the final checkpoint, the cheese on top should be completely melted, vigorously bubbling, and dotted with beautiful golden-brown spots. The dish will release a rich, savory aroma of toasted cheese and warm spices, finished with a bright contrast of fresh red tomatoes and green herbs.
Common mistakes
One common mistake is using cold queso, which increases the required broiling time and can dry out the flour tortillas before the cheese melts. Another frequent error is exposing the baking dish to direct broiler heat if it is not broiler-safe, which can cause cracking.
Always ensure your oven rack is positioned about six inches below the broiler element to prevent the cheese from burning before it heats through.
How to tell it’s done
Since the chicken is already fully cooked, doneness is determined entirely by the state of the cheese and the overall temperature of the dish.
The enchiladas are ready when the queso is hot and bubbling at the edges, and the Monterey Jack cheese is completely melted with golden-brown patches. Serve immediately while the cheese is hot and stretchy.
Up next · Part 3 of 3
2 variations · storage & make-ahead · 3 answers · printable card
Tips, FAQ & printable recipe (Part 3)← Back to the ingredients (Part 1)