Desserts · Part 1 of 3: Ingredients
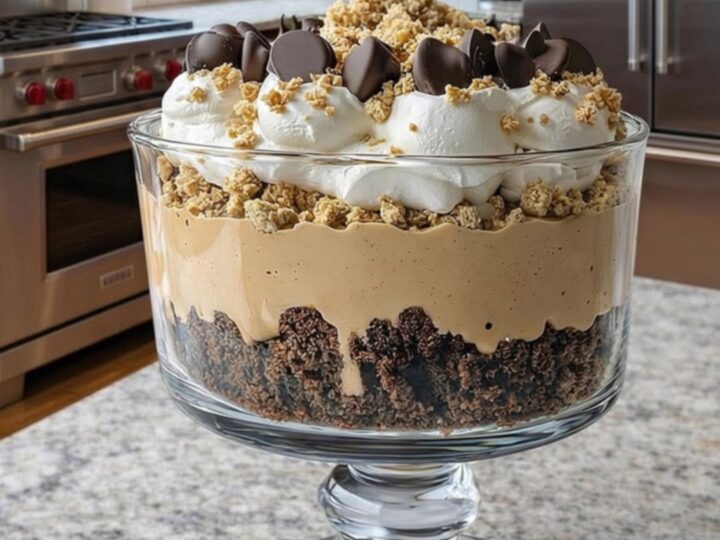
Decadent Creamy Peanut Butter and Fudgy Brownie Trifle
- Prep
- Cook
- Total
- Serves
- 8
Elevate your dessert game with this luxurious peanut butter and brownie trifle. It combines the deep, fudgy intensity of classic brownies with the light, airy sweetness of peanut butter mousse and whipped cream.
This visually stunning dessert is surprisingly simple to assemble, making it an ideal choice for dinner parties, holiday gatherings, or any occasion that calls for a touch of decadence. Each layer offers a distinct texture and flavor profile that comes together in one magnificent, spoonable masterpiece.
The magic of this trifle lies in the contrast between the dense, chocolatey brownie bites and the velvety peanut butter mousse. By stacking these components in a clear glass pedestal dish, the beautiful layers remain visible, creating an impressive presentation that looks like it came from a professional bakery.
Whether you are hosting a crowd or simply craving something extraordinary, this recipe delivers consistent results with minimal effort. It is a timeless dessert that appeals to chocolate and peanut butter lovers alike, providing a balanced, indulgent experience in every single bite.
Ingredients
Layers
- 1 lb fudgy brownies, store-bought or made ahead, cut into bite-sized chunks
- 2 cups peanut butter mousse, prepared
- 2 cups whipped cream, freshly whipped or store-bought
Topping
- 1 cup peanut butter cups, crumbled
Why this recipe works
The success of this trifle is rooted in the strategic layering of textures. By placing the heavier brownie chunks at the base and alternating with lighter mousse and whipped cream, the dish maintains its structure without sinking or becoming overly dense.
The brownie acts as a sturdy foundation that absorbs just enough moisture from the mousse to become tender without losing its characteristic fudgy bite.
The method relies on the temperature contrast of the ingredients. When the mousse and cream are chilled, they provide a refreshing mouthfeel that offsets the richness of the chocolate.
The use of a clear glass vessel is essential for the visual appeal, as it showcases the distinct lines between the dark brownies, golden mousse, and white whipped cream, which is a hallmark of a classic, well-constructed trifle.
Notes and substitutions
For the best results, use a high-quality, fudgy brownie recipe or a premium store-bought variety that holds its shape when cut. Avoid brownies that are too cakey or dry, as they will not provide the necessary density for the trifle structure. Ensure the peanut butter mousse is prepared in advance and chilled thoroughly, as a firm mousse is much easier to spread evenly over the brownie layers.
Regarding equipment, a tall, straight-sided trifle dish is ideal for showing off the layers, but any deep glass bowl will work in a pinch. If the mousse is too thick to spread, let it sit at room temperature for five minutes, but do not allow it to liquefy. You can easily substitute the toppings; chopped pretzels or toasted peanuts work beautifully if peanut butter cups are unavailable.
- peanut butter mousse: a blend of softened cream cheese, peanut butter, and powdered sugar
- peanut butter cups: chopped roasted peanuts or crushed chocolate sandwich cookies
Equipment
- large trifle dish
- serrated knife
- spatula
- mixing bowl