Desserts · Part 2 of 3: Instructions
Creamy Peanut Butter Fudge for Easy Entertaining Step-by-step instructions
- Prep
- Cook
- Total
- Serves
- 16
Before you start
Before beginning, prepare your workspace to ensure a smooth workflow. Line an 8x8 inch square baking dish with parchment paper, leaving an overhang on two sides to make lifting the finished fudge effortless.
Measure all ingredients accurately and have your silicone spatula ready, as the fudge thickens quickly once removed from the heat, leaving little time for last-minute adjustments.
Ingredients at a glance (3)
- 2 cups granulated sugar
- 1 cup creamy peanut butter
- 1/2 cup unsalted butter
Instructions
Creating the base
- Prepare the basePlace the granulated sugar and unsalted butter into a heavy-bottomed saucepan over medium heat. Stir constantly using a silicone spatula until the sugar dissolves and the mixture begins to bubble gently. Ensure the heat is consistent to prevent the sugars from scorching on the bottom of the pan.Look for The mixture should be smooth and bubbling consistently.Tip Using a heavy-bottomed pan helps distribute heat evenly and reduces the risk of burning.
The mixture should be bubbling gently and show no visible sugar crystals. It should smell fragrant and look light amber. Ensure the heat is not too high to prevent the bottom from darkening prematurely, as this will affect the overall flavor and color of your final fudge.
Emulsifying the peanut butter
- Incorporate peanut butterOnce the base is hot and well combined, remove the saucepan from the heat source. Immediately stir in the creamy peanut butter. Continue mixing vigorously until the peanut butter is fully melted and incorporated into the sugar base, creating a glossy, uniform, caramel-colored mixture.Look for The mixture will appear glossy and uniform in color.Tip Work quickly once you add the peanut butter, as the fudge will begin to thicken as it cools.
The mixture must be completely smooth and glossy. Look for a uniform caramel color throughout the pan. When you lift the spatula, the mixture should fall in a thick, cohesive ribbon.
If it appears separated or oily, continue to stir until the ingredients are fully integrated and smooth.
Setting and cooling
- Set and slicePour the prepared fudge mixture into an 8x8 inch square baking dish lined with parchment paper. Spread it evenly to the corners and smooth the top with your spatula. Allow the fudge to cool at room temperature, then transfer to the refrigerator for at least two hours until firm. Once set, lift from the dish and slice into squares.Look for The fudge should be firm to the touch and hold its shape when sliced.Tip For clean edges, dip the knife in hot water and wipe it dry before each slice.
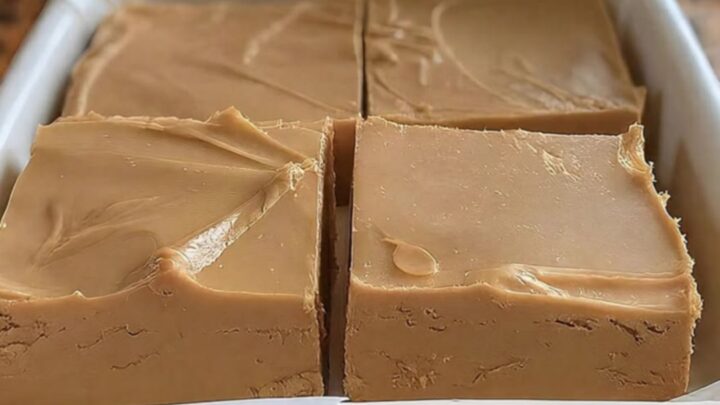
The fudge should be level in the pan with a smooth surface. During the cooling process, it will lose its glossy shine and develop a firm, matte finish. Once it is cool to the touch and firm, it is ready to be lifted from the pan and sliced into even squares for serving.
Common mistakes
A common error is overheating the sugar base, which can lead to a grainy texture. Watch the pan closely and remove it from the heat as soon as the sugar is fully dissolved.
Another mistake is failing to incorporate the peanut butter thoroughly; if streaks of fat remain, the fudge may not set properly or could have a greasy mouthfeel. Stir until the mixture is perfectly uniform.
How to tell it’s done
The fudge is done when it has cooled completely and feels firm to the touch. It should not be sticky or soft in the center when pressed lightly.
The finished product will have a matte, opaque appearance once fully set. If the fudge remains soft after two hours in the refrigerator, it may require additional time to reach the desired density and sliceability.
Up next · Part 3 of 3
2 variations · storage & make-ahead · 3 answers · printable card
Tips, FAQ & printable recipe (Part 3)← Back to the ingredients (Part 1)