Dinner · Part 2 of 3: Instructions
Creamy One-Pot Smoked Sausage Pasta Step-by-step instructions
- Prep
- Cook
- Total
- Serves
- 4
Before you start
Before starting, ensure that all ingredients are measured and ready within reach. Slice the smoked sausage into uniform rounds to ensure even cooking. If you are using a block of cheese, grate it now so it is ready to be added immediately when the sauce phase begins.
Have your large skillet cleaned and positioned on the stove, and clear a workspace to allow for fluid movement between the cutting board and the heating element. This preparation ensures that the process remains smooth and efficient from start to finish.
Ingredients at a glance (3)
- 1 lb smoked sausage, sliced into rounds
- 1 lb farfalle pasta
- 2 cups shredded cheese
Instructions
Searing the Foundation
- Sear the SausagePlace the sliced smoked sausage into a large skillet over medium-high heat. Cook the sausage until browned and seared on both sides, ensuring it reaches an internal temperature of 160°F (71°C).Look for Sausage slices are browned and fragrant.Safe temperature 160°F (71°C) internal temperature (ground meat)Tip Do not crowd the skillet to ensure even browning.
The sausage should be deeply browned and fragrant, with a good amount of rendered fat in the pan. This fat is crucial for the flavor of the dish, so be sure not to drain it away before adding the pasta. The slices should feel firm to the touch and appear well-seared on both sides, indicating they have developed the necessary savory crust that defines this meal.
Simmering the Pasta
- Cook the PastaAdd the farfalle pasta to the skillet and cover with enough water to submerge the noodles. Bring to a boil and cook until the pasta is al dente, stirring occasionally to prevent sticking.Look for Pasta is tender but firm to the bite.Tip Drain excess water if there is too much left after cooking.
The pasta should be cooked until it is al dente, meaning it retains a slight chew in the center. The water should have reduced significantly, leaving only a small amount of starchy liquid behind, which will help bind the sauce. Ensure the pasta is evenly cooked by stirring occasionally, and check that it is tender throughout before moving on to the final incorporation of the creamy elements.
Finishing with Cheese
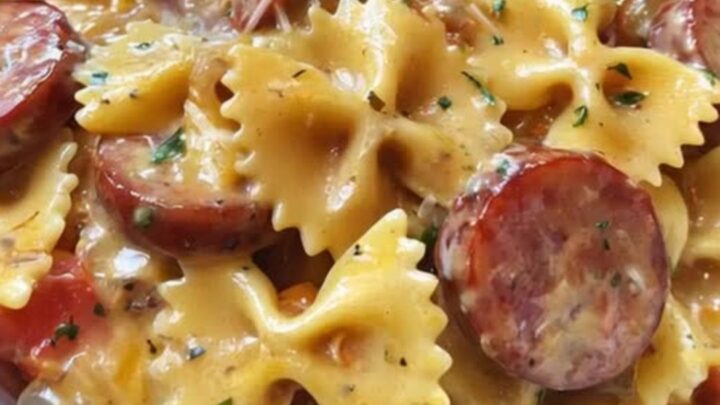
- Create the Creamy SauceLower the heat and stir in the shredded cheese. Continue to stir until the cheese is melted and the sauce becomes glossy and coats the pasta thoroughly.Look for Sauce is thick, glossy, and cheese is fully melted.Tip Keep the heat low so the cheese does not break.
At this point, the sauce should transform into a thick, glossy coating that clings beautifully to the pasta. The cheese should be completely melted with no visible clumps, and the mixture should be cohesive and velvety.
The aroma should be rich and savory, and the pasta should be thoroughly coated, with no excess liquid remaining in the pan. It is now ready to be plated and served immediately.
Common mistakes
A common mistake is overcrowding the skillet during the initial searing of the sausage, which causes it to steam rather than brown. Ensure there is enough space in the pan for each slice to make contact with the surface.
Another error is adding the cheese while the heat is too high, which can cause the sauce to split or become oily. Always lower the heat to a simmer before introducing the dairy components to maintain a stable, smooth emulsion.
How to tell it’s done
The dish is considered done when the pasta is al dente and the sauce has reached a thick, glossy consistency. The smoked sausage should be fully heated through and seared, reaching an internal temperature of at least 160°F (71°C) to ensure safety.
The sauce should be smooth and creamy, coating the pasta without pooling at the bottom of the pan. Test a piece of pasta to ensure it is tender throughout, and verify the heat of the sausage with a food thermometer.
- Ground meat: 160°F (71°C) in the thickest part
Up next · Part 3 of 3
2 variations · storage & make-ahead · 3 answers · printable card
Tips, FAQ & printable recipe (Part 3)← Back to the ingredients (Part 1)