Dinner · Part 2 of 3: Instructions
Creamy One-Pot Broccoli Cheddar Pasta Step-by-step instructions
- Prep
- Cook
- Total
- Serves
- 4
Before you start
Before starting, ensure all your ingredients are measured and ready to go. Shred the cheddar cheese from a block to ensure optimal melting. Have your large skillet cleaned and positioned near the stove.
Prepare a colander for draining the pasta, and keep a heat-resistant serving spoon or a pair of tongs handy to mix the sauce thoroughly once the cheese is added to the hot pasta.
Ingredients at a glance (4)
- 1 lb rigatoni pasta
- 2 cups broccoli florets
- 2 cups shredded cheddar cheese
- 1/2 tsp black pepper
Instructions
Boiling the pasta and broccoli
- Prepare the pasta and broccoliBring a large pot of salted water to a boil. Add the rigatoni and cook according to package directions until al dente. In the final three minutes of cooking, add the broccoli florets to the boiling water with the pasta so they become tender.Look for The pasta should be firm to the bite and the broccoli should be bright green and tender.Tip Save a small amount of the starchy pasta water before draining to help adjust the sauce consistency later.
The rigatoni should be cooked to an al dente state, while the broccoli florets should be tender yet still hold their shape. Ensure the water is well-salted to provide a base layer of flavor for the entire dish. Drain the contents thoroughly, but feel free to reserve a small amount of the cooking water if the pasta seems too dry before adding the cheese.
Emulsifying the cheese sauce
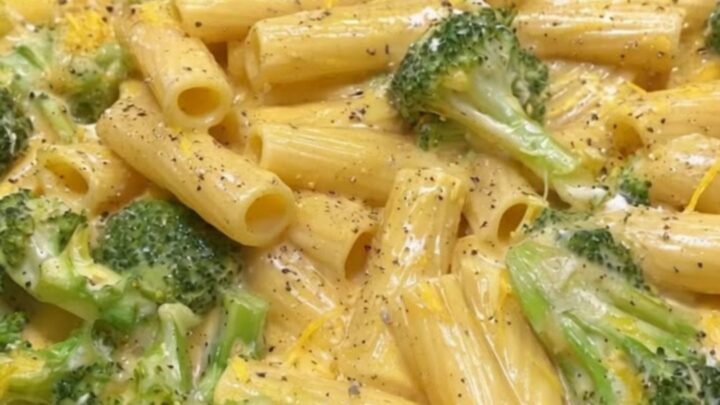
- Create the cheese sauceDrain the pasta and broccoli, returning them to the hot skillet over low heat. Gradually fold in the shredded cheddar cheese, stirring constantly until the cheese melts completely and creates a smooth, thick sauce that coats the pasta evenly.Look for The sauce will look glossy and thick, clinging to every piece of rigatoni.Tip Keep the heat very low to prevent the cheese from separating or becoming grainy.
The cheese must melt smoothly into the pasta, creating a thick, creamy consistency. If the sauce seems too thick or stiff, add a tablespoon of the reserved pasta water at a time until the desired creaminess is achieved. The mixture should smell rich and savory, with the cheese fully coating every surface of the rigatoni and the broccoli florets.
Seasoning and final plating
- Season and serveSprinkle the black pepper over the pasta mixture and toss once more to incorporate the seasoning throughout the dish. Serve immediately while the cheese sauce is warm and creamy, portioning it directly onto plates for serving.Look for The pepper should be evenly distributed throughout the cheesy sauce.Tip Serve with an extra sprinkle of black pepper if desired for a sharper flavor profile.
The black pepper should be evenly distributed, providing a subtle heat that cuts through the richness of the cheddar cheese. The finished dish should be served immediately while the sauce is at its peak temperature and consistency.
Verify that all components are well-combined and that the seasoning is balanced before transferring the pasta to individual plates for serving.
Common mistakes
A common mistake is using heat that is too high when melting the cheese, which can cause the milk solids to separate, leading to a grainy or oily sauce. Always use the lowest heat setting when incorporating the cheese.
Another error is overcooking the broccoli; if added too early, it will lose its texture and color. Timing the addition of the broccoli to the final minutes of the pasta boiling is essential.
How to tell it’s done
The pasta is done when it reaches an al dente texture, meaning it is cooked through but still provides a slight resistance when bitten. The broccoli should be vibrant green and tender enough to pierce easily with a fork.
The cheese sauce must be completely melted, glossy, and thick, clinging to the pasta without any signs of separation or oiliness in the skillet.
Up next · Part 3 of 3
2 variations · storage & make-ahead · 3 answers · printable card
Tips, FAQ & printable recipe (Part 3)← Back to the ingredients (Part 1)