Desserts · Part 2 of 3: Instructions
Creamy No-Bake Pineapple Cheesecake for Tropical Bliss Step-by-step instructions
- Prep
- Cook
- Total
- Serves
- 8
Before you start
Before beginning, ensure all ingredients are at the appropriate temperatures. The cream cheese must be softened at room temperature to allow for a lump-free, smooth blending process.
Check that the pineapple is fresh and cut into small, uniform bite-sized pieces to ensure consistent texture in every slice.
Prepare the springform pan by ensuring it is clean and dry. Having all ingredients measured and ready before starting will streamline the assembly process, allowing for a smooth transition between phases.
Ingredients at a glance (5)
- 1 1/2 cups graham cracker crumbs
- 6 tbsp unsalted butter
- 16 oz cream cheese
- 1 cup fresh pineapple chunks
- 2 cups heavy whipped cream
Instructions
Crust foundation
- Prepare the crustCombine the graham cracker crumbs with the butter in a medium mixing bowl. Stir until the mixture resembles wet sand. Firmly press the crumb mixture into the bottom of a 9-inch springform pan, ensuring an even layer across the base. Place the pan in the refrigerator to set while preparing the filling.Look for The crumbs should hold together when pressed against the side of the bowl.Tip Use the flat bottom of a measuring cup to help press the crust down firmly for a professional finish.
The crust should be evenly pressed and compact, covering the base of the pan completely without any gaps. It should hold its shape when pressed and feel solid and uniform to the touch before the filling is added.
Filling preparation
- Create the creamy fillingIn a large bowl, beat the cream cheese until smooth and creamy. Gently fold in the whipped cream using a spatula until fully incorporated, maintaining the light and airy texture. Carefully fold in the fresh pineapple chunks, ensuring they are evenly distributed throughout the mixture without deflating the cream.Look for The mixture should look uniform, thick, and velvety with visible fruit chunks.Tip Ensure the cream cheese is at room temperature to prevent lumps in the filling.
The filling must be smooth, light, and airy, with the pineapple chunks evenly distributed throughout. It should have a thick, spoonable consistency that holds its own weight when transferred into the pan for chilling.
Setting and finishing
- Assemble and chillPour the pineapple cream mixture over the prepared crust in the springform pan. Smooth the top with a spatula to create an even surface. Refrigerate the cheesecake for at least 4 hours, or until it is completely set and firm to the touch. Remove the sides of the pan carefully before slicing and serving.Look for The center of the cheesecake should feel firm and not wobble when the pan is gently shaken.Tip Run a thin knife around the edge of the pan before releasing the springform ring for a clean edge.
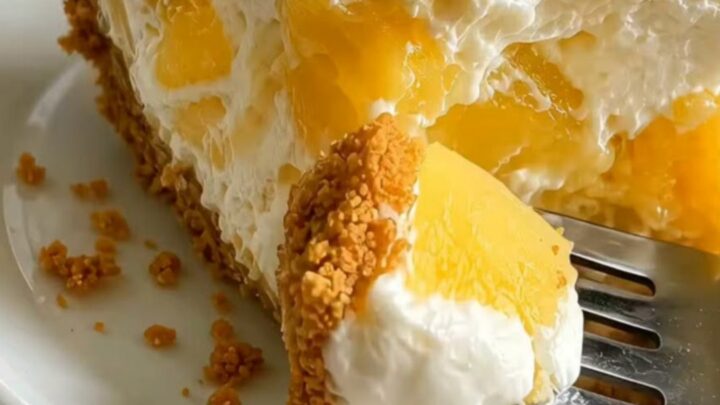
The final cheesecake must be thoroughly chilled so that it is firm enough to slice cleanly. The surface should be smooth, and the pineapple pieces should be visible within the creamy, stable structure.
Common mistakes
A common mistake is failing to soften the cream cheese adequately, which results in unsightly lumps in the filling. Another error is over-mixing the whipped cream when folding it into the cream cheese, which removes the air and leads to a dense, heavy dessert.
Always fold gently with a spatula. Finally, attempting to remove the cheesecake from the pan before it is fully set will cause the sides to collapse, ruining the presentation.
How to tell it’s done
The cheesecake is considered done when it has been refrigerated for at least four hours and the center is firm to the touch. It should feel stable and not wobble when the pan is gently tilted.
The edges should be cleanly separated from the pan, and the surface should be smooth. Because this is a no-bake recipe, there are no protein-based internal temperatures to monitor for safety, but proper chilling is vital for the structure.
Up next · Part 3 of 3
2 variations · storage & make-ahead · 3 answers · printable card
Tips, FAQ & printable recipe (Part 3)← Back to the ingredients (Part 1)