Desserts · Part 2 of 3: Instructions
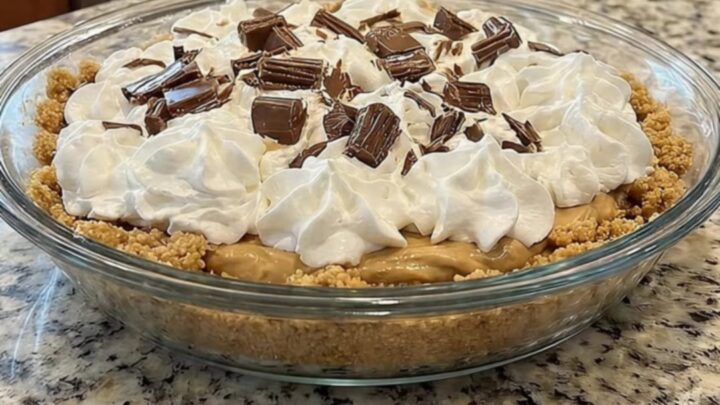
Creamy No-Bake Peanut Butter Pie with Chocolate Step-by-step instructions
- Prep
- Cook
- Total
- Serves
- 8
Before you start
Before beginning, ensure all ingredients are at the appropriate temperatures. The cream cheese must be softened to room temperature for smooth incorporation, while the whipped topping should be thawed in the refrigerator.
Clear enough space in the refrigerator for the pie to sit perfectly flat, and ensure the graham cracker crust is ready on a stable surface.
Ingredients at a glance (5)
- 1 9-inch graham cracker crust, store-bought or made ahead
- 1 cup creamy peanut butter
- 8 oz cream cheese, softened
- 8 oz whipped topping, thawed
- 1/2 cup chocolate chunks
Instructions
Mixing the Base
- Prepare the peanut butter baseIn a large mixing bowl, beat the softened cream cheese and creamy peanut butter together until the mixture is completely smooth and free of any lumps. Continue to mix on medium speed until the base is light and airy.Look for The mixture should look uniform and creamy.Tip Ensure the cream cheese is at room temperature to avoid lumps.
The mixture must be perfectly smooth and creamy with no white streaks of cream cheese remaining. The consistency should be thick and uniform, indicating that the fats are properly emulsified.
Filling the Crust
- Fold and fillGently fold the thawed whipped topping into the peanut butter mixture using a spatula until fully combined. Spread this filling evenly into the prepared graham cracker crust, smoothing the surface with an offset spatula.Look for The filling should be thick and hold its shape.Tip Do not overmix, or the air will escape the whipped topping.
The filling should be spread evenly to the edges of the crust. The surface should look smooth and level, which ensures that the final slices are uniform and visually appealing once the garnish is added.
Chilling and Finishing
- Chill and garnishRefrigerate the pie for at least four hours to allow the filling to set firmly. Before serving, pipe additional whipped topping over the top and sprinkle generously with the chocolate chunks.Look for The pie should be firm to the touch.Tip Cover the pie tightly with plastic wrap while chilling.
The pie must be completely firm before adding the final toppings. A quick test involves gently touching the center of the pie; it should feel solid and not sticky, indicating that the fats have sufficiently hardened.
Common mistakes
A common error is failing to soften the cream cheese, which results in a lumpy filling that never achieves a silky mouthfeel.
Over-mixing the whipped topping is another mistake, as it deflates the air bubbles and results in a dense, heavy pie.
Finally, rushing the chilling process prevents the pie from setting, making it difficult to slice cleanly and affecting the overall presentation.
How to tell it’s done
The pie is considered done when the filling has firmed up significantly after the recommended four hours of refrigeration.
The surface should feel set to the touch, and a knife should be able to glide through the layers without dragging or pulling the filling. If the pie feels soft or moves too much when the dish is tilted, it requires additional time to chill.
Up next · Part 3 of 3
2 variations · storage & make-ahead · 3 answers · printable card
Tips, FAQ & printable recipe (Part 3)← Back to the ingredients (Part 1)