Dinner · Part 2 of 3: Instructions
Creamy Mushroom Parmesan Orzo Bake Step-by-step instructions
- Prep
- Cook
- Total
- Serves
- 4
Before you start
Before beginning the assembly, ensure all ingredients are measured and ready. Slice your mushrooms into uniform pieces to ensure they cook at the same rate. Preheat your oven to 375°F (190°C) and clear enough space on your countertop to safely assemble the baking dish.
Having your butter sliced and your cheese measured beforehand will make the assembly process seamless, allowing you to get the dish into the oven quickly without any unnecessary delays.
Ingredients at a glance (5)
- 1 1/2 cups dry orzo pasta
- 8 oz white mushrooms, sliced
- 3 cups garlic broth
- 1/2 cup grated parmesan cheese
- 3 tbsp unsalted butter, sliced
Instructions
Assembling the base
- Assemble the basePreheat the oven to 375°F (190°C). In a large rectangular ceramic baking dish, spread the dry orzo pasta in an even layer. Arrange the sliced white mushrooms over the pasta, ensuring they are distributed evenly across the surface.Look for The orzo is spread in a flat, even layer without clumping.Tip Ensure the baking dish is large enough to prevent the orzo from overflowing during the boiling process.
The baking dish should contain a uniform, flat layer of dry orzo with the sliced mushrooms distributed evenly across the top. Ensure there are no large clumps of pasta. This stage is crucial for ensuring that every grain of orzo hydrates properly once the liquid is introduced, preventing uneven cooking or dry spots in the final bake.
Adding liquids and fats
- Add liquids and seasoningsPour the garlic broth over the orzo and mushrooms until the pasta is completely submerged. Scatter the grated parmesan cheese across the top, then dot the surface with the slices of butter.Look for The broth covers the pasta, and the butter slices are spaced out.Tip Distribute the butter slices evenly to ensure uniform richness throughout the dish as it melts.
At this point, the orzo and mushrooms should be completely submerged in the garlic broth. The parmesan cheese should be sprinkled across the entire surface, and the butter slices should be placed at regular intervals.
This configuration ensures that as the butter melts, it distributes flavor throughout the dish, and the cheese creates a golden, savory layer.
Baking to perfection
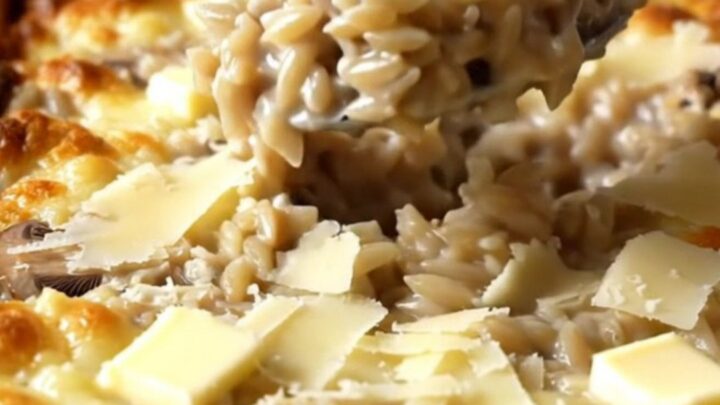
- Bake until creamyPlace the dish into the preheated oven. Bake for approximately 25 to 30 minutes, or until the orzo is tender and the edges are bubbling with a creamy, risotto-like consistency. Remove from the oven and let it rest for 5 minutes before serving.Look for The edges are bubbling, and the sauce has thickened significantly.Tip The residual heat during the resting period allows the sauce to thicken perfectly before serving.
The final stage is marked by bubbling edges and a visibly thickened, creamy sauce. The orzo should appear plump and tender, having absorbed the majority of the broth. If the dish looks too liquid, continue baking for a few more minutes. Once removed, the resting period is essential for achieving the perfect, scoopable consistency that defines this dish.
Common mistakes
A common mistake is overcrowding the baking dish, which can lead to uneven cooking and result in some pasta remaining hard while other parts become mushy. Ensure the orzo is spread in a single, even layer.
Another oversight is failing to properly preheat the oven; a cold oven will cause the pasta to absorb the broth too slowly, potentially leading to a texture that is less than ideal. Finally, avoid over-mixing before baking, as the placement of the butter and cheese on top is intentional for a proper finish.
How to tell it’s done
The dish is considered done when the orzo has reached an al dente texture and the liquid has transformed into a thick, creamy sauce that coats the pasta and mushrooms. The edges should be bubbling vigorously, indicating that the temperature is hot throughout.
Because there are no raw proteins involved, you are looking for the optimal pasta texture rather than a specific internal temperature. Let the dish rest for 5 minutes; this allows the sauce to stabilize and thicken to the desired consistency.
Up next · Part 3 of 3
2 variations · storage & make-ahead · 3 answers · printable card
Tips, FAQ & printable recipe (Part 3)← Back to the ingredients (Part 1)