Dinner · Part 2 of 3: Instructions
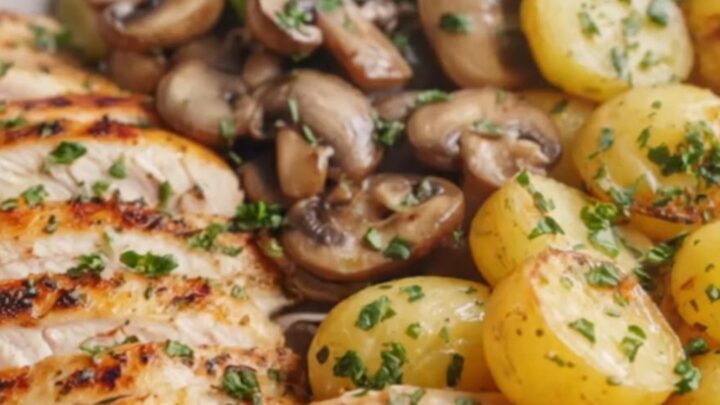
Creamy Mushroom Chicken Bowl with Roasted Potatoes Step-by-step instructions
- Prep
- Cook
- Total
- Serves
- 2
Before you start
Before heating up the stove, organize all your ingredients to ensure a smooth cooking process. Wash and thoroughly dry the baby potatoes, then slice them in half. Cut the broccoli into bite-sized florets. Clean the mushrooms and slice them evenly so they cook at the same rate. Pat the chicken breasts dry with paper towels. Having everything prepped makes the assembly fast and stress-free.
Ingredients at a glance (7)
- 2 boneless skinless chicken breasts
- 1 lb baby potatoes, halved
- 1 tsp dried herbs, such as thyme or rosemary
- 2 cups broccoli florets
- 8 oz mushrooms, sliced
- 4 tbsp butter, divided
- 1/2 cup heavy cream
Instructions
Roasting the Vegetables
- Roast the Baby PotatoesPreheat the oven to 400°F (204°C). In a large bowl, toss the halved baby potatoes with one tablespoon of melted butter and the dried herbs until evenly coated. Spread the potatoes in a single layer on a large baking sheet. Roast in the preheated oven for 15 minutes, turning them halfway through, until they start to soften and turn golden brown.Look for The potatoes should begin to brown on the edges.Tip Ensure the potatoes are cut to a uniform size for even roasting.
- Add and Roast the BroccoliToss the broccoli florets with one tablespoon of melted butter. Remove the baking sheet from the oven, push the baby potatoes to one side, and add the broccoli florets to the empty space. Return the baking sheet to the oven and roast for an additional 10 to 12 minutes until the potatoes are crispy and the broccoli is tender-crisp with slightly charred tips.Look for The broccoli tips should be slightly charred.Tip Do not overlap the vegetables to prevent steaming.
At the end of this phase, the baby potatoes should be deeply golden-brown and crispy on the edges, yielding easily when pierced with a fork. The broccoli florets will be tender-crisp with slightly charred, caramelized tips.
The kitchen will fill with the rustic aroma of roasted potatoes and toasted herbs, signaling that the vegetable base of your bowl is perfectly cooked and ready for assembly.
Searing the Chicken
- Sear the Chicken BreastsHeat a large skillet over medium-high heat. Add one tablespoon of butter to the pan, then add the chicken breasts. Cook for 6 to 8 minutes per side, or until the chicken develops a deep golden crust and reaches a safe internal temperature of 165°F (74°C). Transfer the chicken to a cutting board and let it rest for 5 minutes before slicing.Look for The chicken should be firm and golden-brown.Safe temperature 165°F (74°C) internal temperature (poultry)Tip Letting the chicken rest prevents the flavorful juices from escaping.
The chicken breasts should have a rich, golden-brown crust on both sides from the skillet sear. When checked with an instant-read thermometer inserted into the thickest part, the internal temperature must register exactly 165°F (74°C).
The chicken should feel firm to the touch but still slightly springy. When sliced on a cutting board, it will release a gentle steam while remaining exceptionally tender and juicy inside, ready to be layered into the bowls.
Creating the Mushroom Sauce
- Sauté the MushroomsIn the same skillet used for the chicken, melt the remaining tablespoon of butter over medium heat, scraping up any browned bits from the bottom of the pan. Add the sliced mushrooms and sauté for 5 to 7 minutes, stirring occasionally, until they release their moisture, shrink in size, and develop a rich, deep golden-brown color.Look for The mushrooms should be tender and deeply browned.Tip Scraping the browned bits adds immense flavor to the sauce.
- Simmer the Cream SaucePour the heavy cream into the skillet with the sautéed mushrooms. Reduce the heat to medium-low and bring the mixture to a gentle simmer. Cook for 3 to 5 minutes, stirring frequently, until the cream reduces slightly and thickens into a velvety sauce that easily coats the back of a spoon.Look for The sauce should be thick and velvety.Tip Keep the heat low to prevent the cream from boiling too rapidly.
- Assemble the BowlsSlice the rested chicken breasts on a diagonal into thick strips. Divide the herb-roasted baby potatoes and tender broccoli florets between two serving bowls. Arrange the sliced chicken neatly next to the vegetables. Ladle the hot mushroom cream sauce generously over the chicken and potatoes, allowing it to pool slightly at the bottom, and serve immediately.Look for The bowls are fully assembled and steaming hot.Tip Serve immediately while all elements are hot and fresh.
The mushrooms will be deeply browned and tender, having absorbed the rich butter in the pan. The heavy cream will have simmered down into a thick, velvety sauce that easily coats the back of a spoon. You will hear a gentle, bubbling simmer and smell the luxurious combination of buttery, earthy mushrooms and sweet cream, indicating the sauce is ready to drape over your assembled bowls.
Common mistakes
One common mistake is crowding the skillet when cooking the mushrooms. If the mushrooms are piled on top of each other, they will release moisture and steam instead of browning, preventing them from developing that rich, caramelized flavor.
Another error is slicing the chicken immediately after cooking. Let the chicken rest for five minutes before slicing to allow the juices to redistribute throughout the meat, ensuring every bite remains incredibly tender and moist.
How to tell it’s done
To guarantee the chicken is safely cooked and perfectly juicy, always use a digital meat thermometer. Insert the probe into the thickest part of the chicken breast; it is fully done when it reaches a safe internal temperature of 165°F (74°C).
The roasted baby potatoes are done when they are easily pierced with a fork and have a crispy, browned exterior. The cream sauce is ready when it has reduced slightly and coats a spoon smoothly.
- Poultry: 165°F (74°C) in the thickest part
Up next · Part 3 of 3
2 variations · storage & make-ahead · 3 answers · printable card
Tips, FAQ & printable recipe (Part 3)← Back to the ingredients (Part 1)