Dinner · Part 2 of 3: Instructions
Creamy Midnight Ramen Upgrade Step-by-step instructions
- Prep
- Cook
- Total
- Serves
- 1
Before you start
Before beginning, ensure all ingredients are measured and within easy reach, as the emulsification process moves quickly once the boiling water is added. Have your ramen noodles cooked separately according to the package instructions.
Grate your garlic and slice the scallions in advance so that you can assemble the bowl immediately. Using a wide bowl helps with the whisking process, preventing the hot water from splashing and ensuring a thorough emulsion.
Ingredients at a glance (10)
- 1 raw organic egg yolk
- 1 1/2 tbsp Japanese Kewpie mayonnaise
- 1 raw garlic clove, grated
- 1 packet ramen seasoning packet
- 1 tsp toasted sesame oil
- 400 ml boiling water
- 1 serving instant ramen noodles
- 1 jammy soy-marinated egg, halved
- scallions, sliced, for serving
- chili oil, for serving
Instructions
Creating the base
- Prepare the broth baseIn a large serving bowl, combine the raw egg yolk, mayonnaise, grated garlic, ramen seasoning packet, and toasted sesame oil. Whisk these ingredients together vigorously until a smooth, uniform paste forms. Ensure there are no lumps of mayonnaise remaining to guarantee a perfectly creamy emulsion when the hot liquid is added later.Look for The mixture should look like a pale, creamy custard or thick sauce.Tip Grate the garlic finely to ensure it incorporates evenly without large chunks.
The base should be a smooth, thick, and consistent golden-colored paste. Check that the garlic is finely dispersed and the mayonnaise has fully integrated with the egg yolk and seasoning packet before proceeding to the water step.
Emulsifying the broth
- Create the creamy emulsionSlowly pour the 400 milliliters of boiling water into the bowl while whisking the base constantly. The hot water will cook the egg yolk and emulsify the mayonnaise, turning the water into a rich, frothy, and opaque broth that mimics a slow-cooked tonkotsu. Add the cooked ramen noodles immediately into this hot, creamy broth.Look for The broth will turn from a thick paste into a smooth, opaque liquid.Safe temperature 160°F (71°C) internal temperature (egg dishes)Tip Whisking vigorously is essential to prevent the egg from curdling and to achieve the signature frothy texture.
The broth should be opaque, creamy, and slightly frothy. It should have a consistent texture throughout, with no visible streaks of mayonnaise or oil. The noodles should be evenly coated by this thickened, savory liquid.
Adding final touches
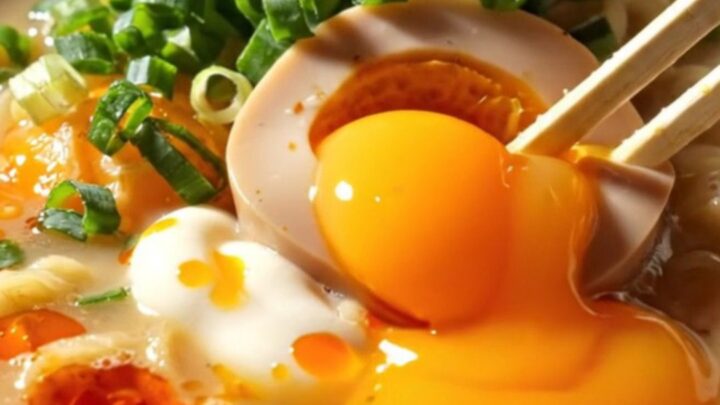
- Assemble and serveCarefully slice the jammy soy-marinated egg in half and place it on top of the ramen. Garnish the bowl with fresh sliced scallions and a drizzle of chili oil for added depth and spice. Serve the ramen immediately while the broth is piping hot and the textures are at their peak.Look for The egg yolk should be jammy and vibrant orange.Tip Prepare the toppings while the water for the noodles is coming to a boil to save time.
The finished bowl should look vibrant and appetizing, with the jammy egg sitting prominently atop the noodles. The broth should remain hot and creamy, and the aroma of toasted sesame and garlic should be noticeable upon serving.
Common mistakes
A common mistake is adding the boiling water too quickly without sufficient whisking, which can lead to the egg scrambling rather than emulsifying.
Ensure the water is truly at a boil to provide enough thermal energy to cook the egg safely.
Another error is failing to fully incorporate the mayonnaise into the yolk paste; take your time during the first step to create a smooth, homogenous base before adding any liquid.
How to tell it’s done
The broth is perfectly emulsified when it appears opaque, frothy, and creamy, with no oily separation on the surface. The egg yolk is cooked through by the 160°F (71°C) boiling water, creating a safe and stable base.
The ramen noodles should be cooked to your preferred level of firmness, ideally al dente, providing a springy contrast to the silky, rich broth.
- Egg dishes: 160°F (71°C) in the thickest part
Up next · Part 3 of 3
2 variations · storage & make-ahead · 3 answers · printable card
Tips, FAQ & printable recipe (Part 3)← Back to the ingredients (Part 1)