Desserts · Part 2 of 3: Instructions
Creamy Meyer Lemon Basque Cheesecake Step-by-step instructions
- Prep
- Cook
- Total
- Serves
- 8
Before you start
Before beginning, ensure that your cream cheese is softened to room temperature, as this is critical for achieving a smooth, professional consistency. Prepare the 9-inch springform pan by lining it with parchment paper, allowing the edges to extend above the rim for easy removal.
Have all ingredients measured and ready to go, and preheat your oven to 420°F (215°C) well in advance to ensure the high heat required for the signature burnt top.
Ingredients at a glance (6)
- 800 g cream cheese, softened
- 240 g granulated sugar
- 4 eggs
- 350 ml heavy cream
- 4 lemons, zest of, lemon zest
- 150 g homemade lemon curd
Instructions
Batter Preparation
- Prepare the BatterIn a large mixing bowl, combine the softened cream cheese and sugar. Whisk vigorously until the mixture is completely smooth and free of lumps. Gradually add the eggs one by one, whisking well after each addition to incorporate. Stir in the heavy cream and the freshly grated zest of four lemons until the batter is uniform and silky.Look for The batter should look smooth, pale, and emulsified with no visible streaks of cream cheese.Tip Ensure the cream cheese is at room temperature before starting to prevent lumps.
The batter must be completely smooth and homogeneous, with no visible lumps of cream cheese. The consistency should be pourable and silky, indicating that the sugar and eggs have been properly emulsified with the cream cheese.
Baking and Swirling
- Swirl and BakePour the cheesecake batter into a parchment-lined 9-inch springform pan. Carefully dollop the lemon curd over the surface of the batter and use a skewer or knife to gently swirl it into the mixture. Place the pan in a preheated oven at 420°F (215°C) and bake for 26 minutes, until the top is deeply blistered and golden brown. To cook the eggs through to a safe temperature, ensure the center reaches 160°F (71°C).Look for The edges should be set, but the center will still have a noticeable wobble.Safe temperature 160°F (71°C) internal temperature (egg dishes)Tip Do not over-swirl, as you want to maintain distinct pockets of lemon curd throughout the cake.
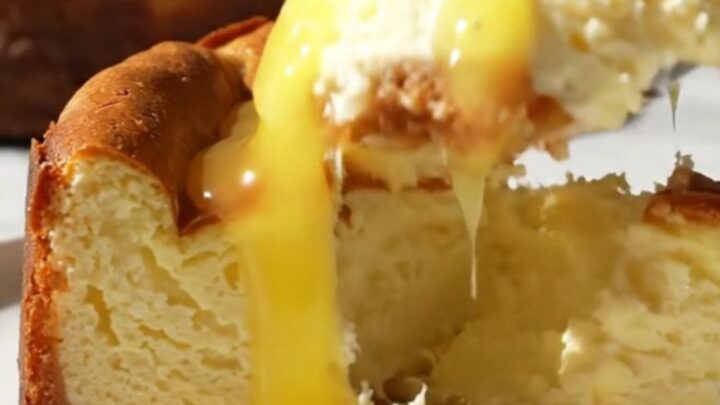
The cheesecake should look deeply golden-brown on top with charred, blistered spots. The curd swirls should be visible and set within the batter, which should still have a gentle, jiggly movement in the very center.
Final Cooling
- Cool and ServeRemove the cheesecake from the oven and allow it to cool completely in the pan for at least one hour before releasing the sides. Drizzle the remaining glossy lemon curd over the top of the warm slices before serving to enhance the bright citrus flavor.Look for The cheesecake should be set but remain soft and creamy in the center.Tip Serving at room temperature provides the best texture for this style of cheesecake.
The cheesecake must be allowed to rest in the pan until it reaches room temperature. This cooling phase allows the custard to set sufficiently so that it can be sliced cleanly while retaining its signature creamy, soft interior.
Common mistakes
A common mistake is failing to fully soften the cream cheese, which results in lumps that are difficult to whisk out.
Another error is over-mixing the batter after adding the eggs; once the eggs are incorporated, stop mixing to prevent too much air from being whipped into the batter, which can lead to cracking.
Finally, do not be tempted to bake the cheesecake until it is firm in the center, as this will destroy the molten texture.
How to tell it’s done
The cheesecake is done when the edges are firm and have risen slightly, but the center still has a distinct, soft wobble when the pan is gently shaken. The top should be deeply caramelized and blistered, ranging from dark amber to mahogany.
The internal temperature of the egg-based custard should reach 160°F (71°C) to ensure it is safely cooked through while maintaining its molten, creamy texture.
- Egg dishes: 160°F (71°C) in the thickest part
Up next · Part 3 of 3
2 variations · storage & make-ahead · 3 answers · printable card
Tips, FAQ & printable recipe (Part 3)← Back to the ingredients (Part 1)