Dinner · Part 2 of 3: Instructions
Creamy Maroilles and Blonde Beer Slow Cooker Rice Step-by-step instructions
- Prep
- Cook
- Total
- Serves
- 4
Before you start
Before beginning, ensure all ingredients are measured and ready. Thinly slice the onions to ensure they soften thoroughly during the cooking time. Cut the Maroilles cheese into uniform, thick chunks to facilitate even melting.
Clear a space on the kitchen counter for the slow cooker and verify that the power cord is accessible. Have a clean serving plate ready to receive the finished, steaming rice.
Ingredients at a glance (5)
- 1 cup round rice
- 1 medium onion, thinly sliced
- 1 cube dry bouillon cube
- 8 oz Maroilles cheese, cut into thick chunks
- 1 cup blonde beer
Instructions
Layering the ingredients
- Assemble the basePlace the round rice in the bottom of the slow cooker. Evenly distribute the sliced onions over the rice. Crumble the dry bouillon cube over the top of the onions to ensure even seasoning throughout the cooking process.Look for The rice should be in an even layer at the bottom of the slow cooker.Tip Ensure the onions are sliced thinly so they soften quickly and meld into the creamy rice texture.
At the end of this phase, the ingredients are neatly arranged in the slow cooker. The rice is evenly spread at the base, the onions are scattered, and the bouillon is crumbled. Everything is ready for the liquid to be added. Check that the rice is spread uniformly to avoid hot spots during the cooking process and ensure the bouillon is distributed.
Infusion and slow cooking
- Add liquid and cheesePour the blonde beer into the slow cooker, ensuring the rice is submerged. Carefully arrange the thick chunks of Maroilles cheese across the surface of the mixture. Cover the slow cooker with its lid to trap the moisture and aroma inside.Look for The cheese chunks should be placed evenly to allow for uniform melting during the cooking cycle.Tip Do not stir the cheese into the rice; leaving it on top allows the rind to soften and the interior to melt into the beer-infused rice.
During this phase, the kitchen will begin to fill with the savory, pungent aroma of the melting cheese and the malty scent of the beer. The liquid should be bubbling gently around the edges of the slow cooker.
Check the progress after three hours to ensure the liquid has not evaporated too quickly, though the lid should remain closed as much as possible.
Final emulsification
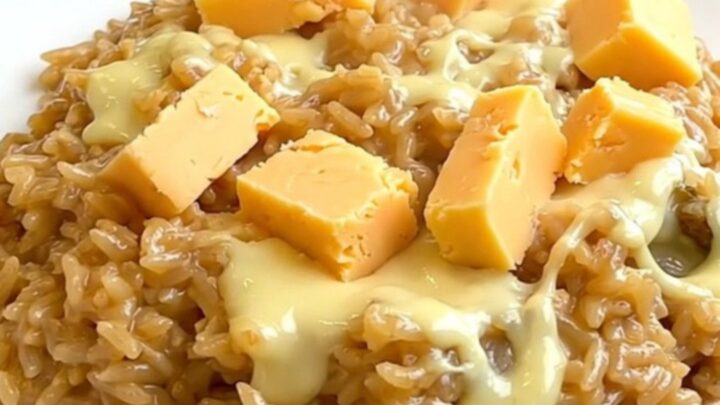
- Cook and serveSet the slow cooker to the low setting and cook for four hours. Once the rice is tender and the cheese has created a creamy, glossy sauce, remove the lid. Stir the contents gently to combine the melted cheese with the rice before serving immediately on warm plates.Look for The rice should be fully cooked, tender, and coated in a thick, creamy sauce from the melted cheese.Tip If the rice seems too dry, add a splash of warm water and stir until the desired creamy consistency is reached.
Once the cooking cycle finishes, the final step involves gently stirring the mixture. The cheese will have formed a thick, creamy emulsion with the beer and starch from the rice. The texture should be cohesive, rich, and glossy. Check that the rice is tender throughout and that the sauce is thick enough to hold its shape slightly on the serving spoon.
Common mistakes
A common mistake is stirring the ingredients too early or too often, which can break the rice grains and result in a mushy texture rather than a creamy one.
Ensure the cheese is placed on top and left undisturbed until the final step. Another error is using a beer that is too bitter; always taste the beer beforehand to ensure it complements the savory, pungent profile of the cheese.
How to tell it’s done
The dish is done when the rice has absorbed almost all the liquid and reached a tender, slightly chewy texture. The cheese should be completely melted, having transformed into a thick, glossy, and pale golden sauce that clings to the rice.
There should be no hard pieces of cheese remaining, and the onions should be translucent and soft, fully integrated into the creamy mixture.
Up next · Part 3 of 3
2 variations · storage & make-ahead · 3 answers · printable card
Tips, FAQ & printable recipe (Part 3)← Back to the ingredients (Part 1)