Dinner · Part 2 of 3: Instructions
Creamy Lemon Garlic Spaghetti Ready in 12 Minutes Step-by-step instructions
- Prep
- Cook
- Total
- Serves
- 4
Before you start
Before starting, fill a large pot with water and bring it to a boil over high heat. Set a large skillet nearby. Finely dice the onion and mince the garlic. Zest and juice the lemon. Grate the Parmesan if not already grated.
Chop the parsley. Measure out the cream, salt, and other ingredients so everything is within reach. This recipe moves quickly once the pasta is cooking, so having everything prepped and measured will make the process smooth and stress-free.
Ingredients at a glance (12)
- 12 oz spaghetti
- 2 tbsp olive oil
- 2 tbsp butter
- 1/2 cup finely diced yellow onion
- 4 cloves minced garlic
- 1 cup heavy cream
- 3 tbsp fresh lemon juice
- 1 tbsp grated lemon zest
- 1/2 tsp salt
- 1/2 cup grated Parmesan cheese
- 1/4 cup chopped fresh parsley
- Freshly cracked black pepper, for serving
Instructions
Pasta and Aromatics
- Cook the spaghettiBring a large pot of salted water to a boil. Add the spaghetti and cook according to package directions until just al dente. Reserve about 1 cup of pasta water before draining. Drain the spaghetti and set aside.Look for The spaghetti should be tender but still firm to the bite.Tip Salt the pasta water generously; it seasons the noodles from within.
- Sauté the aromaticsWhile the pasta cooks, heat the olive oil and butter in a large skillet over medium heat. Add the finely diced onion and cook, stirring often, until soft and translucent, about 3 minutes. Add the minced garlic and cook for 30 seconds until fragrant.Look for The onion turns translucent and the garlic smells sweet and nutty.Tip Do not brown the garlic; it can turn bitter.
The spaghetti should be cooking in the boiling water while the onion and garlic sauté in the skillet. The onion will turn translucent and soft, and the garlic will become fragrant but not browned. The kitchen will smell sweet and savory. Have the cream, lemon, and Parmesan measured and ready to go. The pasta should be al dente by the time the sauce is ready.
Silky Cream Sauce
- Make the lemon cream saucePour the heavy cream into the skillet with the onions and garlic. Add the fresh lemon juice, lemon zest, and salt. Stir to combine and bring to a gentle simmer. Cook for 2 minutes, stirring occasionally, until the sauce thickens slightly.Look for The sauce lightly coats the back of a spoon.Tip Keep the heat at a gentle simmer so the cream doesn't curdle.
- Melt in the ParmesanReduce the heat to low and sprinkle the grated Parmesan over the sauce. Stir gently until the cheese melts completely and the sauce is smooth and velvety. If the sauce seems too thick, add a splash of the reserved pasta water.Look for The sauce turns glossy and coats the spoon evenly.Tip Add pasta water gradually; the starch helps the sauce cling to the noodles.
The cream should be gently simmering with the lemon juice, zest, and salt. The sauce will look slightly thickened and smooth. When the Parmesan is added, it will melt into a velvety, glossy sauce.
The aroma will be rich and citrusy. The sauce should coat the back of a spoon but still be loose enough to coat pasta. If it seems too thick, a splash of pasta water will loosen it.
Toss and Serve
- Toss the spaghetti in the sauceAdd the drained spaghetti to the skillet with the sauce. Use tongs or a wooden spoon to toss the pasta thoroughly, ensuring every strand is coated in the creamy lemon garlic sauce. If needed, add more reserved pasta water to loosen the sauce.Look for The spaghetti looks glossy and the sauce clings to every noodle.Tip Toss for a full minute to emulsify the sauce.
- Finish with parsley and pepperRemove the skillet from the heat. Sprinkle the chopped parsley over the pasta and toss once more. Serve immediately, topped with freshly cracked black pepper and extra Parmesan if desired.Look for The parsley brightens the dish and the pepper adds a fragrant kick.Tip Finish with a drizzle of olive oil for extra richness.
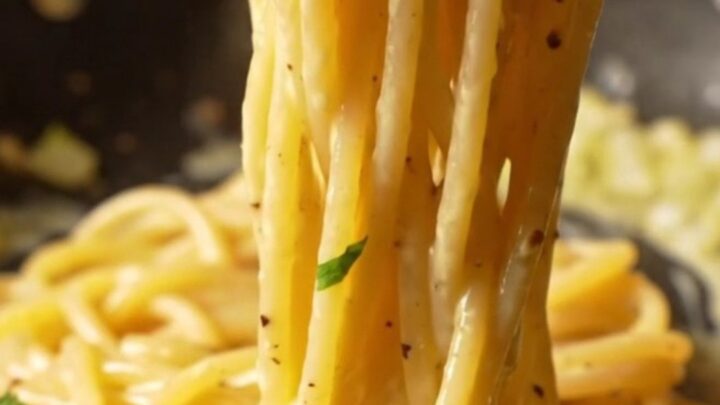
The spaghetti is tossed in the sauce until every strand is coated. The dish looks glossy, with the sauce clinging to the noodles. The parsley adds fresh green flecks, and the cracked black pepper gives a fragrant finish. The pasta should be well coated but not dry; add more pasta water if needed. Serve immediately for the best texture and flavor.
Common mistakes
One common mistake is overcooking the spaghetti, which turns it mushy and less able to hold the sauce. Another is simmering the cream too vigorously, which can cause it to curdle. Keep the heat gentle after adding the cream.
Adding the Parmesan all at once can create lumps; sprinkle it in gradually while stirring. Finally, don't forget the pasta water—it's the key to a silky sauce. Skipping it can leave the pasta dry and the sauce too thick.
How to tell it’s done
The spaghetti is done when it is al dente, meaning it offers a slight resistance when bitten but has no raw flour taste. The sauce is ready when it coats the back of a spoon and is slightly thickened; it will continue to thicken as it sits.
When the pasta is tossed in, it should look glossy and every strand should be coated with the creamy sauce. Taste and adjust salt, lemon, or pepper as needed. Since there are no raw proteins, no internal temperature check is required.
Up next · Part 3 of 3
4 variations · storage & make-ahead · 5 answers · printable card
Tips, FAQ & printable recipe (Part 3)← Back to the ingredients (Part 1)