Dinner · Part 2 of 3: Instructions
Creamy Lemon Garlic Salmon Step-by-step instructions
- Prep
- Cook
- Total
- Serves
- 2
Before you start
Before beginning, ensure all ingredients are measured and ready to use, as the cooking process moves quickly once the pan is heated. Mince the garlic finely to ensure it releases maximum flavor without burning.
Chop the fresh herbs and have your salmon fillets patted dry with paper towels to ensure they are ready for the pan. Having your serving plates and utensils nearby allows for a smooth transition from the stove to the table, ensuring the salmon is served hot.
Ingredients at a glance (4)
- 2 fillets salmon
- 3 cloves garlic, minced
- 1 lemon, sliced into rounds
- 1 tsp fresh herbs, chopped
Instructions
Searing the salmon fillets
- Sear the salmonPlace the salmon fillets into a hot skillet and sear until a deep golden crust forms on the bottom. Flip carefully and cook until the exterior is golden and the fish is nearly cooked through.Look for Salmon should have a crispy golden-brown exterior and release easily from the pan surface.Tip Pat the salmon dry with paper towels before searing to ensure a better crust.
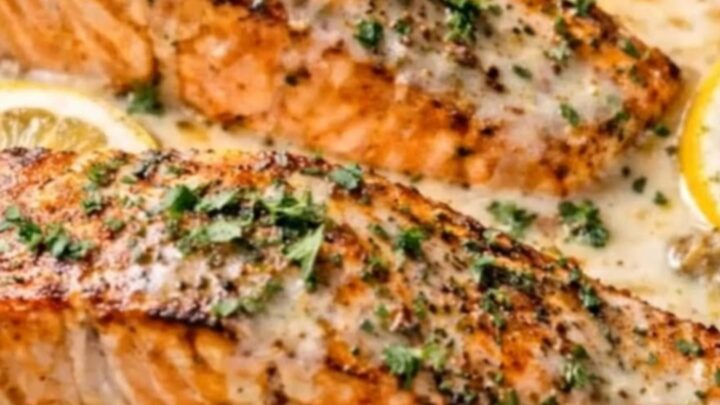
The salmon should have a deep, uniform golden-brown crust on both sides. The exterior should feel firm to the touch while the interior remains slightly soft, indicating that the fish is partially cooked and ready for the sauce integration. The pan should be clean of any burnt debris, and the aroma should be of fresh, seared fish with a hint of toasted aromatics.
Infusing the lemon garlic sauce
- Prepare the sauceAdd the minced garlic to the skillet and sauté until fragrant. Add the lemon slices and allow them to simmer in the pan juices until the sauce is glossy and coats the salmon.Look for The sauce should be glossy and coat the back of a spoon.Tip Keep the heat moderate to prevent the garlic from browning too quickly.
The sauce should be gently bubbling and have thickened enough to coat the pan. The garlic should be golden and fragrant, and the lemon slices should have softened, releasing their bright citrus oils into the mixture.
The sauce should be smooth, glossy, and consistent in texture. It should smell intensely aromatic and savory, indicating that the flavors have successfully melded together.
Finishing and plating
- Finish and serveEnsure the salmon reaches an internal temperature of 145°F (63°C). Remove from heat, sprinkle with fresh herbs, and let rest for 3 minutes before serving.Look for The flesh will be opaque and flake easily when pressed with a fork.Safe temperature 145°F (63°C) internal temperature (fish)Tip Adding the herbs at the very end preserves their bright color and fresh flavor.
The salmon should be tender, flaky, and fully coated in the thick, glossy sauce. The internal temperature must reach 145°F (63°C). The dish should look vibrant, with the green herbs providing a fresh contrast to the sauce and the golden edges of the fish. It is now ready to be transferred to a warm plate and served immediately while the sauce is still silky and the fish is succulent.
Common mistakes
A common mistake is overcrowding the pan, which lowers the surface temperature and causes the salmon to steam rather than sear, resulting in a lack of color and flavor.
Another error is adding the garlic too early or at too high a heat, which can lead to burnt, bitter notes that ruin the delicate sauce. Finally, neglecting to let the fish rest for at least 3 minutes after cooking prevents the juices from redistributing, which is essential for a tender bite.
How to tell it’s done
The salmon is perfectly cooked when it reaches an internal temperature of 145°F (63°C) at its thickest part. Visually, the flesh should transition from a translucent pink to an opaque, light pink color and flake easily when gently prodded with a fork.
It is important to avoid overcooking the fish, as this will cause it to become dry and lose its delicate, buttery texture. Always use a digital thermometer to check the thickest part of the fillet for the most accurate reading.
- Fish: 145°F (63°C) in the thickest part
Up next · Part 3 of 3
2 variations · storage & make-ahead · 3 answers · printable card
Tips, FAQ & printable recipe (Part 3)← Back to the ingredients (Part 1)