Dinner · Part 2 of 3: Instructions
Creamy Kielbasa Stroganoff Noodle Bake with Crispy Onions Step-by-step instructions
- Prep
- Cook
- Total
- Serves
- 6
Before you start
Before beginning, ensure all ingredients are measured and ready. Slice the kielbasa into uniform coins to ensure they cook at the same rate.
Preheat the oven to the specified temperature, as a hot oven is essential for the sauce to bubble and the noodles to soften correctly within the allotted time.
Ingredients at a glance (4)
- 12 oz wide egg noodles, uncooked
- 1 lb kielbasa sausage, sliced into coins
- 2 cups stroganoff sauce, store-bought or made ahead
- 1 cup crispy fried onions
Instructions
Preparation and Assembly
- Assemble the basePreheat the oven to 375°F (190°C). In a large 9x13 inch rectangular baking dish, combine the uncooked wide egg noodles and the sliced kielbasa coins. Spread them out evenly across the bottom of the dish to ensure even cooking during the baking process.Look for The noodles and sausage should be distributed in a single, relatively even layer.Tip Ensure the baking dish is large enough so the noodles are not piled too high, which helps the sauce penetrate better.
The noodles and kielbasa should be evenly spread across the bottom of the baking dish. Everything is ready for the liquid component to be added, ensuring a uniform layer that will cook consistently.
Sauce and Topping Integration
- Add sauce and toppingsPour the stroganoff sauce over the noodle and kielbasa mixture, ensuring all noodles are covered so they soften properly. Scatter the crispy fried onions in an even, thick layer across the top of the dish. Place the dish into the preheated oven carefully.Look for The sauce should just cover the noodles to provide enough moisture for them to cook through.Tip If the sauce is very thick, add a splash of water or broth to ensure the noodles rehydrate perfectly.
The sauce should fully submerge the noodles, and the crispy onions should be distributed in an even layer. The dish is now ready for the oven, with all elements prepared to meld together.
Baking to Perfection
- Bake and serveBake the casserole for 30 to 35 minutes or until the edges are bubbling and the internal temperature of the sausage reaches 160°F (71°C). Remove from the oven and let it rest for 5 minutes before serving with a spoon.Look for The top should be golden brown and the edges of the dish should be bubbling vigorously.Safe temperature 160°F (71°C) internal temperature (ground meat)Tip Cover the dish with foil for the first 20 minutes if the fried onions start to brown too quickly.
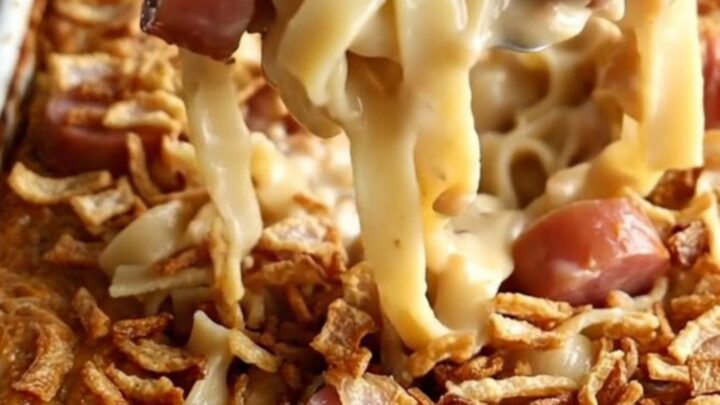
The casserole is finished when the sauce is bubbling and the onions are golden. After resting, the dish should be warm, creamy, and ready to be served immediately from the baking dish.
Common mistakes
A common mistake is failing to ensure all the noodles are submerged in the sauce, which can result in dry or crunchy pasta pieces.
Another error is overloading the dish, which prevents even heat distribution.
Ensure the onions are added according to the instructions, as adding them too early might lead to excessive browning or burning, compromising the final appearance and texture of the casserole.
How to tell it’s done
The dish is perfectly done when the sauce is bubbling around the edges of the baking dish and the noodles are tender to the touch. The internal temperature of the kielbasa should reach 160°F (71°C).
The top should be a deep golden brown, and the crispy onions should be fragrant and crunchy, signaling that the bake is ready for service.
- Ground meat: 160°F (71°C) in the thickest part
Up next · Part 3 of 3
2 variations · storage & make-ahead · 3 answers · printable card
Tips, FAQ & printable recipe (Part 3)← Back to the ingredients (Part 1)