Dinner · Part 2 of 3: Instructions
Creamy Honey Butter Corn Casserole Step-by-step instructions
- Prep
- Cook
- Total
- Serves
- 6
Before you start
Before you begin, ensure your oven is fully preheated to 375°F (190°C) as this is crucial for achieving that golden, bubbling crust. Thaw your corn if it is frozen and drain any excess liquid if you are using canned corn.
Measure all your sauce ingredients carefully and cube the cream cheese into half-inch pieces. Having all your components prepped and the baking dish ready on the counter will make the assembly process seamless and quick.
Ingredients at a glance (5)
- 4 cups sweet corn kernels
- 1/2 cup unsalted butter, melted
- 1/4 cup honey
- 1/2 cup heavy cream
- 4 oz cream cheese, cubed
Instructions
Preparation and Layering
- Prepare the Corn BasePreheat your oven to 375°F (190°C). Distribute the sweet corn kernels evenly across the bottom of a 9x9 inch ceramic baking dish, ensuring they form a uniform layer to promote even cooking throughout the casserole.Look for The corn covers the bottom of the dish in an even, single layer.Tip Using frozen corn that has been thawed and patted dry works just as well as fresh corn kernels.
The corn should be spread in an even, uniform layer across the bottom of the baking dish. It should look bright and fresh. Ensure the dish is clean and dry before you start to avoid any issues with the sauce consistency. The prep is complete when the corn is ready to receive the liquid base.
Sauce Emulsification
- Mix and Pour the SauceIn a small bowl, whisk together the melted unsalted butter, honey, and heavy cream until fully combined. Pour this honey butter mixture evenly over the corn in the baking dish until the kernels are just submerged in the liquid.Look for The sauce is smooth and fully incorporated, covering the corn layer completely.Tip Ensure the butter is warm but not hot when mixing with the cream to prevent curdling.
The honey butter sauce should be smooth, velvety, and well-emulsified before pouring. When poured over the corn, it should just barely cover the kernels. The mixture should look glossy and fragrant. Check that the butter is fully melted into the cream so there are no separated oil spots on the surface.
Baking and Finishing
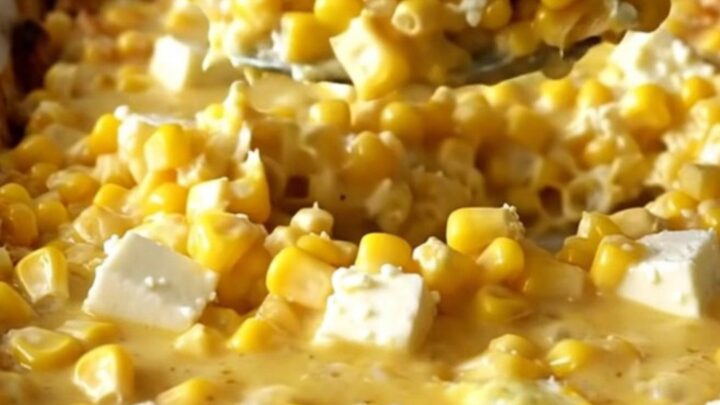
- Add Cream Cheese and BakeDot the surface of the corn mixture with the cubed cream cheese. Place the dish in the preheated oven and bake for 30 minutes, or until the edges are bubbling and the top is golden brown. Remove from the oven and allow to rest for 5 minutes before serving.Look for The casserole edges are bubbling, and the top has developed a light golden color.Tip For a deeper golden color, you can broil the dish for the last minute of baking, but watch it closely to prevent burning the honey.
At the end of the baking phase, the casserole should look golden on top with active, bubbling edges. The cream cheese cubes should appear soft and incorporated into the sauce.
The entire kitchen should smell sweet and savory. Ensure the dish is allowed to rest briefly to let the sauce reach the perfect consistency.
Common mistakes
A common mistake is using corn that is too wet; if there is too much excess liquid from the corn, the sauce will not thicken properly and may result in a soupy casserole. Another potential error is overcrowding the dish, which prevents the heat from circulating effectively.
Ensure the corn is spread in a single, even layer. Finally, do not over-bake, as the high sugar content in the honey can cause the edges to turn from golden to burnt very quickly.
How to tell it’s done
The casserole is done when the sauce is visibly bubbling around the edges and the top has taken on a light, golden-brown hue. The cream cheese cubes should be soft and partially melted into the sauce.
A quick way to check is to gently stir the center; the liquid should appear thickened and creamy rather than watery. Allow the dish to rest for five minutes after removing it from the oven to let the sauce set slightly before serving.
Up next · Part 3 of 3
2 variations · storage & make-ahead · 3 answers · printable card
Tips, FAQ & printable recipe (Part 3)← Back to the ingredients (Part 1)