Desserts · Part 2 of 3: Instructions
Creamy Homemade Speculoos Cookie Butter Spread Step-by-step instructions
- Prep
- Cook
- Total
- Serves
- 12
Before you start
Before beginning, ensure that your slow cooker insert is clean and dry. Prepare the biscuit crumbs by pulsing them in a food processor until they reach a fine, sandy texture without large lumps.
Measure all other ingredients accurately and have them ready on your counter. Ensure your serving bowl is heat-resistant and clean, as the spread will be transferred directly into it after the cooking process is complete.
Ingredients at a glance (4)
- 2 cups speculoos biscuit crumbs
- 4 tbsp unsalted butter, cut into small cubes
- 1 tsp ground cinnamon
- 1 cup evaporated milk
Instructions
Preparation and layering
- Combine ingredientsPlace the crushed speculoos biscuit crumbs into the base of the slow cooker insert. Distribute the cubed butter evenly over the crumbs, then sprinkle the ground cinnamon across the surface to ensure even distribution of the warm spice flavor.Look for The base should be evenly covered with crumbs and butter chunks.Tip Ensure the butter is cold to help it incorporate properly during the heating phase.
The base layer should be uniform, with the butter cubes spread out to allow for even melting. The cinnamon should be lightly dusted over the top to ensure it permeates the entire mixture as the butter begins to liquefy during the initial phase of the slow cooker heating process.
Slow cooking and emulsification
- Heat and meldPour the evaporated milk over the biscuit and butter mixture. Secure the lid on the slow cooker and set it to low heat. Allow the mixture to cook for two hours, stirring occasionally to ensure the butter and crumbs fully dissolve into a smooth, uniform consistency.Look for The mixture should look thick, creamy, and glossy.Tip Stirring periodically prevents the edges from burning or crusting onto the insert.
During this phase, the ingredients should transition from individual components into a cohesive, bubbling mixture. The evaporated milk will act as the carrier for the flavors.
Check that the mixture is not bubbling too vigorously; it should simply maintain a gentle, consistent heat to allow the crumb structure to break down completely.
Cooling and final setting
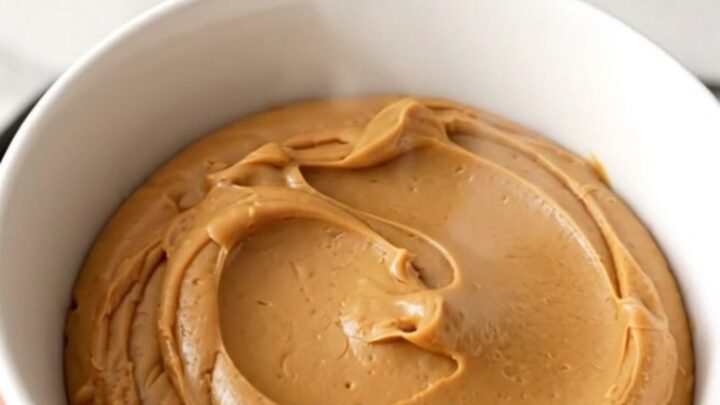
- Cool and finishOnce the cooking time has elapsed, transfer the warm spread into a clean ceramic bowl. Allow it to rest at room temperature for at least 30 minutes. The texture will thicken significantly as it cools down to a spreadable, silky consistency suitable for serving.Look for The spread should be thickened and hold its shape on a spoon.Tip Do not rush the cooling process; the natural setting of the butter helps achieve the final texture.
As the spread cools in the ceramic bowl, it will thicken significantly. It should look like a smooth, thick paste. If it seems too thin while warm, do not worry; it will firm up as the fats solidify during the resting period at room temperature. Ensure it is cooled completely before covering or storing.
Common mistakes
A common mistake is failing to crush the biscuits finely enough, which results in a gritty texture instead of a smooth spread. Another error is neglecting to stir the mixture during the cooking process, which can lead to the edges drying out or the butter separating.
Always ensure the lid is properly seated to maintain the correct humidity and temperature inside the cooker for the duration of the cycle.
How to tell it’s done
The spread is finished when it has reached a thick, glossy, and smooth consistency. It should coat the back of a spoon without dripping off immediately.
When you stir the mixture, it should feel uniform and velvety, with no remaining visible lumps of butter or dry crumbs. The color should be a rich, golden brown, indicating that the spices have properly infused into the liquid base.
Up next · Part 3 of 3
2 variations · storage & make-ahead · 3 answers · printable card
Tips, FAQ & printable recipe (Part 3)← Back to the ingredients (Part 1)