Dinner · Part 2 of 3: Instructions
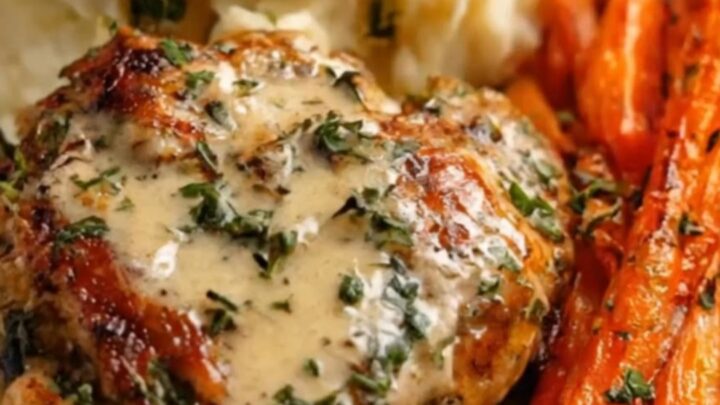
Creamy Herb Chicken with Mashed Potatoes and Roasted Carrots Step-by-step instructions
- Prep
- Cook
- Total
- Serves
- 4
Before you start
Before starting, ensure all vegetables are peeled and prepped to save time. Remove the chicken from the refrigerator about 20 minutes before cooking to help it cook more evenly.
Prepare the mashed potatoes and roasted carrots first, as they can be kept warm while the chicken finishes, ensuring everything is ready to serve at the same time.
Ingredients at a glance (4)
- 4 pieces chicken thighs, bone-in skin-on
- 2 lbs potatoes, peeled and quartered
- 1 lb carrots, peeled and sliced
- 2 tbsp fresh herbs, chopped
Instructions
Preparing the Sides
- Prepare SidesBoil the peeled potatoes in salted water until fork-tender, then drain and mash until smooth. Simultaneously, toss the sliced carrots and roast in a 400°F (200°C) oven until tender and caramelized.Look for Potatoes should be soft enough to mash easily with a fork.Tip Adding a splash of warm milk while mashing makes the potatoes extra fluffy.
The potatoes should be fluffy and smooth, while the roasted carrots should have vibrant color and tender centers. Check that the carrots are caramelized on the edges, which indicates they have developed the necessary sweetness to complement the creamy chicken.
Searing the Chicken
- Sear ChickenHeat a large skillet over medium-high heat. Place the chicken thighs skin-side down and sear until the skin is golden brown and crispy. Flip the chicken to cook the other side thoroughly.Look for The chicken skin should release easily from the pan when perfectly browned.Tip Do not crowd the skillet to ensure the chicken develops a deep, flavorful crust.
The chicken skin must be golden brown and crisp. Check that the bottom of the skillet has developed a rich brown fond, which is the foundation for the upcoming sauce.
Ensure the heat is high enough to sear but not so high that the skin burns before the meat is ready.
Finalizing the Sauce
- Create Sauce and FinishAdd the chopped herbs into the skillet with the chicken. Simmer until the sauce reduces and coats the back of a spoon. Continue cooking until the chicken reaches an internal temperature of 165°F (74°C). Remove from heat and let the chicken rest for 5 minutes before serving.Look for The sauce should be thick enough to cling to the chicken, creating a creamy coating.Safe temperature 165°F (74°C) internal temperature (poultry)Tip Ensure the internal temperature reaches 165°F (74°C) to guarantee safety and tenderness.
The sauce should be thick, creamy, and fragrant with the aroma of fresh herbs. Ensure the chicken is fully cooked through at 165°F (74°C). Check the seasoning of the sauce one last time before removing it from the heat to serve immediately.
Common mistakes
Avoid overcrowding the skillet, as this will cause the chicken to steam instead of sear, preventing the skin from getting crispy.
Another common mistake is adding the cream too early; wait until the chicken is nearly cooked through to ensure the sauce does not separate or over-reduce. Finally, do not skip the resting period, as this is essential for redistributing the juices.
How to tell it’s done
The chicken is perfectly cooked when the juices run clear and an instant-read thermometer inserted into the thickest part of the thigh reads 165°F (74°C).
The meat should be tender and easily pulled away from the bone. The sauce is done when it has reduced to a creamy, velvety consistency that coats the back of a spoon.
- Poultry: 165°F (74°C) in the thickest part
Up next · Part 3 of 3
2 variations · storage & make-ahead · 3 answers · printable card
Tips, FAQ & printable recipe (Part 3)← Back to the ingredients (Part 1)