Dinner · Part 2 of 3: Instructions
Creamy Greek-Style Chicken Broccoli Bake Step-by-step instructions
- Prep
- Cook
- Total
- Serves
- 6
Before you start
Before beginning the cooking process, organize all ingredients and equipment on the counter. Pre-heat the oven to 375°F (190°C). Wash and cut the broccoli into small florets, then steam them for two to three minutes until bright green but still firm.
Slice the chicken breasts into even strips, pat them completely dry with paper towels to ensure a proper sear, and measure out the seasonings, cottage cheese, crumbled feta, fresh dill, and shredded mozzarella.
Ingredients at a glance (7)
- 1 1/2 lb boneless skinless chicken breasts, cut into strips
- 1 tbsp Greek seasoning
- 3 cups broccoli florets, lightly steamed
- 2 cups cottage cheese
- 1/2 cup feta cheese, crumbled
- 1/4 cup fresh dill, finely chopped
- 1 1/2 cups shredded mozzarella cheese
Instructions
Prep and Sear the Chicken
- Prep and Season the ChickenPreheat the oven to 375°F (190°C). Pat the chicken breast strips dry with paper towels to ensure a good sear. Sprinkle the Greek seasoning evenly over the chicken strips, tossing them gently to ensure all sides are fully coated with the herbs and spices.Look for The chicken strips should be evenly coated with seasoning.Tip Ensure the chicken is dry before seasoning so the spices adhere properly.
- Sear the ChickenHeat a large skillet over medium-high heat. Add the seasoned chicken strips in a single layer, working in batches if necessary. Sear the chicken for three to four minutes per side until a golden-brown crust forms.Look for The chicken should have a rich golden-brown exterior.Tip Do not crowd the skillet to prevent the chicken from steaming instead of searing.
At the end of this initial phase, the chicken strips should exhibit a beautiful golden-brown crust on both sides, releasing a savory, seasoned aroma into the kitchen. The meat should not be fully cooked through yet, as it will finish cooking in the oven, but the exterior must be caramelized to lock in the juices. Ensure there is no excess liquid left in the skillet, only a light coating of rendered juices and browned bits.
Assemble the Filling
- Mix the Creamy Cheese BaseIn a large mixing bowl, combine the cottage cheese, crumbled feta, and finely chopped fresh dill. Stir the ingredients thoroughly with a spoon or spatula until the herbs are evenly distributed and a thick, creamy cheese base is formed.Look for The mixture should be thick, creamy, and uniform.Tip Use full-fat cottage cheese for a richer flavor and a more stable sauce.
- Fold in Chicken and BroccoliGently fold the seared chicken strips and the steamed broccoli florets into the cottage cheese mixture. Stir carefully to coat the chicken and broccoli entirely with the creamy sauce, ensuring an even distribution of ingredients throughout the mixture.Look for The chicken and broccoli should be fully coated in cheese sauce.Tip Ensure the broccoli is well-drained to avoid watering down the cheese base.
By the end of this assembly phase, the mixture should look cohesive, thick, and evenly distributed. The white cottage cheese base should be beautifully speckled with green flecks of fresh dill and studded with golden chicken strips and vibrant broccoli florets.
The crumbled feta should be partially folded in, maintaining small pockets of saltiness throughout the mixture, ready to melt slightly and flavor the entire casserole during baking.
Bake to Golden Perfection
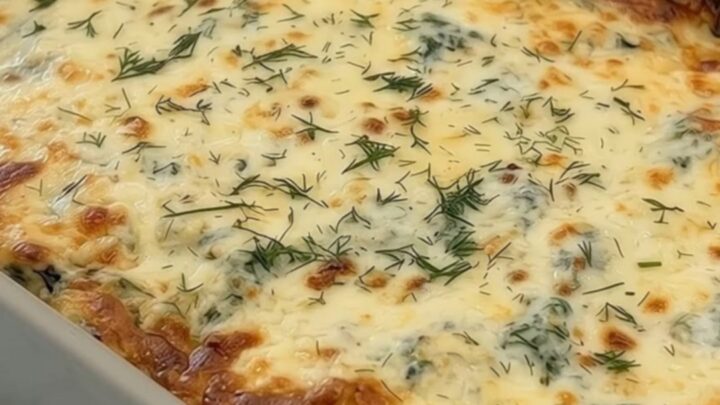
- Assemble and BakeTransfer the mixture to a grey rectangular baking dish, spreading it into an even layer. Sprinkle the shredded mozzarella cheese evenly over the top. Bake for twenty to twenty-five minutes until the casserole is bubbling and the chicken reaches an internal temperature of 165°F (74°C).Look for The cheese should be melted, bubbly, and golden-brown.Safe temperature 165°F (74°C) internal temperature (poultry)Tip Broil for the last two minutes for a deeper golden crust on the mozzarella.
The final checkpoint reveals a spectacular golden-brown casserole bubbling vigorously around the edges of the baking dish. The mozzarella topping should be completely melted, showing patches of deep amber caramelization, with steam rising gently from the center. A spatula inserted into the middle should pull up long, stretchy strands of cheese, revealing a hot, creamy interior where the chicken is fully cooked and the broccoli is tender.
Common mistakes
One common error is using wet broccoli or raw chicken without searing. If the broccoli is not drained properly or if the chicken is boiled rather than seared, excess water will pool at the bottom of the casserole, resulting in a runny, broken sauce.
Another mistake is using watery or low-quality cottage cheese, which lacks the structure to hold up under high heat and will curdle. Finally, avoid overbaking the casserole, which can dry out the chicken breasts and make the mozzarella topping tough and rubbery.
How to tell it’s done
To determine absolute doneness, insert an instant-read meat thermometer into the thickest part of a chicken strip in the center of the casserole. The chicken is safe and fully cooked when the thermometer registers exactly 165°F (74°C).
Additionally, the cheese topping should be fully melted, bubbly, and golden-brown, and the sauce around the edges of the baking dish should be thick and bubbling, indicating that the heat has penetrated completely to the core of the bake.
- Poultry: 165°F (74°C) in the thickest part
Up next · Part 3 of 3
2 variations · storage & make-ahead · 3 answers · printable card
Tips, FAQ & printable recipe (Part 3)← Back to the ingredients (Part 1)