Dinner · Part 2 of 3: Instructions
Creamy Garlic Parmesan White Beans for a Quick Dinner Step-by-step instructions
- Prep
- Cook
- Total
- Serves
- 4
Before you start
Before beginning, verify that your slow cooker is clean and functioning correctly. Gather all ingredients and ensure the cream cheese is softened to room temperature, which will help it melt evenly.
Prepare your garlic by mincing it finely to ensure the flavor distributes throughout the beans.
Have a serving spoon and shallow bowls ready for plating once the cooking process is finished. Ensure you have a clear space on your counter for the slow cooker, away from any heat-sensitive items, to allow for proper airflow during the long cooking duration.
Ingredients at a glance (5)
- 2 cans (15 oz each) cannellini beans, drained and rinsed
- 1/2 cup grated parmesan cheese
- 3 cloves minced garlic
- 1 tbsp dried Italian herbs
- 4 oz cream cheese, softened
Instructions
Initial Preparation
- Combine ingredientsPlace the drained and rinsed cannellini beans into the ceramic insert of your slow cooker. Add the minced garlic, dried Italian herbs, and grated parmesan cheese directly into the pot. Stir the ingredients gently to ensure an even distribution of the herbs and garlic throughout the beans.Look for The beans are evenly mixed with the garlic and herbs.Tip Ensure the beans are well-drained to keep the sauce from becoming too watery during the slow cooking process.
The beans are layered evenly with the herbs and garlic, and the parmesan is distributed. Everything is ready for the slow cooking phase, ensuring all flavors start the process together.
Slow Cooking
- Add cream cheesePlace the block of cream cheese in the center of the bean mixture. Do not stir it in at this stage. Cover the slow cooker with its lid and set it to cook on low heat for approximately 3 hours. This allows the cream cheese to melt slowly and incorporate into the bean juices.Look for The cream cheese is placed centered on top of the bean mixture.Tip Using softened cream cheese helps it melt more uniformly into the sauce during the cooking cycle.
The cream cheese is resting on top, slowly melting into the beans. The kitchen will begin to smell savory and aromatic as the garlic and herbs infuse the liquid during this time.
Final Emulsification
- Finish and serveOnce the cooking time is complete, remove the lid and stir the contents vigorously. The heat from the beans will fully emulsify the melted cream cheese with the parmesan and bean liquids, resulting in a thick, creamy sauce. Serve the beans warm in shallow bowls.Look for The sauce is thick, creamy, and coats the back of a spoon.Tip If the sauce seems too thick after stirring, add a splash of vegetable broth or water to adjust the consistency to your preference.
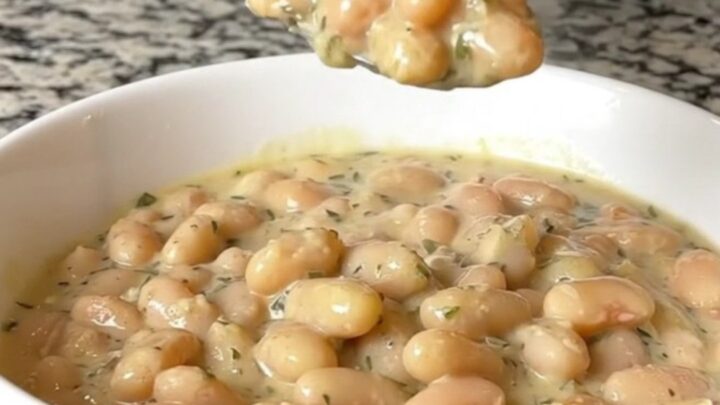
After stirring, the sauce is glossy, thick, and perfectly coats the beans. The final dish is uniform in color and texture, signaling it is ready for immediate serving to your guests.
Common mistakes
A common mistake is failing to rinse the canned beans properly, which can lead to a cloudy and overly salty sauce. Another error is stirring the cream cheese in too early; it must sit on top to melt gently without the risk of breaking the emulsion.
Avoid using high heat settings, as this can cause the dairy to curdle and separate, resulting in a grainy sauce rather than a smooth, velvety one. Finally, ensure the slow cooker lid remains securely on throughout the cooking time to maintain consistent heat.
How to tell it’s done
The dish is done when the beans are tender and the sauce has reached a thick, creamy consistency that coats the back of a spoon. When you stir the mixture, the cream cheese should be completely incorporated with no remaining white streaks.
The aroma should be savory and fragrant with garlic and herbs. There is no protein to monitor for internal temperature, so rely on the visual cues of a smooth, emulsified sauce and softened beans to confirm the dish is ready to be served.
Up next · Part 3 of 3
2 variations · storage & make-ahead · 3 answers · printable card
Tips, FAQ & printable recipe (Part 3)← Back to the ingredients (Part 1)