Dinner · Part 2 of 3: Instructions
Creamy Garlic Parmesan Chicken Penne Step-by-step instructions
- Prep
- Cook
- Total
- Serves
- 4
Before you start
Before you begin cooking, measure out all of your ingredients and have them ready near the stove. Mince the garlic cloves, chop the fresh parsley, and grate both the Parmesan and mozzarella cheeses.
Pat the chicken breasts completely dry with paper towels to ensure a proper sear, and season them generously on both sides. Bring a large pot of salted water to a rolling boil so that the pasta can cook while you prepare the chicken, ensuring everything finishes at the perfect time.
Ingredients at a glance (8)
- 8 oz penne pasta
- 1 lb boneless skinless chicken breasts, seasoned
- 1 tbsp Italian seasoning, mixed with salt and pepper
- 3 garlic cloves, minced
- 1 cup heavy cream
- 1 cup shredded mozzarella cheese
- 1/2 cup grated Parmesan cheese
- 2 tbsp finely chopped fresh parsley
Instructions
Pasta Boiling and Chicken Prep
- Boil the PastaBring a large pot of salted water to a rolling boil. Add the penne pasta and cook according to the package instructions until al dente. Drain the pasta thoroughly and set it aside.Look for The pasta should be tender but still retain a slight firmness when bitten.Tip Reserve a half cup of pasta water before draining to help adjust the sauce later if needed.
- Season the ChickenPat the boneless skinless chicken breasts dry with paper towels. Season both sides of the chicken evenly with the Italian seasoning, salt, and black pepper, pressing the spices gently into the meat.Look for The chicken breasts should be fully and evenly coated in the dry herb mixture.Tip Ensure the chicken is patted completely dry to achieve a superior golden-brown crust when searing.
At the end of this initial phase, the penne pasta is cooked to a perfect al dente texture, drained, and waiting. The chicken breasts are completely dry and evenly coated in a fragrant layer of Italian seasoning, salt, and black pepper. The kitchen smells slightly of savory dried herbs, and all ingredients are prepped and ready for the hot skillet.
Searing Chicken and Crafting the Cream Sauce
- Sear the ChickenHeat a large skillet over medium-high heat. Add the seasoned chicken breasts and sear undisturbed for 6 to 8 minutes per side, or until they develop a rich golden-brown crust and reach an internal temperature of 165°F (74°C). Transfer the chicken to a cutting board and let it rest for 5 minutes before slicing.Look for A digital meat thermometer inserted into the thickest part of the breast must read 165°F (74°C).Safe temperature 165°F (74°C) internal temperature (poultry)Tip Do not crowd the skillet or move the chicken too much while searing to ensure a deep crust.
- Sauté the GarlicReduce the heat to medium. Add the minced garlic cloves directly to the same skillet, scraping up any browned bits left from cooking the chicken, and sauté for 1 minute until fragrant.Look for The garlic should be soft and aromatic without turning brown or burning.Tip Stir the garlic constantly to prevent it from scorching in the hot pan.
- Simmer the Cheese SaucePour the heavy cream into the skillet and bring to a gentle simmer. Reduce the heat to low and gradually whisk in the shredded mozzarella cheese and grated Parmesan cheese. Continue whisking until the cheeses are completely melted and the sauce is smooth and glossy.Look for The sauce should be uniform, creamy, and free of any lumps or separation.Tip Keep the heat low when adding cheese to prevent the dairy from splitting or becoming grainy.
By the end of this phase, the chicken breasts are beautifully browned with a deep golden crust, having reached a safe internal temperature of 165°F (74°C). The skillet is filled with a rich, bubbling, and glossy mozzarella cream sauce that smells intensely of garlic and toasted cheese. The sauce is completely smooth, free of clumps, and ready to receive the pasta.
Combining Pasta and Presentation
- Toss the PastaAdd the cooked and drained penne pasta directly into the skillet with the cheese sauce. Toss the pasta gently using tongs or a wooden spoon until every piece is thoroughly coated and heated through.Look for The sauce should cling beautifully to the ridges of the penne, filling the tubes.Tip If the sauce seems too thick, splash in a little reserved pasta water to loosen it.
- Slice and ServeSlice the rested seared chicken breasts into even strips. Divide the creamy penne pasta among serving plates, arrange the sliced chicken on top, and garnish with the finely chopped fresh parsley. Serve immediately.Look for The dish is ready when hot, steaming, and presented with a bright green parsley garnish.Tip Serve in warmed shallow bowls to keep the creamy cheese sauce at the ideal temperature.
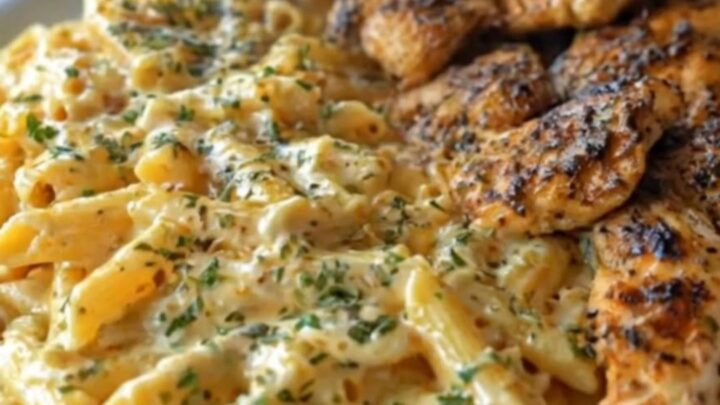
At the final checkpoint, the cooked penne is thoroughly tossed in the warm sauce, with every tube and ridge coated in a glossy, steaming cheese layer.
The rested chicken is sliced into clean, even strips and arranged beautifully alongside the pasta. The entire dish is garnished with bright green parsley, sending up a rich, warm aroma of garlic, cheese, and seared poultry.
Common mistakes
One common mistake is rushing the chicken searing process or moving the chicken around too much in the pan. To get a beautiful golden crust, let the chicken sear undisturbed in the hot skillet.
Another frequent error is boiling the cream sauce too vigorously after adding the cheese. High heat can cause the dairy to split and the cheese to clump, resulting in an oily, separated sauce. Always reduce the heat to low before whisking in the grated cheeses.
How to tell it’s done
The chicken is perfectly cooked when a digital meat thermometer inserted into the thickest part of the breast registers exactly 165°F (74°C). The exterior should be deeply golden-brown, and the juices should run clear.
The pasta is done when it is al dente, meaning it still has a slight bite to it and is not mushy, as it will continue to cook slightly when tossed in the hot cream sauce.
- Poultry: 165°F (74°C) in the thickest part
Up next · Part 3 of 3
2 variations · storage & make-ahead · 3 answers · printable card
Tips, FAQ & printable recipe (Part 3)← Back to the ingredients (Part 1)