Dinner · Part 2 of 3: Instructions
Quick Creamy Garlic Parmesan Chicken Pasta Step-by-step instructions
- Prep
- Cook
- Total
- Serves
- 4
Before you start
Before you start, bring a large pot of salted water to a boil for the pasta. Have all your ingredients measured and ready: pound the chicken, mince the garlic, grate the parmesan, and chop the parsley.
Set out a large skillet and a meat mallet or rolling pin. The cooking moves quickly, so having everything prepped will make the process smooth and stress-free.
Ingredients at a glance (12)
- 1 lb boneless, skinless chicken breasts
- 1 tsp smoked paprika
- 1 tsp garlic powder
- 1/2 tsp salt
- 1/4 tsp black pepper
- 2 tbsp olive oil
- 2 tbsp butter
- 4 cloves garlic, minced
- 2 cups heavy cream
- 1 cup grated parmesan cheese
- 12 oz fettuccine pasta
- 2 tbsp fresh parsley, chopped
Instructions
Phase 1: Sear the Chicken
- Pound and Season the ChickenPlace the chicken breasts between two sheets of plastic wrap and pound to an even 1/2-inch thickness. In a small bowl, mix the smoked paprika, garlic powder, salt, and black pepper. Rub the seasoning all over both sides of the chicken.Look for The chicken is evenly thin, about 1/2 inch thick, and fully coated with the spice rub.Tip If you don't have a meat mallet, use a heavy skillet or rolling pin to pound gently.
- Sear the ChickenHeat the olive oil in a large skillet over medium-high heat until shimmering. Add the chicken and cook for 3-4 minutes per side, until golden brown and cooked through. Transfer the chicken to a plate and set aside.Look for The chicken is golden brown on both sides and registers 165°F (74°C) at the thickest point.Safe temperature 165°F (74°C) internal temperature (poultry)Tip Do not crowd the pan; cook in batches if needed to get a good sear.
The chicken should be golden brown on both sides, with a nice crust, and cooked through to 165°F (74°C).
The kitchen will smell of smoked paprika and garlic. Set the chicken aside on a plate; the skillet will hold the browned bits that flavor the sauce.
Phase 2: Make the Cream Sauce
- Start the Cream SauceReduce the heat to medium and add the butter to the same skillet. Once melted, add the minced garlic and sauté for 30 seconds until fragrant. Pour in the heavy cream and bring to a gentle simmer, scraping up any browned bits from the bottom of the pan.Look for The garlic is fragrant and the cream is bubbling gently, with the browned bits dissolved into the sauce.Tip Stir constantly to prevent the cream from scorching on the bottom.
- Add the ParmesanGradually whisk in the grated parmesan cheese, stirring until the sauce is smooth and thickens slightly. It should coat the back of a spoon.Look for The sauce is smooth and thick enough to coat the back of a spoon.Tip Add the cheese off the heat if the sauce is too hot, to avoid clumping.
The sauce should be smooth and slightly thickened, with the parmesan fully melted. It will smell rich and garlicky, and the color will be a pale golden cream. The sauce should coat the back of a spoon without being too thick.
Phase 3: Combine and Serve
- Cook the PastaBring a large pot of salted water to a boil and cook the fettuccine according to package instructions until al dente. Drain the pasta, reserving about 1/2 cup of the pasta water.Look for The pasta is tender but still firm to the bite, and the reserved water is starchy.Tip Reserve some pasta water to thin the sauce if needed.
- Combine Pasta and SauceAdd the drained fettuccine directly to the skillet with the cream sauce. Toss well to coat every noodle, adding a splash of pasta water if the sauce is too thick.Look for Every noodle is glossy and coated with the sauce.Tip Use tongs to toss the pasta gently and evenly.
- Slice and Add the ChickenSlice the cooked chicken into strips and place on top of the pasta. Toss everything together so the chicken is coated with the sauce.Look for The chicken slices are warm and coated with the creamy sauce.Tip Slice the chicken against the grain for maximum tenderness.
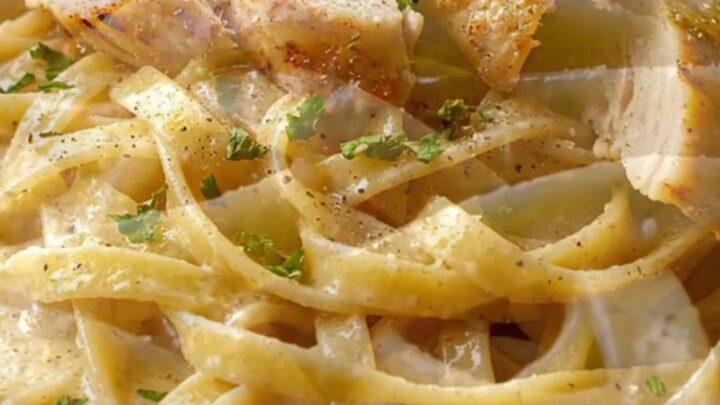
- Garnish and ServeSprinkle with fresh cracked black pepper and chopped parsley. Serve immediately, passing extra parmesan at the table if desired.Look for The dish is garnished with green parsley and freshly cracked pepper.Tip For an extra touch, add a drizzle of olive oil before serving.
The pasta is glossy and fully coated with the sauce, and the chicken slices are nestled throughout. The dish is hot and fragrant, with a final sprinkle of parsley and black pepper. Everything should be evenly distributed and ready to serve immediately.
Common mistakes
One common mistake is overcooking the chicken, which makes it dry. Pound it thin and watch the timing. Another is boiling the cream too vigorously, which can cause it to curdle; keep it at a gentle simmer.
Adding the parmesan all at once can create lumps; whisk it in gradually over low heat. Finally, don't skip the pasta water—it helps loosen the sauce to the perfect consistency.
How to tell it’s done
The chicken is done when it reaches an internal temperature of 165°F (74°C) and is golden brown on both sides. The sauce is ready when it coats the back of a spoon.
The pasta is al dente—tender but still firm to the bite. When everything is combined, the noodles should be glossy and well-coated, with the chicken slices heated through.
- Poultry: 165°F (74°C) in the thickest part
Up next · Part 3 of 3
4 variations · storage & make-ahead · 5 answers · printable card
Tips, FAQ & printable recipe (Part 3)← Back to the ingredients (Part 1)