Dinner · Part 2 of 3: Instructions
Creamy Garlic Parmesan Chicken for a Quick Dinner Step-by-step instructions
- Prep
- Cook
- Total
- Serves
- 4
Before you start
Before starting, ensure all ingredients are measured and ready. Mince the garlic finely to ensure it distributes evenly throughout the sauce. Have your glass baking dish nearby so you can transfer the chicken immediately after searing.
Remember to wash your hands and surfaces after handling raw poultry to maintain food safety standards. If you are using fresh herbs, wash and chop them just before the final garnish step to keep them vibrant and aromatic.
Ingredients at a glance (5)
- 4 chicken breasts
- 4 cloves garlic, minced
- 1 cup heavy cream
- 1/2 cup parmesan cheese, grated
- fresh herbs, for serving
Instructions
Searing the chicken
- Prepare the chickenPlace the chicken breasts in a skillet over medium-high heat. Sear the chicken on both sides until golden brown and cooked through, ensuring the internal temperature reaches at least 165°F (74°C). Remove the chicken from the skillet and set it aside to rest for at least 5 minutes before placing it into a glass baking dish.Look for Chicken is golden brown and firm to the touchSafe temperature 165°F (74°C) internal temperature (poultry)Tip Ensure the chicken is patted dry before searing for better color.
The chicken should be evenly browned on both sides and firm to the touch. Ensure the internal temperature has reached the safe threshold of 165°F (74°C). The pan should have some browned bits at the bottom, which will add flavor to the sauce. If the chicken is not yet cooked through, finish it in the pan before proceeding to the sauce phase.
Building the sauce
- Create the creamy sauceIn the same skillet, add the minced garlic and sauté until fragrant. Pour in the heavy cream and bring to a gentle simmer. Stir in the parmesan cheese until the sauce is smooth and thickened. Pour the rich garlic cream sauce over the rested chicken breasts in the baking dish.Look for Sauce coats the back of a spoonTip Use a whisk to incorporate the cheese smoothly into the cream.
The sauce should smell aromatic with garlic and appear smooth, creamy, and slightly thickened. When you drag a spoon through the sauce, it should leave a clear trail.
The parmesan should be completely melted and integrated. If the sauce seems too thick, add a splash of heavy cream to reach your desired consistency before pouring it over the chicken.
Broiling to finish
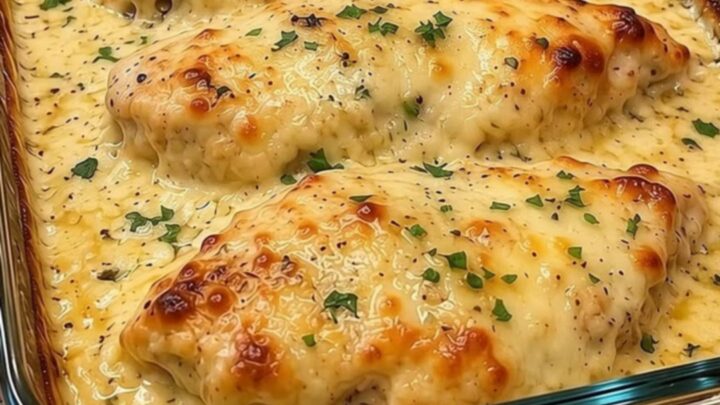
- Broil and garnishPlace the baking dish under a preheated broiler for a few minutes until the sauce is bubbling and the cheese is golden brown. Carefully remove from the oven and sprinkle with fresh herbs before serving immediately.Look for Sauce is bubbling and cheese is goldenTip Watch the broiler closely to prevent burning the top.
The dish is ready when the cheese is bubbling and has developed a beautiful golden-brown color. The sauce should be hot and slightly reduced. Keep a close eye on the broiler to avoid any burnt edges. Once it reaches this stage, remove the dish carefully from the oven, garnish with fresh herbs, and serve while it is piping hot.
Common mistakes
A common mistake is overcrowding the skillet, which causes the chicken to steam rather than sear properly. Work in batches if necessary to ensure each piece gets a nice golden crust.
Another error is rushing the cheese incorporation; add the parmesan slowly while whisking constantly to prevent the sauce from becoming grainy. Finally, avoid leaving the dish under the broiler for too long, as the cheese can go from golden to burnt very quickly.
How to tell it’s done
The chicken is perfectly cooked when it reaches an internal temperature of 165°F (74°C). You can check this using a digital meat thermometer inserted into the thickest part of the breast.
The sauce should be thick enough to coat the back of a spoon, and the cheese topping should be bubbling and golden brown after broiling. If the chicken is not quite at temperature, continue cooking on the stovetop before adding the sauce.
- Poultry: 165°F (74°C) in the thickest part
Up next · Part 3 of 3
2 variations · storage & make-ahead · 3 answers · printable card
Tips, FAQ & printable recipe (Part 3)← Back to the ingredients (Part 1)