Dinner · Part 2 of 3: Instructions
Creamy Garlic Chicken with Fluffy Rice Step-by-step instructions
- Prep
- Cook
- Total
- Serves
- 4
Before you start
Before beginning, ensure all ingredients are measured and ready. Cut the chicken breasts into uniform bite-sized cubes, as this ensures even cooking and prevents smaller pieces from drying out while larger ones finish.
Have your garlic minced and your cream measured. Ensure you have a clean workspace and all necessary equipment, including a reliable instant-read thermometer, within reach to maintain efficiency throughout the cooking process.
Ingredients at a glance (4)
- 1 1/2 lb boneless skinless chicken breasts, cut into bite-sized pieces
- 4 cloves garlic, minced
- 1 cup heavy cream
- 2 cups cooked white rice
Instructions
Searing the Chicken
- Sear the ChickenHeat a large skillet over medium-high heat. Add the bite-sized chicken pieces to the pan in a single layer. Cook the chicken until golden brown on all sides and cooked through, ensuring it reaches an internal temperature of 165°F (74°C). Remove the chicken from the pan and set it aside.Look for The chicken should be golden brown on the outside and opaque throughout.Safe temperature 165°F (74°C) internal temperature (poultry)Tip Ensure the pan is hot before adding the chicken to achieve a good sear.
The chicken pieces should be golden brown and cooked through. Ensure the pan is properly heated to achieve this initial color, which is vital for the overall flavor of the finished dish. Check that the meat is tender and fully opaque before proceeding to the sauce preparation phase.
Creating the Sauce
- Prepare the Garlic SauceIn the same skillet, add the minced garlic and sauté briefly until fragrant, taking care not to burn it. Pour in the heavy cream and stir continuously, scraping up any browned bits from the bottom of the pan to incorporate all the flavor into the sauce. Allow the cream to simmer gently until it begins to thicken slightly.Look for The sauce should thicken enough to coat the back of a spoon.Tip Reduce the heat to low if the cream begins to boil too rapidly to prevent splitting.
The garlic should be soft and aromatic, and the cream should have thickened to a velvety, smooth consistency.
The sauce should be uniform in color and texture, with no signs of separation. Ensure the heat is controlled carefully during this phase to maintain the perfect sauce consistency.
Final Assembly
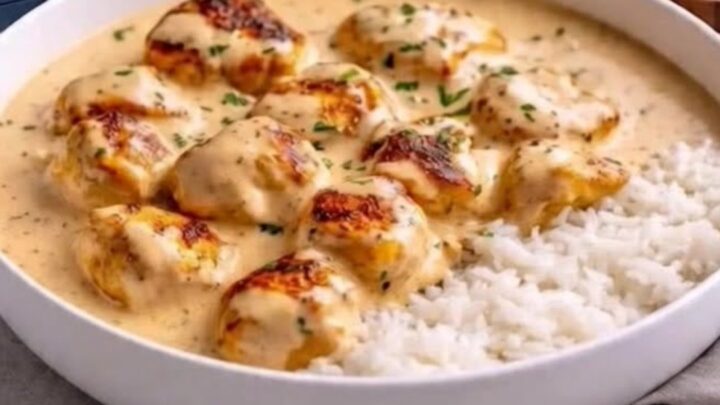
- Combine and ServeReturn the cooked chicken pieces to the skillet with the garlic sauce. Toss gently to ensure every piece is thoroughly coated in the cream. Let the chicken rest for 5 minutes to allow the flavors to meld. Serve the creamy garlic chicken warm over a bed of fluffy white rice.Look for The sauce should be glossy and clinging to the chicken pieces.Tip Serve immediately while steaming hot for the best texture and flavor experience.
The chicken should be fully coated in the garlic cream sauce. The dish should be served steaming hot, with the rice providing a neutral base that complements the richness of the sauce. Check that all components are heated through before plating for an optimal dining experience.
Common mistakes
Avoid overcrowding the pan when searing the chicken, as this causes the meat to steam rather than brown, resulting in a lack of flavor. Do not skip the resting time, as this allows the juices to redistribute, ensuring the chicken remains tender.
Finally, be careful not to let the garlic brown too deeply before adding the cream, as burnt garlic will introduce a bitter, unpleasant note to the entire dish.
How to tell it’s done
The chicken is done when it is golden brown on the outside and opaque throughout, with an internal temperature reaching 165°F (74°C). The sauce should be thick enough to coat the back of a spoon and should appear glossy.
If the sauce remains too thin, continue to simmer it for an additional minute, stirring constantly to prevent it from burning at the bottom of the pan.
- Poultry: 165°F (74°C) in the thickest part
Up next · Part 3 of 3
2 variations · storage & make-ahead · 3 answers · printable card
Tips, FAQ & printable recipe (Part 3)← Back to the ingredients (Part 1)