Dinner · Part 2 of 3: Instructions
Creamy Garlic Chicken Skillet Step-by-step instructions
- Prep
- Cook
- Total
- Serves
- 4
Before you start
Before beginning, ensure all ingredients are measured and ready, as the cooking process moves quickly once the pan is hot. Pat the chicken cutlets thoroughly dry with paper towels to facilitate browning.
Ensure the cast-iron skillet is clean and properly seasoned to prevent sticking. If the chicken is thick, pound it to a consistent half-inch thickness using a meat mallet or the bottom of a heavy pan to guarantee that it cooks through evenly without drying out.
Ingredients at a glance (2)
- 4 pieces chicken breast cutlets
- 1 cup creamy garlic sauce
Instructions
Searing the chicken
- Sear the chickenPlace the chicken cutlets into a hot cast-iron skillet. Sear the chicken until it develops a golden-brown crust on both sides and reaches an internal temperature of 165°F (74°C). Remove the chicken from the skillet and let it rest on a plate for at least 5 minutes.Look for The chicken should be golden brown and firm to the touch.Safe temperature 165°F (74°C) internal temperature (poultry)Tip Ensure the skillet is hot before adding the chicken to achieve a proper sear.
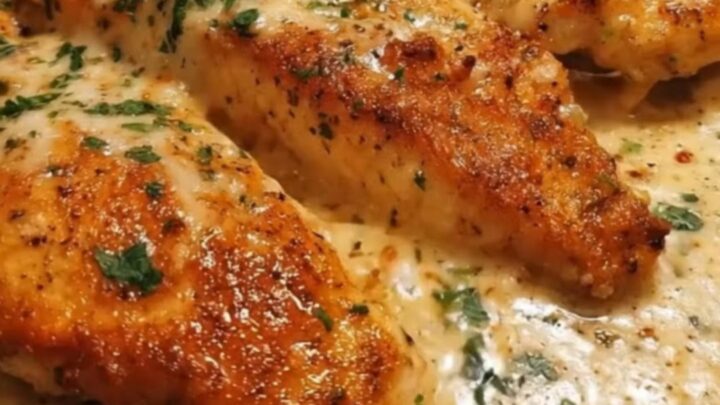
The chicken should be beautifully browned on both sides, with a crisp golden exterior. The pan should have developed a dark, flavorful fond on the bottom. Check that the internal temperature of the chicken has reached 165°F (74°C) before moving the pieces to a plate to rest.
Simmering the garlic sauce
- Add the saucePour the creamy garlic sauce into the skillet with the pan drippings. Stir gently to combine the sauce with the browned bits from the chicken, allowing it to heat through until it begins to bubble.Look for The sauce should be bubbling and aromatic.Tip Keep the heat at a medium setting to prevent the sauce from boiling too rapidly.
The kitchen should be filled with the intense aroma of the garlic sauce. The sauce should be bubbling gently and transforming into a smooth, thickened consistency. The sauce should appear glossy and rich, having picked up all the savory flavor from the bottom of the skillet.
Final assembly
- Combine and serveReturn the seared chicken cutlets to the skillet, coating them thoroughly with the bubbling creamy garlic sauce. Serve the chicken immediately while hot, ensuring each piece is well-covered with the sauce.Look for The sauce should cling to the chicken, creating a glossy finish.Tip Serve immediately to enjoy the contrast between the seared chicken and the creamy sauce.
The chicken should be fully integrated with the sauce, and the entire dish should be hot and fragrant. The sauce should be coating each piece of chicken uniformly, with no separation. Ensure the meal is served while piping hot for the best texture and flavor experience.
Common mistakes
A common mistake is overcrowding the skillet, which drops the pan temperature and prevents the chicken from browning correctly.
Always work in batches if necessary. Another frequent error is adding the sauce while the pan is too hot, which can cause the sauce to separate or curdle.
Reduce the heat before adding the sauce and stir constantly to create a smooth emulsion. Finally, failing to scrape the browned bits from the pan after searing the chicken means missing out on the essential depth of flavor.
How to tell it’s done
The chicken is done when it reaches an internal temperature of 165°F (74°C) as measured by a meat thermometer inserted into the thickest part. Visually, the juices should run clear and the exterior should be a deep, golden-brown color.
The sauce is ready when it has thickened enough to coat the back of a spoon and is bubbling consistently. Do not overcook the chicken, as it will lose its moisture and tenderness even when shielded by the sauce.
- Poultry: 165°F (74°C) in the thickest part
Up next · Part 3 of 3
2 variations · storage & make-ahead · 3 answers · printable card
Tips, FAQ & printable recipe (Part 3)← Back to the ingredients (Part 1)