Dinner · Part 2 of 3: Instructions
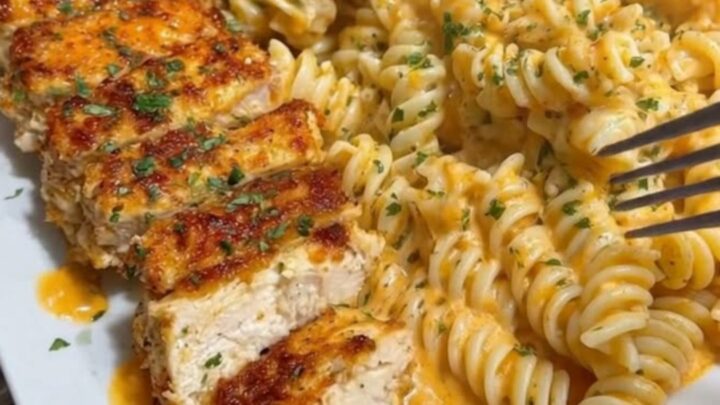
Creamy Garlic Butter Chicken Rotini for a Quick Dinner Step-by-step instructions
- Prep
- Cook
- Total
- Serves
- 4
Before you start
Before starting, ensure all ingredients are measured and ready to go, as the cooking process moves quickly. Cut the chicken into uniform, bite-sized pieces to ensure they cook evenly. Grate the cheese if using blocks, and have a colander ready for the pasta.
Pre-heating the skillet to the correct temperature is essential for achieving a good sear on the chicken, so allow it to heat up for a minute or two before adding the meat. Having everything within reach will help you maintain the perfect consistency for the cream sauce.
Ingredients at a glance (5)
- 1 lb boneless skinless chicken breast, cut into bite-sized pieces
- 12 oz rotini pasta
- 3 tbsp unsalted butter
- 3 cloves garlic, minced
- 1 cup three-cheese sauce base
Instructions
Searing the Chicken
- Prepare the pasta and chickenBring a large pot of salted water to a boil and cook the rotini until al dente. While the water heats, season the chicken pieces with salt and pepper. Heat a large skillet over medium-high heat and sear the chicken until golden brown and cooked through to 165°F (74°C). Remove the chicken from the pan and set aside.Look for The chicken should be golden brown on all sides and no longer pink inside.Safe temperature 165°F (74°C) internal temperature (poultry)Tip Ensure the chicken pieces are uniform in size for even cooking.
The chicken should be browned and cooked through to 165°F (74°C). The bottom of the pan will have small, flavorful brown bits that will provide the base for the garlic butter sauce.
Making the Sauce
- Create the garlic sauceIn the same skillet, melt the butter over medium heat. Add the minced garlic and sauté for one minute until fragrant. Pour in the three-cheese sauce base and bring to a gentle simmer. Once bubbling, stir until the sauce is smooth, glossy, and fully heated through.Look for The sauce will thicken slightly and become glossy once heated through.Tip Keep the heat at a low simmer to prevent the sauce from separating.
The sauce should be smooth and glossy. As the cheese melts into the heavy cream and garlic butter, it will thicken into a rich, velvety consistency that smells savory and fragrant.
Combining the Dish
- Combine and serveAdd the cooked rotini and the seared chicken back into the skillet with the cheese sauce. Toss everything together using tongs until the pasta and chicken are thoroughly coated in the creamy mixture. Serve immediately while hot to enjoy the best texture.Look for The sauce should coat the pasta completely with no excess liquid remaining in the pan.Tip If the sauce gets too thick, add a splash of reserved pasta water.
The pasta and chicken should be completely coated in the sauce. The dish should look uniform, with the sauce clinging to the rotini spirals and the chicken pieces distributed throughout.
Common mistakes
A common mistake is overcrowding the skillet when searing the chicken, which causes the meat to steam instead of brown, resulting in less flavor.
Another frequent error is using heat that is too high when melting the cheese, which can cause the sauce to break or become oily.
Always maintain a gentle simmer and add the cheese gradually while stirring to ensure a smooth, emulsified finish. Lastly, avoid overcooking the pasta, as it will continue to absorb the sauce and soften slightly once combined in the skillet.
How to tell it’s done
The chicken is done when it reaches an internal temperature of 165°F (74°C) and is golden brown on the outside. For the sauce, doneness is achieved when the cheese is fully melted and the mixture has transformed into a thick, glossy coating that clings to the pasta.
If the sauce appears too thin, continue to simmer gently for another minute, stirring constantly to prevent burning. The pasta should be cooked to an al dente texture, providing a slight resistance to the bite, which complements the softness of the cream sauce.
- Poultry: 165°F (74°C) in the thickest part
Up next · Part 3 of 3
2 variations · storage & make-ahead · 3 answers · printable card
Tips, FAQ & printable recipe (Part 3)← Back to the ingredients (Part 1)