Dinner · Part 2 of 3: Instructions
Creamy Garlic Butter Chicken Linguine for a Quick Dinner Step-by-step instructions
- Prep
- Cook
- Total
- Serves
- 4
Before you start
Before beginning, ensure all ingredients are measured and ready, as the cooking process is rapid. Cut the chicken into uniform bite-sized pieces to ensure even cooking. Mince the garlic finely and grate the parmesan cheese.
Bring a large pot of water to a boil for the pasta, adding a generous amount of salt once it begins to bubble. Have your skillet, tongs, and serving plates within easy reach to maintain the flow of the recipe.
Ingredients at a glance (7)
- 1 lb chicken breast, cut into bite-sized chunks
- 3 tbsp unsalted butter
- 4 cloves garlic, minced
- 1 cup heavy cream
- 1/2 cup grated parmesan cheese
- 8 oz linguine
- fresh parsley, chopped, for serving
Instructions
Searing the Chicken
- Prepare the ChickenHeat a large skillet over medium-high heat. Add the chicken breast chunks and sear them until they are browned and cooked through, reaching an internal temperature of 165°F (74°C). Remove the chicken from the skillet and set aside to rest for at least 5 minutes before serving.Look for Chicken should be golden brown and opaque throughout.Safe temperature 165°F (74°C) internal temperature (poultry)Tip Ensure the pan is hot before adding the chicken to get a good sear.
The chicken should be golden-brown on all sides and cooked through. The bottom of the skillet will have flavorful brown bits, known as fond, which will contribute significantly to the depth of the sauce later.
Ensure the pan is not too crowded so the chicken browns properly rather than steaming in its own juices.
Creating the Creamy Sauce
- Make the SauceIn the same skillet, melt the butter over medium heat. Add the minced garlic and sauté until fragrant, about one minute. Pour in the heavy cream and bring to a gentle simmer. Stir in the parmesan cheese until the sauce is smooth and velvety.Look for The sauce should thicken enough to coat the back of a spoon.Tip Whisk the cheese in gradually to ensure it melts evenly without clumping.
The garlic should be aromatic and soft without being browned. The cream and parmesan mixture should be simmering gently, turning into a smooth, thick, and velvety sauce. It should look cohesive and glossy, with no signs of oil separation. This is the base that will hold all the flavors together.
Tossing the Pasta
- Combine and ServeWhile the sauce simmers, boil the linguine in a separate pot of salted water until al dente. Drain the pasta and add it directly into the skillet with the cream sauce. Toss the cooked chicken back into the skillet. Mix everything together until the pasta is well-coated. Garnish with fresh parsley before serving.Look for The sauce should cling to the pasta strands perfectly.Tip Reserve a splash of pasta water if the sauce becomes too thick.
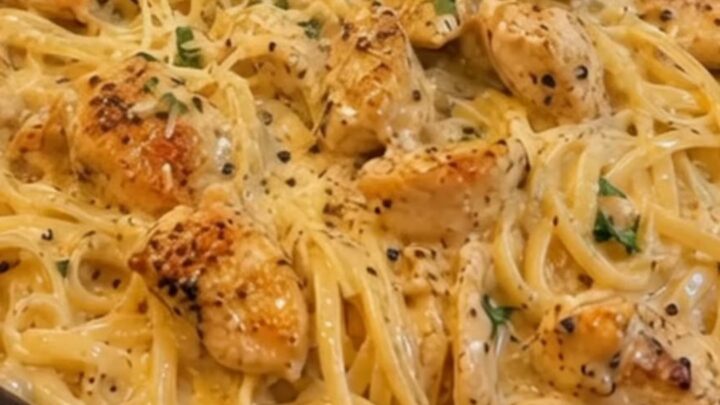
The pasta should be fully coated in the sauce, with the chicken pieces distributed evenly throughout. The final dish should look glistening and rich, with the parsley providing a pop of color. The sauce should be thick enough to cling to the noodles, creating a perfect, comforting bite of creamy goodness.
Common mistakes
A common mistake is overcrowding the skillet when searing the chicken, which causes the meat to steam rather than brown. Another error is adding the parmesan cheese while the sauce is at a rolling boil, which can cause the cheese to clump or the sauce to break.
Always reduce the heat to a gentle simmer before adding the cheese to ensure a smooth, emulsified texture that perfectly coats the linguine for the best possible result.
How to tell it’s done
The chicken is perfectly cooked when it reaches an internal temperature of 165°F (74°C) and is golden brown on the exterior. The sauce should be thick enough to coat the back of a spoon without being oily or separated.
When the pasta is added, it should be tender but still have a slight bite, known as al dente, which ensures it holds its shape when tossed in the rich, creamy sauce.
- Poultry: 165°F (74°C) in the thickest part
Up next · Part 3 of 3
2 variations · storage & make-ahead · 3 answers · printable card
Tips, FAQ & printable recipe (Part 3)← Back to the ingredients (Part 1)