Dinner · Part 2 of 3: Instructions
Creamy Garlic Butter Chicken and Rotini in Parmesan Sauce Step-by-step instructions
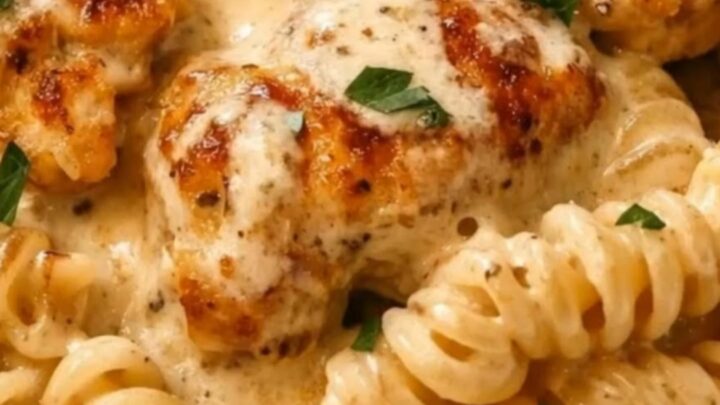
- Prep
- Cook
- Total
- Serves
- 4
Before you start
Before turning on the stove, gather and measure all ingredients to ensure a smooth cooking process. Pat the chicken breasts dry with paper towels. Mince the garlic cloves and freshly grate the parmesan cheese.
Bring a large pot of water to a rolling boil for the rotini pasta. Having everything prepped and ready to go prevents the garlic from burning and ensures the sauce comes together seamlessly.
Ingredients at a glance (7)
- 1 1/2 lb boneless skinless chicken breasts
- 12 oz rotini pasta
- 4 tbsp unsalted butter
- 4 cloves garlic, minced
- 1 1/2 cups heavy cream
- 1 cup parmesan cheese, freshly grated
- 2 tbsp fresh parsley, chopped
Instructions
Searing the Chicken
- Sear the ChickenMelt butter in a large skillet over medium-high heat. Add the chicken breasts and sear for 6 to 8 minutes per side, until a golden crust forms and the internal temperature reaches 165°F (74°C). Transfer the chicken to a plate.Look for The chicken develops a beautiful deep golden crust and the juices run clear.Safe temperature 165°F (74°C) internal temperature (poultry)Tip Avoid moving the chicken too much during the first few minutes to ensure a good sear.
- Boil the PastaWhile the chicken cooks, bring a large pot of water to a boil. Add the rotini pasta and cook according to the package instructions until al dente, which typically takes about 8 to 10 minutes. Drain the pasta thoroughly, but do not rinse it, and set it aside.Look for The pasta is tender but still has a slight bite in the center.Tip Save half a cup of pasta water before draining to help adjust the sauce later if needed.
At the end of this phase, the chicken breasts should have a beautiful golden-brown crust on both sides and sizzle gently in the skillet.
The kitchen will fill with the rich, savory aroma of browning butter and seared poultry. Check that the thickest part of the chicken has reached a safe internal temperature before removing it from the heat to rest.
Building the Creamy Garlic Sauce
- Sauté the GarlicReduce the skillet heat to medium-low. Add the minced garlic to the remaining melted butter in the pan. Sauté for about 1 minute, stirring constantly to prevent burning, while scraping up the savory browned bits left behind by the chicken from the bottom of the skillet.Look for The garlic becomes highly fragrant and soft without turning brown.Tip Keep the heat low during this step, as burnt garlic will make the entire sauce taste bitter.
- Build the Parmesan SaucePour the heavy cream into the skillet and bring the mixture to a gentle simmer. Gradually whisk in the freshly grated parmesan cheese. Keep stirring over low heat until the cheese is completely melted and the sauce becomes smooth, glossy, and slightly thickened.Look for The sauce is smooth and coats the back of a spoon without any clumping.Tip Whisking constantly helps the cheese incorporate smoothly without separating.
The skillet should now hold a gently bubbling, velvety cream sauce that has thickened slightly. The grated parmesan should be completely melted and integrated, creating a smooth, glossy texture. The aroma of sweet cooked garlic and nutty parmesan should be prominent, and the sauce should easily coat the back of a spoon.
Combining and Serving
- Toss the RotiniAdd the drained rotini pasta directly into the bubbling garlic parmesan cream sauce. Gently toss the pasta for 1 to 2 minutes to ensure that every spiral is thoroughly coated in the velvety sauce and heated through.Look for The sauce clings beautifully to the spirals of the pasta.Tip Tossing the pasta directly in the warm sauce allows the starch to bind with the cream.
- Slice and GarnishSlice the rested chicken breasts into strips. Arrange the warm chicken over the creamy rotini pasta in the skillet or on individual serving plates. Garnish the dish with chopped fresh parsley and serve immediately.Look for The dish is beautifully presented with vibrant green parsley over the golden chicken and pasta.Tip Slice the chicken against the grain for the most tender texture.
The rotini pasta should be thoroughly coated in the luxurious garlic parmesan sauce, with no excess liquid pooling at the bottom. The seared chicken breasts, rested and sliced, should look incredibly juicy. Garnish with fresh parsley to add a bright pop of green contrast against the golden, creamy dish.
Common mistakes
A common mistake is cooking the garlic over high heat, which causes it to burn quickly and turn bitter, ruining the delicate cream sauce. Always reduce the heat to medium-low before adding the garlic, and sauté it only until fragrant, about one minute.
Another error is adding the cooked pasta to the sauce cold or completely dry; instead, toss the rotini into the sauce immediately after draining so the warm starches can bind with the cream and cheese.
How to tell it’s done
The chicken breasts are fully cooked and safe to eat when an instant-read digital meat thermometer inserted into the thickest part registers 165°F (74°C). The meat should feel firm to the touch and the juices should run clear.
The sauce is perfectly done when it reaches a velvety, coat-the-back-of-a-spoon consistency, bubbling gently but not boiling rapidly, which could cause the dairy to separate.
- Poultry: 165°F (74°C) in the thickest part
Up next · Part 3 of 3
2 variations · storage & make-ahead · 3 answers · printable card
Tips, FAQ & printable recipe (Part 3)← Back to the ingredients (Part 1)