Dinner · Part 2 of 3: Instructions
Creamy Garlic Broccoli Chicken Bake Step-by-step instructions
- Prep
- Cook
- Total
- Serves
- 4
Before you start
Before you begin, ensure your oven is fully preheated to 375°F (190°C) to ensure the dish starts cooking immediately upon entering the oven. Prepare your ingredients by washing and drying the broccoli, dicing the red bell peppers into uniform pieces, and mincing the garlic finely.
It is helpful to have your casserole dish ready on a flat surface. If the chicken breasts are uneven, consider trimming them or pounding them slightly so they cook at the same rate, which prevents some pieces from overcooking while others remain underdone.
Ingredients at a glance (6)
- 4 pieces boneless skinless chicken breasts
- 2 cups broccoli florets
- 1 cup red bell peppers, diced
- 1 1/2 cups heavy cream
- 3 cloves garlic, minced
- 1 1/2 cups shredded mozzarella cheese
Instructions
Assembly of the Bake
- Prepare the BasePreheat the oven to 375°F (190°C). Place the chicken breasts in the glass casserole dish. Arrange the broccoli florets and diced red bell peppers around the chicken in an even layer to ensure uniform cooking across the dish.Look for Vegetables should be distributed evenlyTip Pat the chicken dry before placing it in the dish for better browning.
At the end of this phase, the chicken and vegetables should be arranged neatly in the casserole dish. Ensure the broccoli and peppers are distributed evenly to maximize flavor in every portion. The dish should look organized and ready for the liquid components.
Sauce Incorporation
- Add Garlic Cream SauceIn a small bowl, whisk together the heavy cream and minced garlic. Pour this mixture carefully over the chicken and vegetables in the casserole dish, ensuring the liquid reaches the bottom of the pan to prevent burning.Look for Sauce should pool around the ingredientsTip Season the cream with a pinch of salt and pepper if desired.
Once the garlic cream sauce is poured, it should settle into the gaps between the chicken and vegetables. The liquid should cover the base of the dish evenly, creating a foundation for the flavors to meld during the baking process.
Baking to Golden Perfection
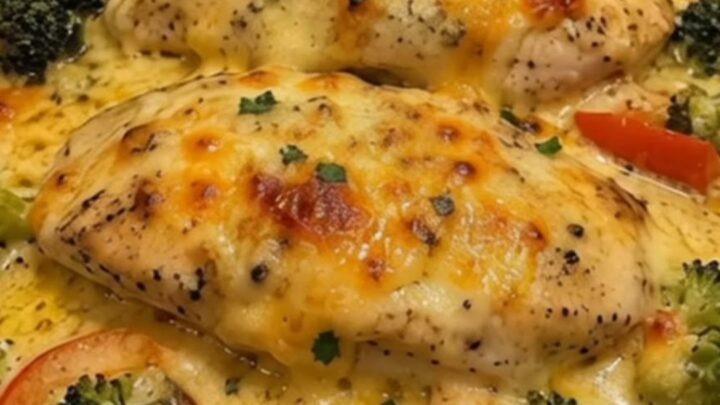
- Bake and ServeSprinkle the shredded mozzarella cheese over the top of the dish. Bake for 25 to 30 minutes until the cheese is bubbling and golden brown. Ensure the chicken reaches an internal temperature of 165°F (74°C). Remove from the oven and let rest for 5 minutes before serving.Look for Cheese should be golden and bubblingSafe temperature 165°F (74°C) internal temperature (poultry)Tip Tent with foil if the cheese browns too quickly.
The final phase concludes when the cheese is melted, browned, and bubbling. The kitchen should smell aromatic with garlic. Check the chicken temperature and ensure the sauce has reduced to a thick, creamy consistency before removing the dish from the oven.
Common mistakes
Avoid overcrowding the casserole dish, as this prevents the sauce from circulating and bubbling effectively, which can lead to uneven cooking. Do not skip the resting period, as the sauce will be too thin and the chicken juices will run out if cut immediately.
Another common mistake is using dairy that does not have enough fat content, which can cause the sauce to split or become watery during the long bake. Always ensure your oven is calibrated correctly, as an oven that is too cool will result in rubbery chicken and soggy vegetables.
How to tell it’s done
The dish is perfectly done when the cheese is deeply golden and blistering, and the sauce is bubbling vigorously around the edges.
Most importantly, the chicken must be fully cooked through. Use a meat thermometer to check the thickest part of the breast; it must reach an internal temperature of 165°F (74°C).
The vegetables should be tender-crisp. After removing the dish from the oven, allow it to rest for at least 5 minutes; this allows the sauce to thicken slightly and the juices to redistribute, ensuring every bite is succulent and flavorful.
- Poultry: 165°F (74°C) in the thickest part
Up next · Part 3 of 3
2 variations · storage & make-ahead · 3 answers · printable card
Tips, FAQ & printable recipe (Part 3)← Back to the ingredients (Part 1)