Dinner · Part 2 of 3: Instructions
Creamy French Onion Tortellini Bake Step-by-step instructions
- Prep
- Cook
- Total
- Serves
- 6
Before you start
Before beginning, ensure your slow cooker is clean and dry. Slice the yellow onions into uniform thin strips to ensure even cooking. Measure out your beef bone broth and prepare the fresh thyme by removing the leaves from the woody stems.
Have your refrigerated tortellini, cream cheese, and shredded Gruyere measured and ready for the final stage. If you are preparing bacon, cook it in a skillet until crisp, then crumble it into small pieces and set aside for the final topping.
Ingredients at a glance (10)
- 3 yellow onions, thinly sliced
- 4 tbsp butter
- 1 tbsp brown sugar
- 3 cups beef bone broth
- 1 tbsp Worcestershire sauce
- fresh thyme to taste
- 20 oz refrigerated cheese tortellini
- 8 oz cream cheese
- 2 cups shredded Gruyere cheese
- 4 slices crispy bacon, cooked and crumbled
Instructions
Building the flavor base
- Layering the basePlace the thinly sliced yellow onions into the base of the slow cooker. Add the butter, brown sugar, beef bone broth, Worcestershire sauce, and fresh thyme on top of the onions.Look for Ensure the onions are evenly spread across the bottom of the ceramic insert.Tip Slicing the onions thinly ensures they caramelize evenly during the long cooking process.
The onions are layered with butter, sugar, and broth, creating a fragrant setup. Everything should look neat and organized in the slow cooker insert, ready for the slow-cooking transformation that will meld these simple ingredients into a complex, savory, and aromatic base over the next five hours.
Slow-simmering the onions
- Slow cookingCover the slow cooker with the lid and cook on LOW for 5 hours. The onions will become rich, jammy, and deeply caramelized during this time.Look for The onions should be dark golden brown and very tender.Tip Avoid opening the lid during the first few hours to maintain a consistent internal temperature.
After five hours, the kitchen will be filled with a deep, savory aroma. The onions should be soft, jammy, and significantly reduced in volume, with a dark, rich color. The liquid will have transformed into a concentrated, flavorful broth that is ready to be transformed by the addition of the pasta and cheese.
Melting the creamy finish
- Finishing the dishStir in the refrigerated cheese tortellini, cream cheese, and shredded Gruyere cheese. Cover and cook for an additional 20 minutes until the pasta is tender and the sauce is creamy and melted. Serve topped with crispy bacon.Look for The sauce should be thick and glossy with the cheese fully melted.Tip Stir well to ensure the cream cheese is fully incorporated into the broth base.
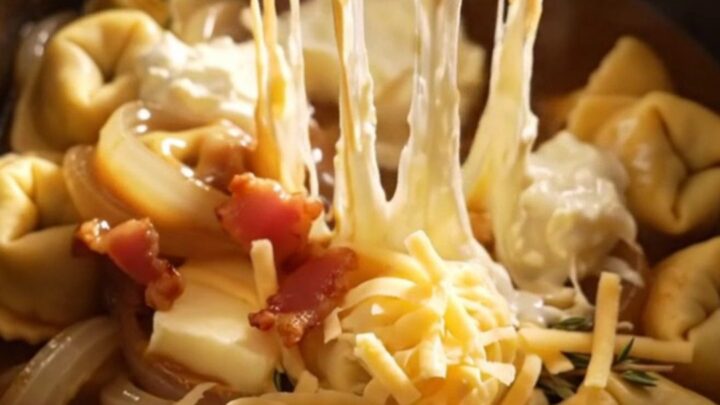
Once the tortellini and cheeses are added, the final phase brings everything together. The pasta should be tender, the sauce thick and creamy, and the Gruyere should be melted and stretchy.
The dish will look decadent and inviting, with the aroma of caramelized onions and melted cheese becoming more pronounced.
Common mistakes
Avoid adding the pasta too early, as it will become mushy and lose its structure during the long simmering process. Do not skip the caramelization phase, as the deep flavor of the onions is what defines the dish.
Ensure the cream cheese is stirred in thoroughly; if it is added in large clumps, it may take longer to melt, resulting in an uneven sauce. Finally, do not overcrowd the slow cooker, as this can affect the heat distribution and the texture of the onions.
How to tell it’s done
The dish is done when the tortellini are cooked through to an al dente texture and the cheese sauce is smooth, bubbling, and fully emulsified. The onions should be soft and jammy, with a deep mahogany color.
Check that the cheese has fully melted into the beef broth and cream cheese base, creating a uniform, velvety consistency. The final dish should be piping hot throughout, with the cheese pull evident when serving.
Up next · Part 3 of 3
2 variations · storage & make-ahead · 3 answers · printable card
Tips, FAQ & printable recipe (Part 3)← Back to the ingredients (Part 1)