Dinner · Part 2 of 3: Instructions
Creamy Dijon White Cheddar Slow Cooker Chicken Step-by-step instructions
- Prep
- Cook
- Total
- Serves
- 4
Before you start
Before beginning, ensure your slow cooker is clean and placed on a stable, heat-resistant surface. Have all your ingredients measured and ready to go.
If you are using frozen chicken, be sure to thaw it completely in the refrigerator overnight to ensure food safety and even cooking. Clear enough counter space to work comfortably and have your shredding forks ready for when the cooking cycle is complete.
Ingredients at a glance (4)
- 4 boneless skinless chicken breasts
- 1 cup diced onion
- 1 tsp garlic powder
- 8 oz cream cheese
Instructions
Assembly of ingredients
- Prepare the slow cookerPlace the raw chicken breasts at the bottom of the slow cooker basin. Scatter the diced onions evenly over the chicken to ensure flavor distribution during the cooking process.Look for Chicken is placed in a single layer at the bottom.Tip Ensure the chicken is fully thawed before placing it in the slow cooker for even cooking.
At this phase, the raw chicken, onions, garlic powder, and cream cheese are layered inside the slow cooker. Ensure the chicken is in a single layer to promote uniform heat distribution. Do not add any extra liquid, as the moisture released from the chicken and onions will be sufficient to create the base for the creamy sauce.
Slow cooking process
- Add seasoning and cream cheeseSprinkle the garlic powder over the chicken and onions. Place the block of cream cheese directly in the center of the slow cooker on top of the other ingredients.Look for Cream cheese is centered on top.Tip Do not stir the ingredients yet; the slow cooker will handle the melting process.
During the cooking phase, the slow cooker maintains a steady, low temperature that gently cooks the chicken. You should notice the onions softening and the cream cheese beginning to melt into the juices. The kitchen will start to smell aromatic and savory as the garlic powder seasons the chicken throughout the cooking duration.
Shredding and finishing
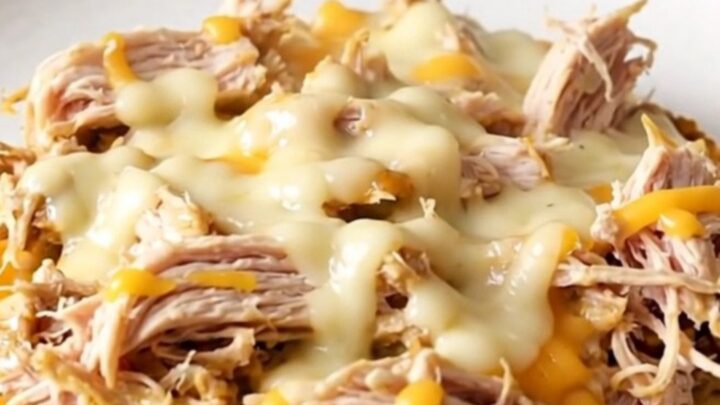
- Cook and shred the chickenCover and cook on low for four hours. Once the chicken reaches an internal temperature of 165°F (74°C), remove the chicken to a plate, shred with two forks, and stir the melted cream cheese into the juices until smooth. Let the meat rest for 5 minutes before serving.Look for Chicken shreds easily with a fork and sauce is creamy.Safe temperature 165°F (74°C) internal temperature (poultry)Tip Stir the sauce vigorously to incorporate all the juices from the onion and garlic into the cream cheese base.
Once the cooking time is up, the chicken should be tender and ready to shred. The sauce will have thickened slightly and appear glossy.
After shredding the meat, ensure it is thoroughly coated in the creamy mixture. Check that no pink remains in the center of the largest pieces before serving to ensure the dish is perfectly cooked.
Common mistakes
Avoid lifting the lid of the slow cooker unnecessarily during the cooking process, as this releases heat and significantly increases the total cooking time. Another common mistake is adding the cream cheese too early or too late; adding it at the beginning as instructed allows it to melt gradually without splitting.
Finally, ensure you do not overcook the chicken, as even in a slow cooker, breasts can become dry if kept on the heat for too long after they have reached the target temperature.
How to tell it’s done
The chicken is done when the meat is opaque throughout and shreds easily with the pressure of a fork. Using a meat thermometer is the most reliable way to check for doneness.
Insert the probe into the thickest part of the breast; the chicken must reach an internal temperature of 165°F (74°C). Once this temperature is reached, let the meat rest for 5 minutes before shredding to maintain its moisture and flavor.
- Poultry: 165°F (74°C) in the thickest part
Up next · Part 3 of 3
2 variations · storage & make-ahead · 3 answers · printable card
Tips, FAQ & printable recipe (Part 3)← Back to the ingredients (Part 1)