Dinner · Part 2 of 3: Instructions
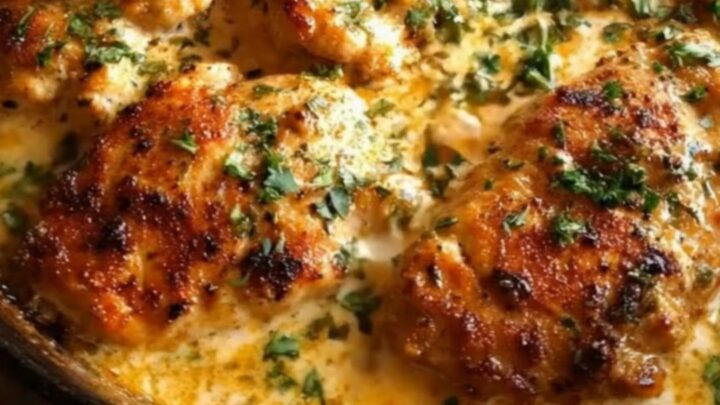
Creamy Dijon Chicken Breasts for a Quick Dinner Step-by-step instructions
- Prep
- Cook
- Total
- Serves
- 4
Before you start
Before you begin, ensure your chicken breasts are patted dry with paper towels. Excess moisture on the surface of the meat will cause it to steam instead of sear, which prevents the development of that essential golden-brown crust.
Have your heavy cream, Dijon mustard, and herbs measured and ready to go near the stove, as the sauce comes together quickly once the chicken is seared. Ensure your skillet is clean and properly seasoned to prevent sticking.
Ingredients at a glance (4)
- 4 pieces boneless skinless chicken breasts
- 2 tbsp Dijon mustard
- 1 cup heavy cream
- 1 tsp dried herbs
Instructions
Searing the chicken
- Sear the chickenPlace the chicken breasts in the hot cast-iron skillet. Sear them undisturbed until a deep golden crust forms on the bottom, then flip and cook until the chicken is nearly cooked through.Look for deep golden brown crust formsTip Ensure the pan is hot before adding the chicken to achieve the best sear.
The chicken should have a deep, golden-brown crust on both sides. The meat will be firm to the touch but not yet fully cooked through in the center. Ensure the skillet is hot enough to hear a distinct sizzle when the chicken first hits the surface, as this sound indicates that the searing process is working correctly and building flavor.
Building the sauce
- Prepare the cream sauceLower the heat to medium. Pour the heavy cream into the skillet around the chicken. Stir in the Dijon mustard and dried herbs, scraping any browned bits from the bottom of the pan to incorporate the flavor into the sauce. Simmer gently until the sauce thickens and coats the back of a spoon.Look for sauce thickens and coats a spoonTip Whisk constantly to ensure the mustard integrates smoothly with the cream.
The sauce should be bubbling gently and starting to thicken. It should smell aromatic from the herbs and have a distinct, tangy scent from the Dijon mustard.
When you stir, the sauce should coat the back of a spoon without running off immediately. If it looks too thin, continue to simmer for an additional minute or two until it reaches the desired consistency.
Finishing and resting
- Finish and restContinue to simmer until the chicken reaches an internal temperature of 165°F (74°C). Remove the skillet from the heat. Transfer the chicken breasts to a plate and let them rest for at least 5 minutes before serving to ensure the juices redistribute throughout the meat.Look for internal temperature of 165°FSafe temperature 165°F (74°C) internal temperature (poultry)Tip Letting the meat rest is crucial for maintaining tenderness and moisture.
The chicken should be fully cooked, reaching an internal temperature of 165°F (74°C). The sauce should be glossy and rich, clinging to the chicken breasts. Once you remove the pan from the heat, the chicken will be ready to transfer to a plate. Ensure the resting time is observed, as this allows the juices to settle, ensuring every bite is tender and moist.
Common mistakes
A common mistake is overcrowding the skillet, which lowers the pan temperature and leads to steaming. Sear the chicken in batches if necessary to maintain high heat. Another error is adding the cream while the pan is too hot, which can cause the sauce to break or the cream to curdle.
Always lower the heat before adding the dairy and simmer gently. Finally, failing to rest the meat results in lost juices and drier chicken; patience during the resting phase is essential.
How to tell it’s done
The chicken is perfectly done when the thickest part of the breast reaches an internal temperature of 165°F (74°C). Use a digital meat thermometer to verify this, inserting the probe into the center of the thickest portion.
The meat should be opaque throughout and firm to the touch. Once the temperature is reached, remove the skillet from the heat immediately to prevent overcooking, and allow the chicken to rest for at least 5 minutes before slicing.
- Poultry: 165°F (74°C) in the thickest part
Up next · Part 3 of 3
2 variations · storage & make-ahead · 3 answers · printable card
Tips, FAQ & printable recipe (Part 3)← Back to the ingredients (Part 1)