Dinner · Part 2 of 3: Instructions
Creamy Crockpot White Chicken Chili Step-by-step instructions
- Prep
- Cook
- Total
- Serves
- 6
Before you start
Before starting, ensure your slow cooker is clean and positioned on a stable, heat-resistant surface. Have all your ingredients measured and ready to go.
If you are using canned beans, drain and rinse them thoroughly to remove excess starch, which helps keep the final texture of the chili clean and creamy. Make sure your cream cheese is at room temperature for the best melting results.
Ingredients at a glance (5)
- 2 lbs boneless skinless chicken breasts
- 30 oz canned white beans, drained and rinsed
- 1 packet chili seasoning
- 8 oz cream cheese
- green onions, sliced, for serving
Instructions
Layering the ingredients
- Assemble the ingredientsPlace the raw chicken breasts into the bottom of a slow cooker. Add the white beans on top of the chicken. Sprinkle the chili seasoning packet evenly over the beans and chicken, then place the block of cream cheese in the center.Look for The chicken is at the bottom with beans and cream cheese layered on top.Tip Ensure the cream cheese is placed in the center to melt evenly during the cooking process.
At this stage, the slow cooker is prepared and loaded with the raw chicken, beans, seasoning, and cream cheese. Ensure the chicken is evenly distributed at the bottom and the cream cheese is centered. The assembly should take only a few minutes, making it a perfect quick-start process for a busy day.
Slow cooking and shredding
- Slow cook the chiliCover the slow cooker and cook on low for 4 to 6 hours or on high for 2 to 3 hours. Once cooked, use two forks to shred the chicken directly in the pot. Stir well until the cream cheese is fully incorporated into the sauce.Look for The chicken shreds easily with a fork and the sauce is creamy and uniform.Safe temperature 165°F (74°C) internal temperature (poultry)Tip If the sauce is too thick, add a small splash of chicken broth or water to reach the desired consistency.
The chili is done cooking when the chicken is tender enough to shred effortlessly. Check that the internal temperature of the chicken has reached 165°F (74°C).
The sauce should appear glossy and thick, with the cream cheese fully melted and blended throughout the mixture. The aroma should be savory and inviting.
Finishing and serving
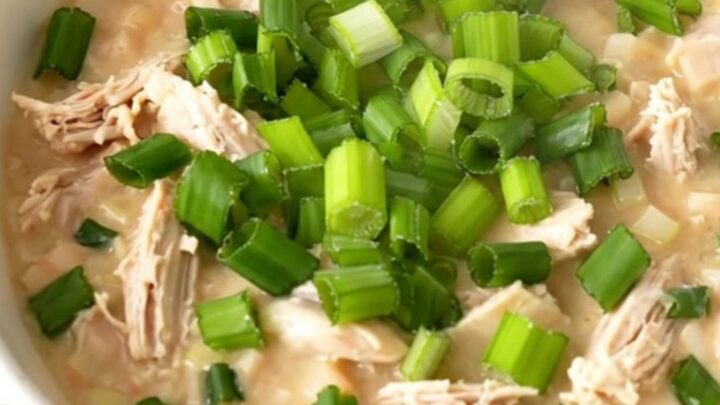
- Garnish and serveLadle the hot chili into individual serving bowls. Top each portion with freshly sliced green onions before serving immediately. Let the cooked chicken rest for 5 minutes before serving to ensure tenderness.Look for The chili is steaming and the garnish is fresh.Safe temperature 165°F (74°C) internal temperature (poultry)Tip Use a sharp knife to slice the green onions thinly for a better presentation.
The final phase involves shredding the meat and adding the fresh garnish. Ensure the green onions are thinly sliced for the best texture. Once the chili is ladled into bowls and topped, it should be served immediately while steaming hot. Check that the seasoning is well-distributed throughout the creamy base.
Common mistakes
Avoid lifting the lid of the slow cooker too often, as this releases heat and significantly increases cooking time. Do not overcook the chicken, as it can eventually become stringy or dry, even in a liquid-heavy dish.
Ensure you stir the chili thoroughly after shredding the chicken to fully incorporate the cream cheese, as an uneven mixture will result in a sauce that lacks its signature velvety texture.
How to tell it’s done
The chili is finished when the chicken is fully cooked and shreds easily with a fork. Use a meat thermometer to check the thickest part of the chicken, ensuring it reaches an internal temperature of at least 165°F (74°C).
The sauce should be thick, creamy, and uniform, with no visible lumps of cream cheese remaining. After shredding, let the meat rest for 5 minutes before serving to lock in the juices.
- Poultry: 165°F (74°C) in the thickest part
Up next · Part 3 of 3
2 variations · storage & make-ahead · 3 answers · printable card
Tips, FAQ & printable recipe (Part 3)← Back to the ingredients (Part 1)