Dinner · Part 2 of 3: Instructions
Creamy Crockpot Tuscan Pork Tenderloin Step-by-step instructions
- Prep
- Cook
- Total
- Serves
- 4
Before you start
Before beginning, ensure all ingredients are measured and ready. Soften the cream cheese at room temperature for about 30 minutes to ensure it whisks smoothly into the broth without leaving clumps.
Check your slow cooker to ensure the insert is clean and properly seated in the heating base. If using refrigerated pork, remove it from the packaging and pat it dry with paper towels to ensure the seasonings adhere properly to the surface of the meat before it goes into the pot.
Ingredients at a glance (6)
- 2 lbs pork tenderloin
- 1/2 cup sun-dried tomatoes
- 1 tbsp Italian seasoning
- 1/2 cup grated Parmesan cheese
- 1/2 cup chicken broth
- 4 oz cream cheese, softened
Instructions
Arrangement
- Prepare the slow cookerPlace the raw pork tenderloins into the bowl of your slow cooker. Ensure they are arranged in an even layer at the bottom of the vessel to promote uniform cooking.Look for The pork lies flat on the bottom of the slow cooker.Tip Do not overcrowd the cooker if using a smaller model.
The pork tenderloins should be placed in a single layer at the bottom of the slow cooker. Ensure the surface of the meat is clean and ready for the seasonings. The slow cooker should be plugged in and ready to go, with all ingredients pre-measured and the cream cheese softened to room temperature to ensure a smooth, uniform sauce during the cooking process.
Seasoning
- Add aromatics and seasoningsScatter the sun-dried tomatoes over the pork. Sprinkle the Italian seasoning and the grated Parmesan cheese evenly across the top of the meat to build the flavor base.Look for The seasonings cover the tenderloins.Tip Use freshly grated Parmesan for the best melting texture.
The sun-dried tomatoes, Italian seasoning, and grated Parmesan should be evenly distributed over the pork. The goal is to create a flavorful crust that will infuse the meat as it slowly cooks. Check that the seasonings are not clumped in one area, as an even distribution ensures that every bite of the final dish is packed with consistent, savory, and aromatic flavor.
Sauce Integration
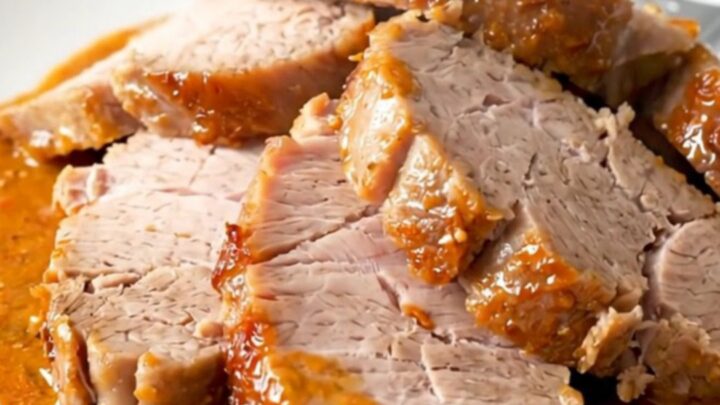
- Incorporate the creamy sauce and cookIn a separate bowl, whisk the chicken broth and softened cream cheese until smooth, then pour the mixture over the pork. Cover and cook on low for 4 to 6 hours until the pork reaches an internal temperature of 145°F (63°C). Let the meat rest for 5 minutes before slicing.Look for The sauce is smooth and the pork is tender.Safe temperature 145°F (63°C) internal temperature (steaks, chops and roasts)Tip Ensure cream cheese is fully softened to avoid lumps.
The cream cheese and broth mixture should be whisked until completely smooth before being poured over the pork. At this stage, the sauce should look uniform.
Once the slow cooker is covered and turned on, the cooking process will begin to break down the cream cheese, eventually creating a thick, creamy, and fragrant sauce that perfectly complements the tender, slow-cooked pork tenderloin.
Common mistakes
A common mistake is using cream cheese that is too cold, which prevents it from blending evenly with the broth and leads to a lumpy sauce. Another error is overcooking the tenderloin; because it is a lean cut, it can quickly become dry if left in the slow cooker for too long.
Always use a thermometer to gauge doneness rather than relying solely on the clock, as slow cooker temperatures can vary by model and age.
How to tell it’s done
The pork tenderloin is done when it is opaque throughout and reaches an internal temperature of 145°F (63°C) as measured by a meat thermometer inserted into the thickest part. The meat should be very tender and easily pierced with a fork.
It is essential to let the pork rest for at least 5 minutes after removing it from the slow cooker; this allows the juices to redistribute, ensuring every slice is succulent and moist when served.
- Steaks, chops and roasts: 145°F (63°C) in the thickest part, then a 3-minute rest
Up next · Part 3 of 3
2 variations · storage & make-ahead · 3 answers · printable card
Tips, FAQ & printable recipe (Part 3)← Back to the ingredients (Part 1)