Dinner · Part 2 of 3: Instructions
Creamy Crockpot Greek Yogurt Chicken Step-by-step instructions
- Prep
- Cook
- Total
- Serves
- 4
Before you start
Before beginning, ensure that your slow cooker insert is clean and dry. Prepare the red onion by removing the papery skin and slicing it into thin, uniform strips to ensure they cook at the same rate.
Measure out your chicken broth and Greek yogurt, keeping them ready for the final assembly step. If you are using a digital thermometer, have it calibrated and ready to verify the final temperature of the chicken once the cooking time concludes.
Ingredients at a glance (6)
- 4 pieces boneless skinless chicken breasts
- 1 medium red onion, sliced
- 1 tsp dried oregano
- 1 tsp garlic powder
- 1 cup plain Greek yogurt
- 1/2 cup chicken broth
Instructions
Layering the ingredients
- Prepare the slow cooker basePlace the boneless skinless chicken breasts into the bottom of the slow cooker, arranging them in an even layer. This ensures consistent cooking throughout the entire cooking process.Look for Chicken pieces should lie flat in the base of the slow cooker insert.Tip If the breasts vary significantly in thickness, pound the thicker parts slightly to ensure even cooking.
- Season the chickenScatter the sliced red onion over the chicken. Sprinkle the dried oregano and garlic powder evenly across the surface of the meat to infuse the aromatics during the braising process.Look for The onions should be distributed evenly to provide a balanced flavor base.Tip Use your fingers to ensure the seasoning covers all pieces of the chicken breast.
The chicken should be arranged in a single layer at the bottom of the cooker, covered with the sliced onions and seasonings. Everything should look organized and ready for the liquid components to be added.
Adding the braising liquid
- Add the sauceWhisk together the Greek yogurt and chicken broth in a glass measuring cup until smooth. Pour this mixture over the chicken and onions. Cover the slow cooker with the lid.Look for The liquid should partially submerge the chicken pieces.Tip Ensure the yogurt is fully incorporated into the broth before pouring to prevent clumping.
The yogurt and broth mixture should look smooth and well-combined before being poured over the chicken. The surface should be evenly coated, preparing the ingredients for the slow braise, ensuring that the chicken is fully submerged.
Final braising and checking
- Braise the chickenCook the chicken on the low setting for 4 hours. Once finished, check that the internal temperature of the thickest part of the chicken reaches 165°F (74°C). Let the chicken rest for 5 minutes before serving.Look for The chicken should be opaque throughout and the sauce thickened and creamy.Safe temperature 165°F (74°C) internal temperature (poultry)Tip Verify the temperature with a meat thermometer to ensure food safety.
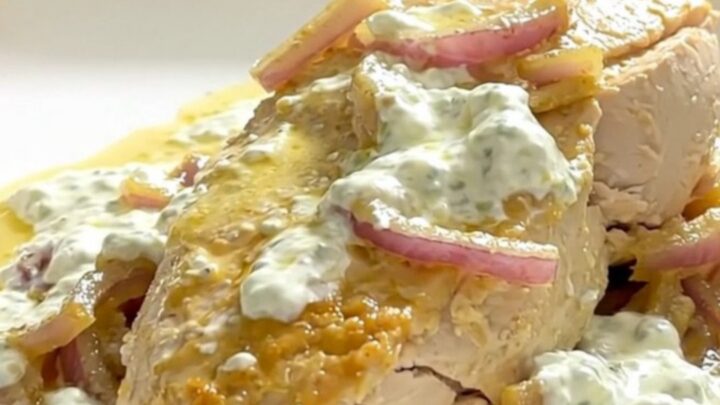
The chicken will look tender and fully poached in the creamy sauce. The aroma should be savory and fragrant, and the thermometer should confirm the internal temperature has reached 165°F (74°C).
Common mistakes
A common mistake is using a high-heat setting, which can cause the yogurt in the sauce to curdle or separate. Stick strictly to the low setting to maintain the integrity of the dairy.
Another error is neglecting to check the internal temperature, which may result in undercooked poultry.
Always verify with a thermometer rather than relying solely on the cooking time, as slow cooker models can vary significantly in their actual heat output.
How to tell it’s done
The chicken is fully cooked when it is firm to the touch and opaque throughout. Use an instant-read meat thermometer inserted into the thickest part of the breast; it must reach an internal temperature of 165°F (74°C).
The sauce should appear thickened and creamy, with the onions softened and translucent. Allow the chicken to rest for at least 5 minutes before slicing to ensure the juices redistribute throughout the meat, maintaining maximum tenderness.
- Poultry: 165°F (74°C) in the thickest part
Up next · Part 3 of 3
2 variations · storage & make-ahead · 3 answers · printable card
Tips, FAQ & printable recipe (Part 3)← Back to the ingredients (Part 1)