Dinner · Part 2 of 3: Instructions
Creamy Crockpot Chicken Thighs with Bacon Gravy Step-by-step instructions
- Prep
- Cook
- Total
- Serves
- 6
Before you start
Before you begin, gather all your ingredients and ensure your slow cooker is clean and ready for use. Slice your yellow onions into uniform pieces to ensure they cook evenly.
If you are using raw bacon, fry it until crispy and crumble it beforehand; if using pre-cooked bacon, simply crumble it into small, manageable pieces. Have your soup and broth measured and ready to combine for the final pour.
Ingredients at a glance (7)
- 6 whole boneless skinless chicken thighs
- 6 slices cooked bacon, crumbled
- 1 medium yellow onion, sliced
- 1/2 tsp black pepper
- 1 tsp garlic powder
- 1 can (10.5 oz) cream of chicken soup
- 1/2 cup chicken broth
Instructions
Layering the ingredients
- Assemble the basePlace the boneless skinless chicken thighs into the bottom of the slow cooker, ensuring they are arranged in a single layer to promote even cooking throughout the process.Look for Chicken is arranged in a flat layer.Tip Trim any excess fat from the thighs before placing them in the cooker for a cleaner sauce.
- Layer the aromaticsScatter the crumbled bacon and sliced onions evenly over the top of the chicken thighs. Ensure the onions are distributed well to allow them to soften during the slow cooking phase.Look for Bacon and onions cover the chicken.Tip Using pre-cooked bacon saves time, but make sure it is crisp enough to hold texture.
The chicken thighs are neatly arranged at the bottom of the crockpot. The bacon and onions are spread evenly over the surface, creating a flavorful bed for the chicken.
Everything looks organized and ready for the liquid components, ensuring all parts of the meal will receive equal heat and seasoning during the slow cook.
Adding the sauce base
- Season and pourSprinkle the black pepper and garlic powder over the chicken and onion mixture. In a separate bowl, whisk together the cream of chicken soup and chicken broth, then pour the mixture over the contents of the slow cooker.Look for Liquid covers the chicken and onions.Tip Whisking the soup and broth together before pouring ensures a consistent texture in the final gravy.
The seasoning is distributed, and the creamy soup-and-broth mixture has been poured over the top. The liquid should cover the chicken and aromatics, creating a moist environment. Everything should look well-integrated, with no large clumps of soup remaining on top of the chicken or onion layer.
Slow cooking to perfection
- Slow cook and serveCover the slow cooker and cook on low for 4 hours. Once the chicken reaches an internal temperature of 165°F (74°C), turn off the heat and allow it to rest for 5 minutes before serving.Look for Chicken is tender and sauce is thickened.Safe temperature 165°F (74°C) internal temperature (poultry)Tip Check the temperature at the thickest part of the thigh to ensure it is fully cooked.
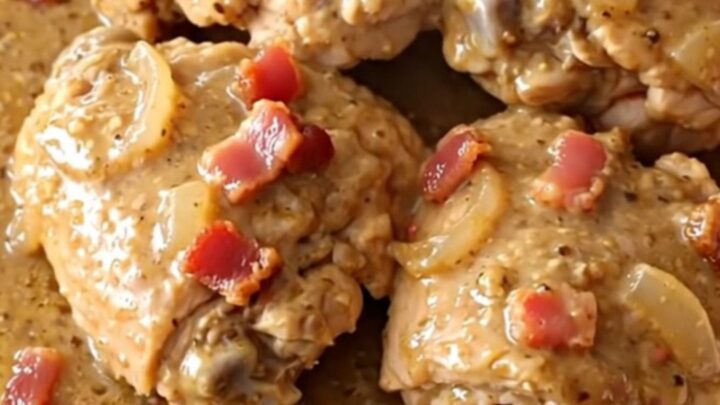
After four hours, the kitchen smells savory and rich. The chicken is tender enough to be pierced easily with a fork, and the sauce has thickened into a luxurious gravy. The onions are soft and translucent, and the bacon has imparted a smoky flavor throughout the entire dish.
Common mistakes
A common mistake is overcrowding the slow cooker, which can lead to uneven cooking and excess liquid. Keep the chicken in a single layer for the best results.
Another error is failing to incorporate the soup and broth thoroughly, which can leave pockets of unmixed ingredients. Finally, do not lift the lid during the first few hours of cooking, as this releases heat and significantly increases the required cooking time.
How to tell it’s done
The chicken is done when it is opaque throughout and pulls apart easily with a fork. Using a meat thermometer is the most reliable way to check for safety; insert it into the thickest part of the chicken thigh to ensure it reaches at least 165°F (74°C).
The sauce should be thick, creamy, and clinging to the chicken, with the onions completely softened.
- Poultry: 165°F (74°C) in the thickest part
Up next · Part 3 of 3
2 variations · storage & make-ahead · 3 answers · printable card
Tips, FAQ & printable recipe (Part 3)← Back to the ingredients (Part 1)