Dinner · Part 2 of 3: Instructions
Creamy Crockpot Cajun Cheddar Macaroni Step-by-step instructions
- Prep
- Cook
- Total
- Serves
- 4
Before you start
Before starting, ensure your slow cooker insert is clean and dry. Prepare all ingredients by measuring the milk and chopping the bell peppers into uniform pieces to ensure they cook evenly.
Verify that you have a functional slow cooker with a well-fitting lid, as maintaining the internal moisture is vital for the pasta to rehydrate and cook properly throughout the duration of the cycle. Have your serving plates ready near the appliance for quick service once the cooking process concludes.
Ingredients at a glance (4)
- 1 lb uncooked elbow macaroni
- 1 cup diced red bell pepper
- 2 tbsp Cajun seasoning
- 4 cups whole milk
Instructions
Layering the ingredients
- Assemble ingredientsAdd the uncooked elbow macaroni into the base of the slow cooker. Evenly distribute the diced red bell peppers over the top of the pasta. Sprinkle the Cajun seasoning over the mixture, ensuring it is spread across the surface for balanced flavor distribution.Look for Ingredients are layered evenly in the slow cooker.Tip Ensure the macaroni is fully submerged once the liquid is added later.
The macaroni, bell peppers, and spices are layered neatly in the bottom of the slow cooker. The ingredients should look organized and ready to be submerged by the milk. Ensure no ingredients are clumping together, as even distribution is key to achieving consistent cooking results during the subsequent hours in the slow cooker.
Slow cooking process
- Add liquid and cookPour the whole milk over the macaroni, bell peppers, and seasoning. Ensure the milk covers the pasta completely. Cover the slow cooker with its lid and cook on the low setting for approximately 2.5 hours, or until the pasta is tender and the sauce has thickened significantly.Look for Pasta is tender and sauce is thick and glossy.Tip Check the pasta consistency halfway through to prevent overcooking.
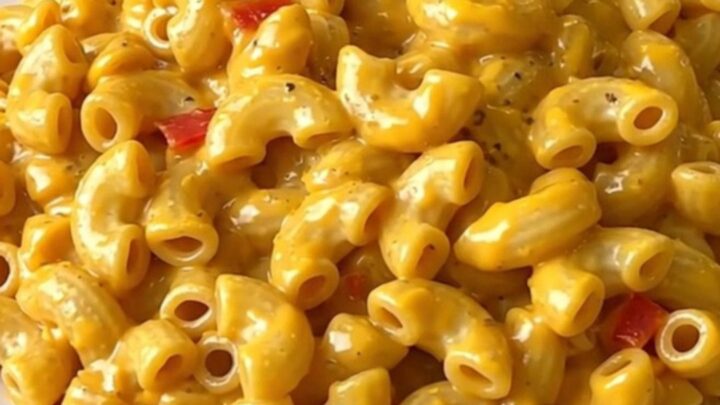
The liquid has transformed into a thick, creamy sauce that clings to the perfectly tender macaroni. The bell peppers should be soft and aromatic, having infused their flavor into the milk.
The entire mixture should look cohesive, with no dry spots or separated liquid, indicating that the starch has fully incorporated into the sauce.
Stirring and finishing
- Final stir and serveOnce the cooking time is complete, remove the lid and gently stir the macaroni to incorporate the thickened, creamy sauce. Let the dish rest for about 5 minutes before serving to allow the sauce to settle and reach the ideal serving consistency.Look for The sauce coats the back of a spoon.Tip If the sauce is too thick, stir in a splash of warm milk before serving.
After a gentle stir, the dish should appear glossy, uniform, and inviting. The sauce should be thick enough to coat a spoon evenly. Once the mixture looks smooth and well-combined, it is ready to be portioned out onto plates for immediate service, ensuring the best possible texture and temperature for your meal.
Common mistakes
A common mistake is using a milk alternative with insufficient fat content, which will result in a sauce that lacks the desired thickness and creamy mouthfeel. Another error is overcooking the pasta, which can lead to a mushy texture; always stick to the recommended time and check the consistency as the cooking nears completion.
Finally, failing to stir the pasta properly after cooking can leave the sauce unevenly distributed, so take a moment to gently combine everything for a uniform, delicious, and professional result.
How to tell it’s done
The macaroni is done when the pasta is tender to the bite but still maintains a slight firmness, known as al dente. The sauce should be thick, creamy, and glossy, coating the noodles thoroughly without being overly watery or dry.
Since this recipe does not involve proteins, there is no specific internal temperature required, but the mixture should be steaming hot throughout, indicating it has reached a safe and pleasant temperature for serving.
Up next · Part 3 of 3
2 variations · storage & make-ahead · 3 answers · printable card
Tips, FAQ & printable recipe (Part 3)← Back to the ingredients (Part 1)