Breakfast · Part 2 of 3: Instructions
Creamy Cinnamon Roll Bake for Easy Mornings Step-by-step instructions
- Prep
- Cook
- Total
- Serves
- 12
Before you start
Before beginning, ensure your oven is fully preheated to 350°F (175°C). Having the oven at the correct temperature is crucial for the rolls to rise properly and achieve that golden-brown finish.
Prepare your baking dish by lightly greasing it if necessary, although the butter and cream usually provide enough lubrication to prevent sticking.
Gather all your ingredients so that the assembly process is efficient and the rolls do not sit out at room temperature for too long before they enter the oven.
Ingredients at a glance (3)
- 12 count raw cinnamon roll dough rounds, store-bought or made ahead
- 1/2 cup heavy cream
- 1/2 cup melted brown sugar butter
Instructions
Arranging the dough
- Prepare the baking dishArrange the raw cinnamon roll dough rounds in rows within the rectangular ceramic baking dish. Ensure they are spaced evenly to allow for proper expansion during the baking process.Look for The dough rounds should sit snugly in the dish without overcrowding.Tip Use a ceramic dish for even heat distribution to prevent the bottoms from burning.
The dough rounds should be placed evenly in the dish. Ensure there is just enough space between each roll for them to expand without spilling over the sides of the dish. The dish should be clean and ready for the liquid ingredients.
Adding the liquids
- Add the cream and glazePour the heavy cream evenly over the arranged cinnamon roll rounds. Follow this by spooning the melted brown sugar butter over the top of each individual spiral to ensure full coverage.Look for The cream should pool slightly at the bottom of the dish.Tip Ensure the butter is warm but not boiling to avoid melting the dough prematurely.
The heavy cream and brown sugar butter should be distributed evenly. The cream should settle around the base of the rolls, and the butter should coat the tops. Ensure no dry spots remain on the dough before moving to the oven.
Baking until golden
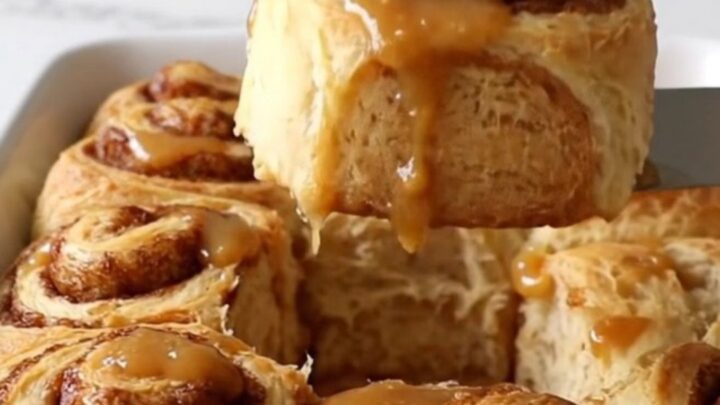
- Bake and servePlace the dish in a preheated oven at 350°F (175°C) and bake until the rolls are puffed and golden brown with bubbling edges. Remove from the oven and allow to rest for 5 minutes before serving warm.Look for The rolls should look golden and the sugar butter should be bubbling.Tip Watch the edges closely to ensure they do not become too dark while the center bakes.
The rolls should be puffed and golden with bubbling edges. The kitchen should smell strongly of caramelized sugar and cinnamon. Check that the center rolls are firm to the touch before removing the dish from the oven.
Common mistakes
A common mistake is using too little cream, which can result in rolls that are dry rather than soft. Ensure you pour enough to create a thin layer at the bottom of the dish.
Another error is baking at too high a temperature, which can scorch the sugars in the glaze before the center of the rolls is cooked. Always monitor the oven closely during the last few minutes of baking to ensure the sugar does not burn.
How to tell it’s done
The rolls are done when they have puffed up significantly and the tops are a deep, golden brown. The edges of the dish should show a bubbling, caramelized brown sugar butter sauce.
If you insert a toothpick into the center of a roll, it should come out clean, indicating that the dough is fully baked through. Allow the dish to rest for 5 minutes after removing it from the oven to let the sauce thicken slightly.
Up next · Part 3 of 3
2 variations · storage & make-ahead · 3 answers · printable card
Tips, FAQ & printable recipe (Part 3)← Back to the ingredients (Part 1)