Desserts · Part 2 of 3: Instructions
Creamy Chocolate and Caramel Layered Dessert Step-by-step instructions
- Prep
- Cook
- Total
- Serves
- 8
Before you start
Before beginning the assembly, ensure all ingredients are properly chilled. The chocolate base should be at room temperature or slightly cooler to ensure it spreads easily, while the whipped cream must be freshly whipped and kept cold to maintain its volume.
Ensure that the glass baking dish is placed on a flat, stable surface within the refrigerator, as the dessert will need to remain undisturbed during the chilling phase to ensure the layers set perfectly without shifting.
Ingredients at a glance (4)
- 1 cup chocolate ganache or chocolate pudding, prepared
- 2 cups whipped cream, freshly whipped
- 1/4 cup caramel sauce, for drizzling
- 4 pieces chocolate squares, for garnish
Instructions
Base Layer Preparation
- Assemble the chocolate layerSpread the prepared chocolate ganache or pudding evenly into the bottom of an 8x8 inch glass baking dish to form a smooth, solid base layer.Look for The chocolate layer should be perfectly flat and cover the entire bottom of the glass dish.Tip Use a small offset spatula to ensure the edges are crisp and the surface is level.
The chocolate layer should be perfectly smooth and level across the bottom of the glass dish. Check that there are no gaps or air bubbles along the sides of the glass, as these will be visible in the final presentation. The surface should be flat enough to provide a stable platform for the subsequent layers of whipped cream.
Cream Layer Application
- Add the creamy layerGently spread the whipped cream over the set chocolate layer, taking care not to disturb the bottom layer while creating a clean, uniform top layer.Look for The whipped cream should look light and fluffy with distinct, visible layers when viewed from the side of the glass.Tip Chill the spatula slightly before spreading the cream to achieve a smoother finish.
The whipped cream should be spread gently to avoid mixing with the chocolate base. The boundary between the chocolate and the cream should be straight and sharp. Ensure the cream reaches the corners of the dish to create a uniform look from all angles. The top should be smoothed over to create a clean surface for the toppings.
Final Chilling and Garnish
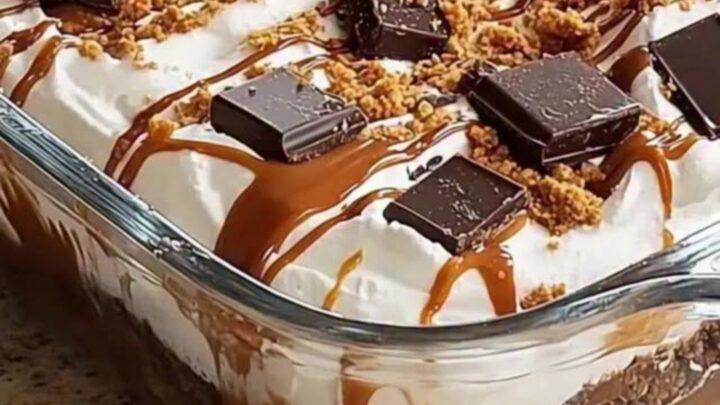
- Finish and chillDrizzle the caramel sauce across the surface of the whipped cream. Arrange the chocolate squares on top. Place the dish in the refrigerator to chill for at least two hours before slicing.Look for The dessert must be firm enough to lift a clean slice with a spatula without the layers collapsing.Tip For the cleanest slices, wipe the knife blade with a hot, damp cloth between each cut.
After the chilling period, the dessert should look firm and stable. The caramel drizzle should be set into the cream, and the chocolate squares should sit securely on top.
When a slice is lifted, the layers should stay together, revealing a clean cross-section that confirms the dessert has reached the proper consistency for serving.
Common mistakes
A common mistake is rushing the chilling process, which leads to layers that are too soft to slice cleanly. Always allow the full two hours to ensure the fats have solidified. Another error is overworking the whipped cream while spreading it; be gentle to maintain the aeration.
Finally, using a warm knife will cause the cream to melt and the chocolate to smear, so always use a cold or room-temperature blade for slicing to maintain the integrity of the professional-looking layers.
How to tell it’s done
The dessert is ready to serve once the layers have set firmly in the refrigerator. The chocolate base should feel dense and cool to the touch, and the whipped cream should hold its shape when a spatula is inserted.
There is no cooking involved, so the primary indicator of readiness is the structural stability of the entire assembly. When sliced, the layers should remain distinct and separate, showing clean, sharp edges that do not slump on the serving plate.
Up next · Part 3 of 3
2 variations · storage & make-ahead · 3 answers · printable card
Tips, FAQ & printable recipe (Part 3)← Back to the ingredients (Part 1)