Dinner · Part 2 of 3: Instructions
Creamy Chicken Tortellini Skillet for a Quick Comfort Meal Step-by-step instructions
- Prep
- Cook
- Total
- Serves
- 4
Before you start
Before starting, ensure all ingredients are measured and ready, as the cooking process moves quickly. Cut the chicken into uniform, bite-sized pieces to ensure even cooking. Mince the garlic finely to allow its flavor to distribute evenly throughout the sauce.
If using frozen tortellini, there is no need to thaw them beforehand; they can go directly into the simmering sauce. Have a serving spoon and plates ready nearby for quick plating.
Ingredients at a glance (6)
- 1 lb chicken breast, cut into bite-sized pieces
- 1 lb cheese tortellini, refrigerated or frozen
- 3 cloves garlic, minced
- 1 cup creamy sauce base
- 1/2 cup parmesan cheese, freshly grated
- fresh herbs, for serving
Instructions
Searing the Protein
- Sear the ChickenHeat a large cast-iron skillet over medium-high heat. Add the chicken pieces and cook until they are golden brown on all sides and reach an internal temperature of 165°F (74°C). Remove the chicken from the skillet and set aside to rest for at least 3 minutes.Look for The chicken should be golden brown and fully opaque.Safe temperature 165°F (74°C) internal temperature (poultry)Tip Do not overcrowd the skillet to ensure the chicken browns properly rather than steaming.
The chicken should look deeply golden-brown on the exterior and be completely opaque throughout. The skillet will have small browned bits stuck to the bottom, which are vital for the flavor profile.
Ensure the chicken has rested for at least three minutes before returning it to the skillet to maintain its juiciness and tender texture in the final dish.
Building the Cream Sauce
- Prepare the SauceIn the same skillet, add the minced garlic and sauté until fragrant. Pour in the creamy sauce base and bring to a gentle simmer. Stir in the parmesan cheese until the sauce is smooth and slightly thickened.Look for The sauce will thicken enough to coat the back of a spoon.Tip Use freshly grated parmesan for the smoothest sauce consistency.
The garlic should be aromatic and soft without turning brown. The sauce base and parmesan mixture will transform into a silky, smooth sauce that coats the spoon. It should smell fragrant and savory. If it seems too thick, a small amount of warm water or additional liquid can be stirred in to achieve the desired consistency before adding the pasta.
Final Assembly
- Combine and FinishAdd the cooked tortellini and the seared chicken back into the skillet. Toss everything together until the pasta is heated through and well-coated in the creamy sauce. Garnish with fresh herbs before serving immediately.Look for The tortellini should be tender and hot throughout.Tip If the sauce becomes too thick, add a splash of pasta water or extra cream.
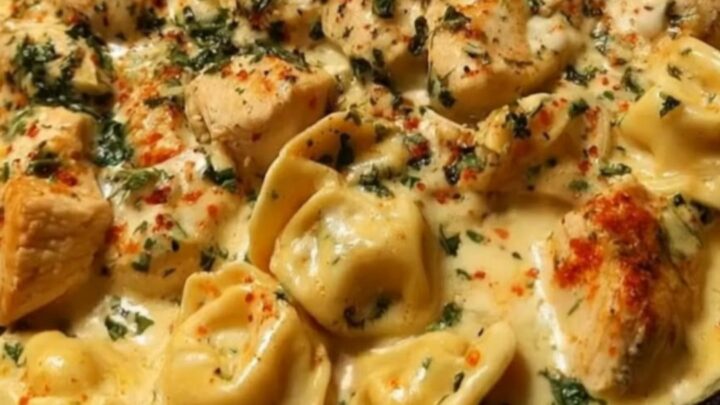
The tortellini should be plump and tender, having absorbed some of the sauce. The chicken should be evenly distributed throughout the skillet.
The entire dish should be steaming and fragrant, with the sauce clinging to every piece of pasta and chicken. Check that the pasta is hot throughout and the sauce is perfectly creamy before removing from the heat.
Common mistakes
A common mistake is overcrowding the skillet while searing the chicken, which causes the meat to steam instead of developing a golden-brown crust.
Another error is overcooking the tortellini; once the pasta is added to the sauce, it only needs a few minutes to heat through. If the sauce is left to boil too vigorously, the cream may separate, so keep the heat at a gentle simmer.
How to tell it’s done
The dish is considered done when the chicken has reached an internal temperature of 165°F (74°C) and the tortellini is heated through to a tender consistency. The sauce should be glossy and thick enough to coat the back of a spoon. When a fork pierces a tortellini, it should offer no resistance, and the chicken should be tender and juicy throughout.
- Poultry: 165°F (74°C) in the thickest part
Up next · Part 3 of 3
2 variations · storage & make-ahead · 3 answers · printable card
Tips, FAQ & printable recipe (Part 3)← Back to the ingredients (Part 1)