Dinner · Part 1 of 3: Ingredients
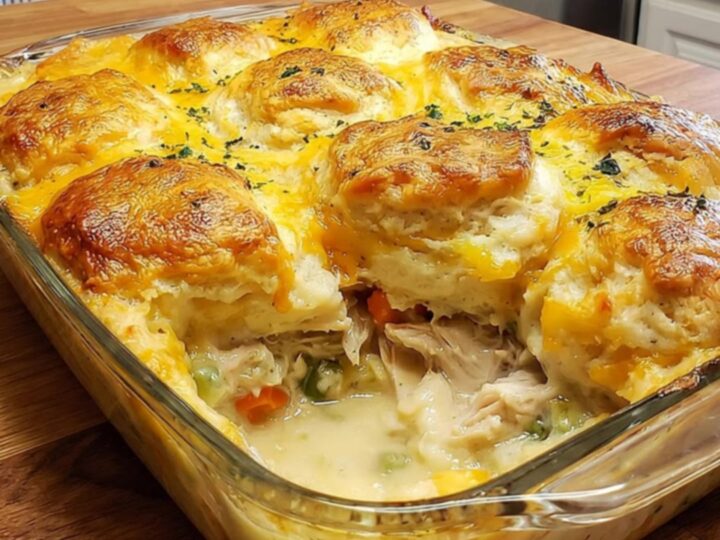
Creamy Chicken Cobbler Casserole with Golden Biscuits
- Prep
- Cook
- Total
- Serves
- 6
Discover the ultimate comfort food with this creamy chicken cobbler casserole. It combines a rich, savory chicken and vegetable filling with a fluffy, cheesy biscuit topping that bakes to perfection in one dish.
This recipe is designed for ease and flavor, making it a reliable choice for busy weeknights when you need something hearty, warm, and deeply satisfying for the entire family. Every bite offers a perfect balance of textures and savory goodness that everyone at the table will love.
This chicken cobbler casserole is a classic comfort dish that simplifies dinner by combining your main protein, vegetables, and bread into one single baking vessel. By using pre-cooked chicken and store-bought biscuit dough, the preparation time is kept to a minimum, allowing the oven to do all the heavy lifting.
The result is a bubbling, golden-brown masterpiece that is as beautiful to look at as it is to eat. Whether you are feeding a hungry family or looking for a cozy meal to enjoy on a chilly evening, this recipe delivers consistent results every time.
Ingredients
Filling
- 2 lbs chicken breasts, cooked and shredded
- 2 cups mixed vegetables, thawed if frozen
- 2 cups creamy chicken sauce
Topping
- 1 can refrigerated biscuit dough
- 1 cup shredded cheddar cheese
Why this recipe works
The method of layering a creamy, dense filling beneath a biscuit topping allows the biscuits to absorb the savory steam from the chicken mixture as they bake. This ensures the underside of the biscuits remains tender and flavorful, while the top becomes golden and crisp. The high heat of the oven creates a rapid rise in the dough, resulting in a light, airy texture that contrasts beautifully with the rich, thick sauce below.
Using a wide, glass baking dish provides optimal surface area for the biscuit topping. This ensures that every portion served receives an equal amount of golden-brown crust and creamy chicken.
The glass material also allows for excellent heat distribution and retention, ensuring the casserole cooks evenly from the center to the edges. By keeping the sauce thick initially, the dish maintains its structural integrity when scooped, preventing a soggy outcome during the baking process.
Notes and substitutions
For the best results, use high-quality creamy chicken sauce as the base. If preferred, you can substitute this with a homemade bechamel sauce seasoned with garlic powder and herbs for a richer profile.
Ensure that the chicken is shredded into bite-sized pieces so that every mouthful contains a consistent blend of ingredients. If you prefer a more rustic appearance, you can tear the biscuit dough into smaller, irregular chunks before placing them on the filling.
Regarding equipment, a standard 9x13 inch glass baking dish is ideal for this recipe. If you only have a metal pan, be aware that it may conduct heat faster, so keep a close watch on the biscuit browning. You can easily adapt this recipe by using different types of shredded cheese, such as Monterey Jack or a sharp cheddar blend, to adjust the flavor profile. Always ensure your oven is fully preheated before inserting the dish to achieve the proper biscuit rise.
- creamy chicken sauce: a homemade bechamel sauce thickened with heavy cream and chicken bouillon
- refrigerated biscuit dough: a homemade drop biscuit batter made with flour, baking powder, butter, and milk
Equipment
- 9x13 inch baking dish
- large mixing bowl
- spatula
- whisk
Up next · Part 2 of 3
3 steps · 40 min of cooking · what to look for at each stage
Step-by-step instructions (Part 2)