Dinner · Part 2 of 3: Instructions
Creamy Chicken and Herb Stuffing Casserole for Easy Weeknight Dinners Step-by-step instructions
- Prep
- Cook
- Total
- Serves
- 6
Before you start
Before beginning, ensure that the oven is fully preheated to 375°F (190°C) to allow for immediate and consistent heat distribution. Have all ingredients measured and ready to ensure the assembly process remains efficient.
If using refrigerated shredded chicken, let it sit on the counter for about 15 minutes to take the chill off, which helps the dish heat through more evenly and prevents the sauce from cooling down during the assembly phase.
Ingredients at a glance (3)
- 4 cups shredded cooked chicken
- 1 1/2 cups heavy cream
- 3 cups herb seasoned stuffing cubes
Instructions
Preparing the creamy base
- Prepare the chicken basePlace the shredded cooked chicken into a large mixing bowl. Pour the heavy cream over the chicken and stir until the meat is thoroughly coated and the mixture achieves a silky, uniform consistency throughout.Look for The chicken should be evenly coated with the cream sauce.Tip Ensure the chicken is at room temperature before adding the cream for better absorption.
The chicken and cream should be thoroughly combined in a large mixing bowl. The mixture should look thick and glossy, with no dry patches of chicken.
The texture should be cohesive, ensuring that when the cream is poured, it coats every strand of chicken fully, which is essential for preventing dryness during the high-heat baking phase.
Assembling the casserole
- Assemble the casseroleTransfer the creamy chicken mixture into a 9x13 inch baking dish, spreading it out into an even layer. Evenly distribute the herb seasoned stuffing cubes across the top of the chicken mixture to create a complete covering.Look for The stuffing should fully cover the chicken layer.Tip Press down lightly on the stuffing to ensure it makes contact with the cream sauce.
The chicken mixture must be spread evenly across the bottom of the baking dish. When the stuffing is added, it should be distributed in a single, uniform layer. The surface should look textured and slightly uneven, which helps create those desirable crispy bits during the final stage of cooking in the oven.
Baking to golden perfection
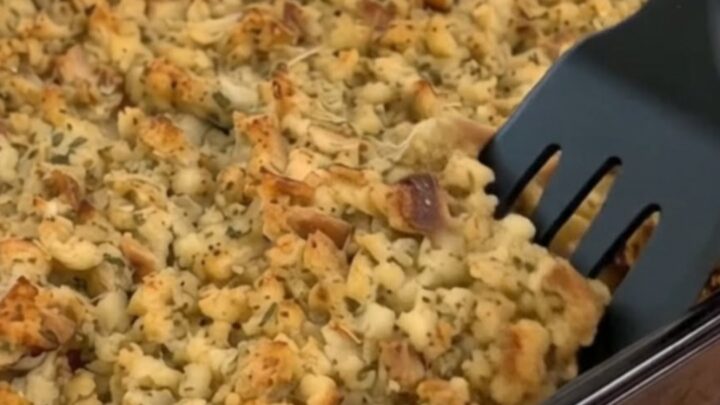
- Bake until goldenPlace the baking dish in an oven preheated to 375°F (190°C). Bake until the stuffing is crispy and golden brown, and the chicken mixture reaches an internal temperature of 165°F (74°C). Remove from the oven and let rest for 5 minutes before serving.Look for The top should be golden brown and the edges should be bubbling.Safe temperature 165°F (74°C) internal temperature (poultry)Tip Cover with foil if the stuffing browns too quickly before the center is hot.
The casserole is finished when the top is firm and golden brown. You will hear a light crackling sound from the crispy stuffing and see the creamy sauce bubbling actively around the edges. Before moving to the table, ensure the center is hot by using a thermometer to verify the required temperature.
Common mistakes
A common mistake is using too much cream, which can result in a soupy casserole that prevents the stuffing from crisping. Always measure the cream carefully to maintain the proper ratio.
Another frequent error is failing to preheat the oven properly, which leads to the stuffing absorbing too much moisture before the heat can effectively crisp the surface. Avoid using frozen chicken unless it has been fully thawed and patted dry to remove excess surface moisture.
How to tell it’s done
The casserole is perfectly cooked when the top layer of herb stuffing is deep golden brown and crispy to the touch. The sauce should be bubbling around the edges of the dish, and the internal temperature of the chicken mixture must reach 165°F (74°C) as verified by a food thermometer.
Let the dish rest for at least 5 minutes before serving to allow the sauce to set slightly, making it easier to scoop and serve without it falling apart.
- Poultry: 165°F (74°C) in the thickest part
Up next · Part 3 of 3
2 variations · storage & make-ahead · 3 answers · printable card
Tips, FAQ & printable recipe (Part 3)← Back to the ingredients (Part 1)