Dinner · Part 2 of 3: Instructions
Creamy Chicken and Buttered Noodles Step-by-step instructions
- Prep
- Cook
- Total
- Serves
- 4
Before you start
Before starting, ensure all ingredients are measured and ready, as the cooking process moves quickly. Have the colander ready near the stove to drain the noodles immediately once they reach the desired tenderness.
Clearing the workspace and having the tongs and serving plates accessible will make the entire process smoother and more enjoyable. Ensure the chicken is patted dry before searing to achieve the best possible golden-brown crust.
Ingredients at a glance (3)
- 2 lb boneless skinless chicken breasts
- 12 oz egg noodles
- 4 tbsp unsalted butter
Instructions
Searing the Chicken
- Sear the ChickenHeat a large skillet over medium-high heat. Add the chicken breasts to the pan. Sear the chicken until it is golden brown and reaches an internal temperature of 165°F (74°C). Remove the chicken from the pan and let it rest on a cutting board for at least 5 minutes before slicing.Look for Chicken is golden brown and juices run clear.Safe temperature 165°F (74°C) internal temperature (poultry)Tip Do not move the chicken until a crust has formed to prevent sticking.
The chicken is perfectly seared when it develops a deep, golden-brown crust on both sides. The kitchen should smell like savory, caramelized poultry. Ensure the skillet is hot enough before adding the meat to avoid sticking. The chicken must reach an internal temperature of 165°F (74°C) to be safe and ready for the final assembly of the meal.
Boiling the Noodles
- Prepare the NoodlesBring a large pot of water to a rolling boil. Add the egg noodles and cook until tender. Drain the noodles well in a colander. Return the hot noodles to the pot and immediately toss with the unsalted butter until every strand is coated in a glossy, buttery sheen.Look for Noodles are tender yet firm to the bite.Tip Toss the noodles while they are still steaming hot to ensure the butter melts evenly.
The noodles are ready when they are cooked to a tender texture. Once drained, they should be tossed immediately with butter while still piping hot.
The butter will melt on contact, creating a glossy, rich coating that serves as the perfect foundation for the dish. The noodles should be well-drained to ensure the butter coats them evenly without becoming diluted.
Assembly
- Assemble and ServeSlice the rested chicken breasts. Arrange the buttered noodles on plates and top with the sliced chicken. Serve the dish immediately while the chicken is tender and the noodles are warm.Look for Chicken is sliced and noodles are warm.Tip Serve immediately for the best texture and flavor.
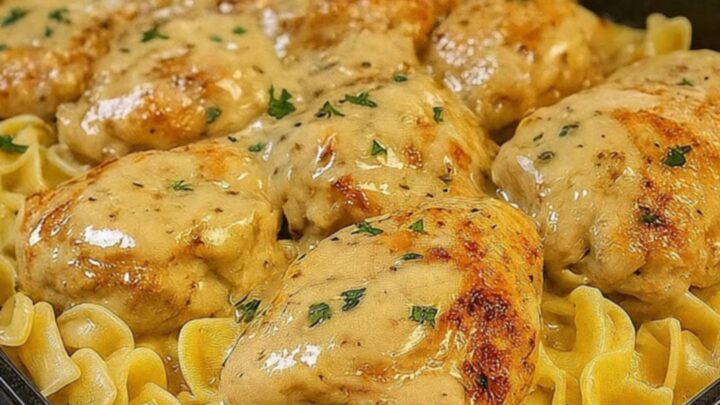
The dish is finished when the sliced chicken is placed over the buttered noodles. The entire meal should be served immediately to ensure the chicken remains tender and the noodles stay warm and buttery. The presentation should highlight the contrast between the golden-brown chicken and the rich, glossy noodles, creating an inviting and cohesive final plate.
Common mistakes
A common mistake is overcrowding the skillet when searing the chicken, which causes the meat to steam rather than brown. Work in batches if necessary to maintain the heat.
Another potential error is failing to drain the noodles thoroughly before tossing them with butter, which can lead to a watery sauce. Always ensure the noodles are well-drained to maintain the rich, buttery consistency that defines this classic dish.
How to tell it’s done
The chicken is perfectly cooked when it reaches an internal temperature of 165°F (74°C) as measured by a meat thermometer inserted into the thickest part. The exterior should be deeply golden brown, and the juices should run clear.
The noodles should be tender, showing no hard white center when tasted, indicating they are properly cooked. The butter should be fully melted and coating the noodles in a glossy sheen.
- Poultry: 165°F (74°C) in the thickest part
Up next · Part 3 of 3
2 variations · storage & make-ahead · 3 answers · printable card
Tips, FAQ & printable recipe (Part 3)← Back to the ingredients (Part 1)