Dinner · Part 2 of 3: Instructions
Creamy Chicken Alfredo Pasta Casserole Step-by-step instructions
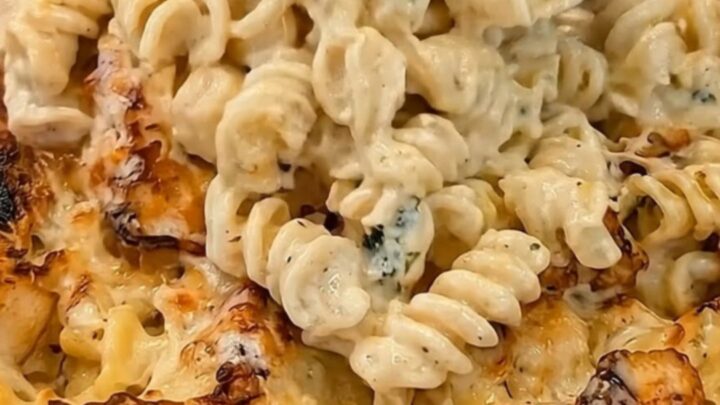
- Prep
- Cook
- Total
- Serves
- 6
Before you start
Before beginning, ensure all ingredients are measured and ready for assembly. Cook the chicken breast ahead of time, ensuring it is cooled slightly before cubing, which makes handling easier.
Preheat the oven to 375°F (190°C) and prepare your 9x13 inch baking dish by lightly greasing it if necessary. Having all components within arm's reach streamlines the process and helps maintain a calm, organized kitchen environment during preparation.
Ingredients at a glance (3)
- 1 lb rotini pasta
- 2 lbs chicken breast, cooked and cubed
- 32 oz alfredo sauce
Instructions
Boiling the pasta base
- Boil the pastaBring a large pot of salted water to a boil and cook the rotini pasta according to the package directions until al dente. Drain the pasta thoroughly using a colander before transferring it to a large mixing bowl.Look for Pasta is tender but firm to the bite.Tip Do not overcook the pasta, as it will continue to soften while baking in the sauce.
The rotini should be cooked until it reaches an al dente state, meaning it is tender but still retains a slight bite. Once drained, the pasta should appear plump and slightly glossy.
Ensure the water is well-salted to season the pasta from within before it meets the sauce. This phase establishes the foundation for the entire dish, so verify the texture carefully before moving forward to the mixing stage.
Mixing the creamy components
- Combine ingredientsIn the large bowl with the cooked pasta, add the cubed chicken and the alfredo sauce. Stir until all components are evenly coated with the creamy sauce. Pour the mixture into a 9x13 inch baking dish and spread it into an even layer.Look for Pasta is fully coated and chicken is distributed throughout.Tip Ensure the chicken pieces are relatively uniform in size to maintain consistent texture.
At this point, the pasta, chicken, and alfredo sauce should be thoroughly combined in the mixing bowl. The mixture should look uniform, with the sauce evenly coating every piece of pasta and chicken. There should be no dry spots or clumps of pasta. Once the mixture is transferred to the baking dish and spread into an even layer, it is ready for baking.
Baking to perfection
- Bake the casserolePreheat the oven to 375°F (190°C). Bake for 20 to 25 minutes until the sauce is bubbling and the chicken reaches an internal temperature of 165°F (74°C), then let the dish rest for 5 minutes.Look for Sauce is bubbling around the edges.Safe temperature 165°F (74°C) internal temperature (poultry)Tip Broil for the last two minutes if a deeper color is desired.
The final phase is complete when the sauce is bubbling consistently throughout the dish, and the internal temperature of the chicken should reach the required 165°F (74°C). The kitchen should smell rich and savory. Once these visual and temperature benchmarks are met, remove the dish from the oven and let it rest, allowing the creamy sauce to settle before serving.
Common mistakes
Avoid overcooking the pasta during the initial boiling step, as it will continue to cook in the hot sauce within the oven; aim for a firm al dente texture. Another common error is using too little sauce, which can result in a dry final dish.
Ensure the chicken is cubed into bite-sized pieces so that every forkful contains a good ratio of pasta, sauce, and meat. Finally, do not skip the resting period, as cutting into the casserole too early can cause the creamy sauce to run.
How to tell it’s done
The casserole is ready when the sauce is actively bubbling and the internal temperature of the chicken reaches at least 165°F (74°C) to ensure safety. The pasta should be tender throughout, and the sauce should look creamy and integrated rather than separated.
A brief rest of 5 minutes is mandatory to allow the structure to set properly before serving, ensuring that each portion maintains its shape when scooped from the dish.
- Poultry: 165°F (74°C) in the thickest part
Up next · Part 3 of 3
2 variations · storage & make-ahead · 3 answers · printable card
Tips, FAQ & printable recipe (Part 3)← Back to the ingredients (Part 1)