Dinner · Part 2 of 3: Instructions
Creamy Chicken Alfredo Broccoli Pasta Bake Step-by-step instructions
- Prep
- Cook
- Total
- Serves
- 6
Before you start
Before beginning the assembly, ensure the oven is fully preheated to 375°F (190°C) to guarantee a consistent bake. Prepare all ingredients by shredding or cubing the cooked chicken into uniform, bite-sized pieces.
If using fresh broccoli, cut the florets into small, manageable sizes so they cook evenly alongside the pasta. Keep the mozzarella shredded and ready to use, and clear enough counter space to accommodate the large mixing bowl and baking dish required for the assembly process.
Ingredients at a glance (5)
- 1 lb penne pasta
- 2 cups cooked chicken breast, shredded or cubed
- 2 cups broccoli florets
- 24 oz alfredo sauce
- 2 cups shredded mozzarella cheese
Instructions
Pasta and broccoli preparation
- Prepare the pasta and broccoliBring a large pot of salted water to a boil. Add the penne pasta and cook according to the package directions until al dente. During the last three minutes of boiling, add the broccoli florets to the pasta water. Drain everything well using a colander.Look for Pasta is tender but firm to the bite.Tip Do not overcook the broccoli, as it will continue cooking in the oven.
The pasta should be cooked to an al dente state, maintaining a slight bite. The broccoli should be bright green and just tender. Ensure all excess water is drained from the colander before combining with the sauce to prevent the final dish from becoming watery or diluted during the baking phase.
Combining the ingredients
- Combine ingredientsPreheat the oven to 375°F (190°C). In a large mixing bowl, combine the cooked pasta, broccoli, shredded chicken, and alfredo sauce. Stir until all ingredients are evenly coated in the creamy sauce.Look for Ingredients are thoroughly mixed and coated.Tip Ensure the chicken is cut into bite-sized pieces for even distribution.
The mixture should look uniform, with the alfredo sauce coating every piece of chicken and pasta. The broccoli should be evenly dispersed throughout the bowl. Check that no large clumps of chicken remain and that the sauce has reached all the way to the bottom of the mixing bowl.
Baking and final finish
- Bake and serveTransfer the mixture into a 9x13 inch baking dish. Sprinkle the mozzarella cheese evenly over the top. Bake for 20 minutes until the cheese is melted and bubbling, and the internal temperature of the chicken reaches 165°F (74°C). Let the dish rest for 5 minutes before serving to allow the sauce to set.Look for Cheese is golden brown and bubbling.Safe temperature 165°F (74°C) internal temperature (poultry)Tip Use a broiler for the last minute if extra browning on top is desired.
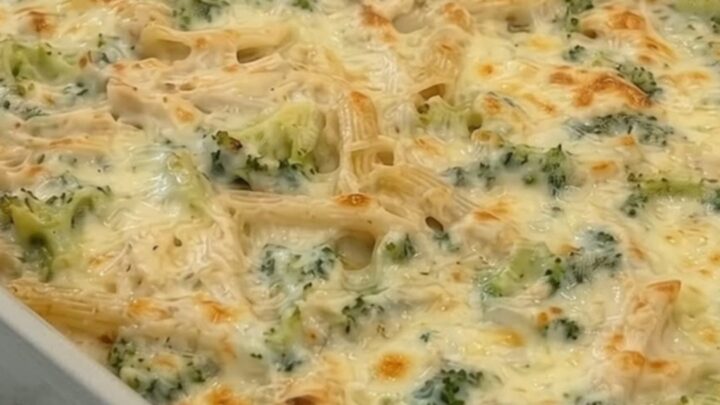
The top of the dish will show a beautifully melted, bubbly cheese layer with golden brown spots. The edges should appear slightly crisp.
Use a probe thermometer to confirm the internal temperature of the chicken is at least 165°F (74°C) before pulling the dish from the oven for the final resting.
Common mistakes
Avoid overcooking the pasta during the boiling stage, as it will continue to soften in the oven; aim for a firm al dente texture. Do not overcrowd the baking dish, as this can lead to uneven cooking and a soggy texture.
Ensure the sauce is thoroughly distributed; dry patches of pasta can occur if the mixture is not tossed correctly. Finally, do not skip the resting period, as the sauce will be too thin to serve properly if the dish is plated immediately.
How to tell it’s done
The dish is considered perfectly done when the mozzarella cheese on top has transformed into a bubbling, golden-brown layer that stretches when pulled. The internal temperature of the chicken must reach at least 165°F (74°C).
The sauce should be thick and creamy, clinging to the pasta rather than pooling at the bottom of the dish. Allow the bake to rest for at least 5 minutes after removing it from the oven to ensure the sauce sets slightly for easier serving.
- Poultry: 165°F (74°C) in the thickest part
Up next · Part 3 of 3
2 variations · storage & make-ahead · 3 answers · printable card
Tips, FAQ & printable recipe (Part 3)← Back to the ingredients (Part 1)