Appetizers · Part 2 of 3: Instructions
Creamy Cheesy Pulled Pork Dip for Parties Step-by-step instructions
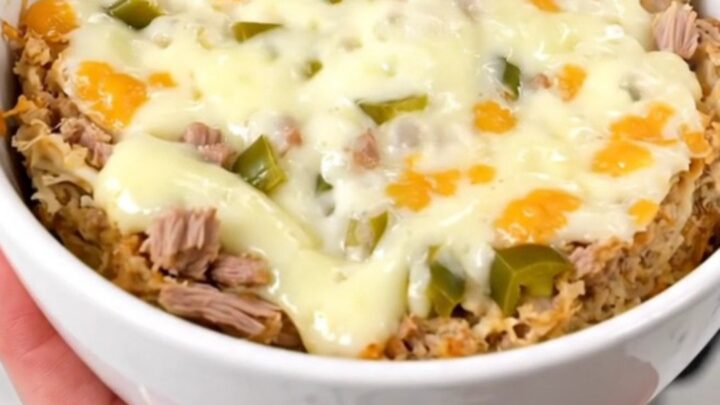
- Prep
- Cook
- Total
- Serves
- 8
Before you start
Before beginning, ensure that your slow cooker is clean and positioned on a stable, heat-resistant surface near a power outlet. Prepare the ingredients by shredding the pulled pork, dicing the green chiles if they are not already pre-diced, and cubing the cream cheese into uniform, one-inch pieces.
Having all items measured and ready to go will make the assembly process seamless and quick, allowing you to get the dip cooking in just a few minutes.
Ingredients at a glance (4)
- 2 cups cooked pulled pork, shredded
- 4 oz diced green chiles
- 1 cup shredded pepper jack cheese
- 8 oz cream cheese, cut into cubes
Instructions
Layering the ingredients
- Layering the basePlace the shredded pulled pork into the bottom of the slow cooker, spreading it out evenly to form a base for the other ingredients.Look for The pork should cover the bottom of the slow cooker evenly.Tip Ensure the pork is not too dry before adding it to the cooker.
- Adding flavor and cheeseSpoon the diced green chiles over the layer of pork, then scatter the shredded pepper jack cheese across the top.Look for Distribute the chiles and cheese as evenly as possible.Tip Using freshly grated cheese helps the dip melt more smoothly.
At the end of this phase, the ingredients are neatly stacked in the slow cooker, creating a compact base. The pork is at the bottom, topped with the green chiles and the pepper jack cheese. Everything is ready to receive the final layer of cream cheese, which will act as the rich, unifying element for the final dip. Ensure the slow cooker is covered securely.
Adding the cream cheese
- Adding cream cheesePlace the cubes of cream cheese directly in the center of the slow cooker on top of the other ingredients.Look for The cream cheese should sit prominently in the middle.Tip Cubing the cream cheese helps it melt faster and more evenly.
The cream cheese is now placed in the center, ready to begin its transformation. At this stage, the slow cooker is ready to be turned on. The ingredients are positioned so that as the cream cheese warms, it will slowly soften and blend with the chiles and cheese below. Verify that the lid is tightly sealed before starting the cooking cycle.
Cooking the dip
- Cooking and finishingCover the slow cooker and cook on low heat until the cheese is completely melted and the dip is hot, reaching an internal temperature of 145°F (63°C) for the pork. Let the dip rest for at least 3 minutes, then stir everything together until smooth.Look for The dip should look glossy, creamy, and steaming.Safe temperature 145°F (63°C) internal temperature (steaks, chops and roasts)Tip Stirring vigorously at the end ensures a uniform, velvety consistency.
Once the cooking time is complete, the dip should look completely transformed. The cheese will be fully melted, and the mixture will have a glossy, smooth consistency that is ready to be stirred.
The aroma should be savory and slightly spicy, indicating that the flavors have successfully melded together. Check the internal temperature to ensure it is hot and ready to serve.
Common mistakes
A common mistake is failing to stir the dip thoroughly at the end of the cooking process. Without proper mixing, the layers will remain distinct rather than forming a cohesive dip.
Another potential issue is using high heat settings, which can lead to the edges of the cheese becoming gritty or burnt. Always stick to the low heat setting to maintain a smooth, velvety texture throughout the entire cooking duration.
How to tell it’s done
The dip is considered done when the cream cheese has completely melted into the other ingredients and the mixture is steaming throughout.
Use a kitchen thermometer to ensure the pork component reaches a safe internal temperature of 145°F (63°C). The final texture should be uniform, glossy, and creamy, with no visible lumps of un-melted cheese remaining in the bowl.
- Steaks, chops and roasts: 145°F (63°C) in the thickest part, then a 3-minute rest
Up next · Part 3 of 3
2 variations · storage & make-ahead · 3 answers · printable card
Tips, FAQ & printable recipe (Part 3)← Back to the ingredients (Part 1)